

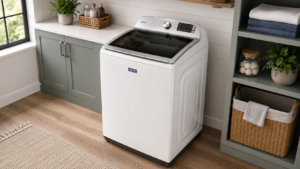
When a Maytag top-load washer has erratic controls, ignores cycle selections, or stays unresponsive after basic power checks, the main control board may need attention. A Maytag washer main control board replacement keeps the repair inside the console, but careful wire placement and a model-matched board are important. Good preparation helps.
Control faults can overlap with power, lid-lock, and harness problems. Common control board problems include symptoms that can appear before an electronic control is replaced. The procedure below keeps the control-board swap in the established repair order. A clear symptom record also gives the final test a useful baseline.
Safety Before the Repair
Basic electrical precautions should be in place before the console is opened.
- Unplug the washer before removing console screws or touching internal wiring.
- Keep hands and the work area dry while the electronic control is exposed.
- Keep children and pets away from the open washer and loose hardware.
- Handle wire connectors by their housings and avoid pulling on the wires.
- Use the washer manual for any model-specific safety or installation instructions.
- Work in a well-lit area and keep removed screws in a small container so hardware does not disappear into the cabinet.
- Wear work gloves when reaching around metal console edges or handling parts with sharp mounting tabs.
- Do not force a connector that resists removal because the plastic lock should be released before the plug is pulled free.
- Check the washer’s technical information before the repair when the model uses a setup or calibration procedure after control replacement.
Tools
Have the required hand tools ready before opening the console.
- Putty knife
- Phillips screwdriver
- 1/4-inch nut driver
Signs Worth Recording Before the Repair
These details can make the diagnosis clearer and provide a useful reference after the new board is installed.
- Write down which buttons, cycles, or indicators fail to respond so the same functions can be checked after reassembly.
- Note whether the washer is completely dead or whether some panel functions still work because each symptom points to a specific electrical path.
- Check whether the problem appears at startup, during cycle selection, or after the cycle begins because timing can narrow the affected circuit.
- Look for repeated behavior across several cycle attempts, especially when the washer sometimes responds after power is reset.
- Record any recent electrical event, moisture exposure, or console work that happened before the control problem began.
How to Complete a Maytag Washer Main Control Board Replacement
Follow these steps in order, keeping each connector and screw organized for reassembly.
Open the Console
- Remove the 1/4-inch screws that hold the console to the back cover.
- Insert the putty knife between the console and top panel at each front corner, press the locking tabs inward, and lift the console.
- Pull the cycle knob off the console and lay the console face down.
Remove the Old Control
- Take a clear picture of the wires while they are still connected to the main control.
- Disconnect the wires from the main control by releasing the locking tabs.
- Remove the Phillips screws that secure the main control.
- Lift the old main control out of the console and set it aside.
Install the New Control
- Set the new main control into position, reinstall its screws, and reconnect the wires in their original locations.
- Place the console back in position and reinstall the cycle knob.
- Secure the back cover to the console with the 1/4-inch screws.
What to Inspect While the Console Is Open
A quick visual check can catch conditions that may affect the new control after the repair.
- Look for a connector that sits crooked, feels loose, or shows a damaged locking tab before the new board is secured.
- Check the harness for rubbed insulation or a wire pinched against a sharp console edge.
- Look for corrosion, moisture marks, darkened terminals, or heat damage around the old control and nearby plugs.
- Confirm that no screw, clip, or loose object can fall onto the control after the console is closed.
- Confirm the replacement board matches the original connector positions and mounting points before final assembly.
Checks After the New Board Is Installed
Use these checks before returning the washer to normal loads.
- Confirm every connector is fully seated and each locking tab has engaged before restoring power.
- Turn the cycle knob through its normal selections and check that it moves freely without rubbing the console.
- Start a short empty cycle and confirm the controls accept selections and the washer begins the cycle normally.
- Check the console for gaps or trapped wiring that could keep the cover from sitting flat.
- If the washer still will not start, other washer start problems can separate lid-lock, power, and control-path faults from the replaced board.
Washer Care After Control Work
Routine care can reduce moisture, load, and debris problems around the washer.
- Run a washer-cleaning cycle on the schedule recommended for the appliance. Routine washer maintenance tips also cover common care checks outside this repair.
- Leave the lid open after use so trapped moisture can dry.
- Inspect water supply hoses for damage, leaks, or mineral buildup.
- Keep the dispenser and exterior controls clean and dry.
- Balance laundry loads and stay within the washer’s stated capacity.
- Wipe detergent spills from the lid and console before residue dries around switches or panel seams.
- Check pockets before loading clothes so small objects do not reach the pump or tub.
- Remove wet laundry soon after a cycle ends to reduce odor and moisture buildup.
- Keep the top and console free of detergent residue that can hold moisture near controls.
In Summary
A Maytag washer main control board replacement is a focused console repair when the board has been correctly diagnosed. Careful connector handling, a compatible replacement board, and the original wire positions keep the work organized.
Once the console is secure, a short empty cycle can confirm that the controls respond and the washer starts normally. If the same symptom remains, follow the power, lid-lock, and harness path and test each part before another replacement.