
Frustrated with a flashing E22 error code on your Bosch dishwasher? Before you call in an expensive repairman, take a few minutes to resolve the issue yourself. This guide will walk you through the simple steps to fix a bothersome E22 error. You’ll learn how to safely clean the filter and drain area, which are the most common causes of the error code. Armed with some basic tools and these easy directions, you can get your dishwasher running smoothly again without breaking the bank.
What You Need
To fix the E22 error code on your Bosch dishwasher, you will need a few basic tools and supplies. This section lists everything you should gather before starting.
Cleaning Brush
- You need a cleaning brush to scrub away grease and scraps of food stuck on the filter.
- Look for a brush with stiff, sturdy bristles. Soft bristles won’t clean as well.
- An old toothbrush works in a pinch, too!
Warm Water
- Warm, soapy water helps loosen gunk on the filter.
- Hot water from the tap is best. If it’s too cold, add some hot water from a kettle.
- Lukewarm water won’t dissolve grease as quickly.
Mild Soap
- Dish soap or another mild cleaner lifts stuck-on grime.
- Stay away from harsh chemicals that could damage parts.
- A drop or two of soap in warm water makes a good cleaning solution.
Safety First
Fixing a dishwasher on your own can be dangerous if you’re not careful. This section talks about things you should do to stay safe.
1. Turn Off Power
- Unplug the dishwasher before working on it.
- Electricity powers the machine. Unplugging stops possible shocks.
2. Let it Cool Down
- A running dishwasher makes heat.
- After turning off the power, wait for the heat to go away.
- Working on a hot dishwasher could mean burns.
3. Take Your Time
- Rushing leads to messy mistakes.
- Move slowly and double-check each step.
- Careful work keeps you safe.
4. Avoid Testing Live Voltage
- Leave voltage tests to appliance pros.
- Multimeters measure electricity.
- Unsafe use risks bad shocks.
5. Turn Off Water
- Shut off water lines before fixing your dishwasher.
- Keep towels around to catch leaks.
- No water flow means no spills or flooding.
6. Work in a Bright Area
- Good lighting helps you see better.
- Notice small parts and hazard dangers.
- Use overhead lights or portable work lamps.
7. Keep the Area Clear
- finding tools in a mess wastes time and frustrates.
- Tripping on clutter risks injury.
- Neat workspace allows safe, speedy repairs.
8. Keep Hands Dry When Inside
- Water and electricity still don’t mix if unplugged.
- Damp hands are touching parts risk shocks.
- Dry off your hands before reaching inside.
9. Check Manual Guidance
- User guides detail dishwasher repairs.
- Step-by-step instructions keep things safe.
- Missing manual? Search online for your model.
10. Handle Parts With Care
- Dishwashers have fragile moving pieces.
- Being gentle prevents damage.
- Force can break the plastic and bend metal.
11. Wear Insulated Gloves
- Insulated gloves prevent shocks.
- Rubber protects hands from moisture and juice.
- Thick options shield skin and provide grip.
12. Keep Wires Untouched
- Exposed wires and terminals carry electricity.
- Accidental contact risks dangerous jolts.
- Tape down; don’t touch bare cables inside.
13. Note Connections Before Unplugging
- A dishwasher has cables linked to parts.
- Cameras or paper help map wires.
- Diagrams make reassembly easier.
Finding the E22 Cause
This part walks through how to track down the reason for the E22 error code. Step-by-step directions break it down into easy stages.
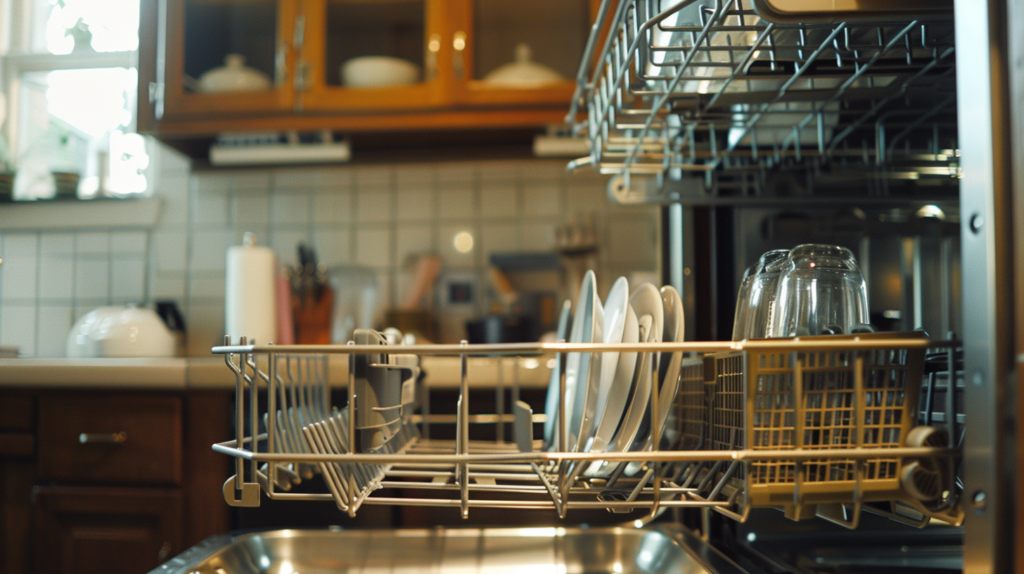
Step 1: Remove the Filter
The filter traps gunk during wash cycles. Checking it first makes sense since clogs often trigger E22.
- Unplug the dishwasher. No power means no shock risks.
- Twist the water supply knobs off. This cuts water flow.
- Pull out the bottom rack for access. Less bending makes things easier.
- Turn the filter counterclockwise to loosen it. Lefty loosey!
- Pull straight out once loose. Avoid an angle or tube damage.
Step 2: Scrub the Filter
Is the filter gunky? Clearing clogs might solve E22.
- Separate the outer filter from the inner screen. More surface area to clean!
- Use that brush to scrub off stuck-on food scraps.
- Soak both parts in hot, soapy water. Let the solution do the work.
- Enable thorough drying. Water residue risks re-clogs.
Step 3: Put Back the Filter
Double-check that the filter and screen are gunk-free before replacing them.
- Push the filter back onto the inner screen. Teamwork makes the dream work!
- Insert the assembled piece into its slot. An angle helps it slide easier.
- Twist clockwise to lock it into place. Righty tighty secures things.
- If removed before, put back the lower spray arm. Crucial for full wash power!
- Slide the bottom rack loaded with dishes back in.
- Reconnect electricity and water. Necessities for test runs!
- Run a wash cycle. Does E22 rear its head again?
Avoiding Future E22 Errors
You fixed the immediate E22 error code. Great! But how can you stop it from popping up again? This part discusses tips to prevent more E22 headaches.
Clean the Filter After Each Wash
- Gunk builds up quickly with regular use.
- Get ahead of clogs before they block water flow.
- A fast rinse keeps the filter clear long-term.
Check the Drain Hose
- Kinks in the drain hose prevent water exit.
- Lay the hose as flat as possible with no tight bends.
- Smooth water flow avoids backup and E22.
Regular Sanitize Cycles
- Monthly sanitizing cycles blast grime inside.
- They refresh the dishwasher’s washing power.
- It’s like a deep clean for the appliance.
Use Baking Soda and Vinegar
- These homemade solutions dissolve stuck-on gunk.
- Coating the inside with baking soda and then running a hot vinegar cycle scrubs it sparkly.
- Search online for full directions.
Don’t Overload the Dishwasher
- Packing in too many dishes at once causes problems.
- Things don’t get fully clean, and water can’t circulate easily.
- Follow the loading guidelines in your user manual.
Use the Right Detergent
- Dishwasher detergent makes suds that break up grease.
- Hand washing soap creates excess suds that clog.
- The detergent dispenser has specific soap types. Stick to those.
Avoid Harsh Chemical Cleaners
- Bleach, acids, and degreasers seem like strong solutions.
- But they damage the inner workings over time.
- Soap and hot water work with fewer risks.
Check the Dispenser
- Detergent, rinse aid, and other excess get stuck.
- Soaking and then scrubbing keeps chemicals flowing freely.
- Follow the clog-clearing steps in the user guide.
Finishing Up
After all that, take a minute to look back at the progress you made. Getting frustrated with home repairs tempts many people to call in costly repair pros. But as this article laid out step-by-step, E22 and other dishwasher errors become less scary when broken down.
You now have:
- A walkthrough of prerequisites to gather upfront
- Safety guidance to protect you through the repair
- Troubleshooting tips to identify the E22 trigger
- Filter cleaning basics to clear the clogs
- Reassembly instructions to finish the repair
- Prevention pointers to avoid future E22s
Still fuzzy or overwhelmed in certain areas? That’s natural! Re-read tricky sections and supplement where needed. Extra search engine searches or watching appliance repair videos might help solidify the concepts, too.
The power of understanding how your dishwasher components connect enables you to maintain the appliance yourself. And the savings add up quick when fixing issues sans expensive technician house calls. Good luck on your repair journey!