
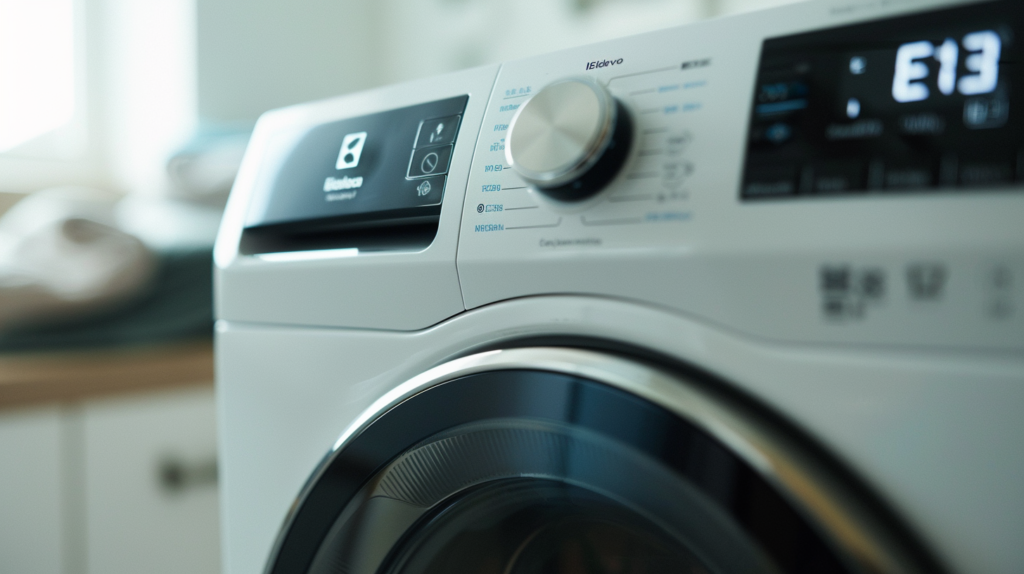
Does your Electrolux washer display an E13 error code? This usually signals an issue with improper water or air pressure inside the outer tub. The washer is smart enough to stop and notify you before major damage occurs. The E13 code typically stems from small leaks in the tub, air bell system, or a faulty pressure sensor. With some basic tools, safety precautions, and step-by-step troubleshooting, you can likely resolve the E13 alarm on your own. We’ll walk through inspecting the tub, testing components, and verifying normal operation after repairs. With a bit of time and patience, you’ll have your Electrolux washing machine fixed and the annoying E13 code cleared for good.
What does the E13 error code mean?
The E13 error code on your Electrolux washing machine indicates an issue with water or air pressure inside the outer wash tub. This error is triggered when the electronic control board detects abnormal air and water pressure readings while the washer is operating.
There are two possible causes for the E13 code:
- A water leak somewhere inside the outer wash tub
- An air leak within the tub’s internal air bell system
Let’s break these down:
Water leak
A water leak within the outer tub can throw off the washer’s ability to accurately measure the water level. The leak likely occurs due to:
- A cracked or damaged outer tub
- Worn or faulty tub gasket allowing water to seep
- Blocked drain system preventing proper water drainage
Air leak
The air bell system uses inflated bladders to seal, suspend, and stabilize the inner wash basket. An air leak here leads to:
- Improper basket suspension and rotation
- Inability to accurately sense water fill levels
The E13 code is the washer’s way of telling you there’s an issue it can’t automatically fix, so it’s up to you to find and repair the source of the water or air leak in the tub.
Doing so will clear the E13 code and get your washer functioning normally again.
What you need
Fixing the E13 error on your Electrolux washing machine doesn’t require any fancy tools or supplies. Here’s a quick list of the basic items you’ll need:
Tools
- Pliers – Helpful for loosening hose clamps
- 1/4-inch nut driver – To remove access panels and detach hoses or fittings
Supplies
- Container – Place under the washer to catch any leaking water
- Towels – For cleaning up water and drying parts
And that’s it! Having these basic tools and supplies on hand will make the troubleshooting process much smoother.
A few key things to remember:
- Use pliers carefully when handling plastic fittings to avoid cracking them
- Choose a container large enough to hold a few gallons of water
- Keep plenty of dry towels around to soak up spills and leaks
With just a simple set of tools and some towels, you’ll be equipped to track down the source of the E13 code. The right preparations make any repair less frustrating.
Safety precautions
Doing repairs on any appliance comes with certain risks, so it’s important to take safety seriously. Rushing through repairs or ignoring safety steps can easily lead to electric shocks, chemical burns, falls, or serious injury. Let’s walk through some key safety precautions to follow when troubleshooting your Electrolux washer’s E13 error code:
Power off and unplug the washer
This is the most important first step. Make sure to completely power off the washer and unplug it from the electrical outlet before doing any work. This eliminates the risk of dangerous electric shocks while you have the machine open.
If the washer is hardwired directly to the home’s electrical system with no plug, you’ll need to locate the circuit breaker box and switch off the dedicated breaker that controls the washer. With no power running to the machine, you can work safely without fear of shocks.
Allow time for cooling
Washers contain heating elements, hot water lines, and drive motors that can become very hot during operation. Before accessing any internal components, allow sufficient time for the washer to completely cool down. Touching hot parts like heating coils, pipes, or motors can cause painful burns.
How long should you wait? For a washer that was running just prior, allow at least 30-60 minutes of cooling time before starting repairs. You want all surfaces and parts to reach room temperature.
Take your time and avoid rushing
Appliance repairs require careful focus. Rushing through the job or taking shortcuts increases the chances of slip-ups and injuries. Make sure to work slowly, double-check connections, and take breaks if needed. Attempting repairs when frustrated or distracted is an invitation for mistakes.
Clear clutter and watch your footing
Appliance repair always involves some awkward positions that can lead to slips and falls. Make sure the floor around the washer is dry and free of any tools, parts, laundry, or other clutter. Secure any cables or cords safely out of the way. Have a clear path to walk around the washer without tripping. Take your time and watch your footing.
Keep hands dry when handling electrical parts
Water and electricity don’t mix! Whenever you need to handle or disconnect any electrical wiring or connections, make sure your hands are completely dry. Any moisture on your hands can allow electricity to pass through your body, causing a dangerous shock.
Review the user manual
Every washer model has slightly different parts and repair procedures. Check the user manual or online guides from the manufacturer to understand the proper steps for your unit. Following the correct process will make the repair smooth and prevent damage.
Handle parts gently
Internal washer parts like hoses, gaskets, sensors, and plastic fittings can crack easily if handled roughly. When removing or replacing parts, go slowly and gently to avoid breakage. Damaged parts often need full replacement.
Consider wearing gloves and eye protection
Repairs may expose you to hot parts, sharp edges, chemical residues, or debris. Wearing insulated gloves and safety glasses helps prevent burns, cuts, skin irritation, and eye injuries.
By taking the proper safety steps, you can troubleshoot the E13 error confidently and avoid personal harm. Never rush or cut corners when appliance repair is involved. Prioritizing safety saves repairs, money, and possibly your health.
Troubleshooting steps
Now that we’ve covered safety let’s walk through the steps to track down the source of the E13 code.
Step 1: Inspect the tub for leaks
The first thing to check is if there are any visible leaks coming from the outer tub itself:
- Remove the rear access panel to expose the tub.
- Run a drain and spin cycle and watch closely for water dripping down from the tub or accumulating underneath.
- Thoroughly check around the tub exterior and gasket seal for any wet spots or water droplets.
- Carefully inspect the tub for any cracks, damage, or wear that could allow leaks.
- Examine the flexible bellow or boot between the outer tub and cabinet for gaps or moisture buildup.
Finding water leaks here would point to a crack or failure in the outer tub as the issue.
Step 2: Check the air bell system
If no outer tub leaks are found, next inspect the air bell, hoses, and fittings:
- Examine the plastic air bell bladders along the tub for any cracks or damage.
- Check that all air hoses are tightly secured with clamps. Tighten any loose clamps.
- Look closely for punctures or holes in the hoses that could cause air loss.
- Verify all hose fittings are secure and have no gaps. Tighten as needed.
Leaks in the air bell system mean that’s likely the source of the E13 error code.
Step 3: Inspect the pressure sensor
The pressure sensor detects leaks based on air pressure readings. To check:
- Verify no cracks or holes exist in the plastic air hoses.
- Listen closely near the tub and air bell for any faint hissing air leaks.
- Ensure the sensor’s electrical connection is solidly inserted.
- If no leaks are found, the sensor itself may be malfunctioning and need replacing.
With no obvious leaks, a faulty sensor is a probable issue.
Step 4: Test the washer
Once any leaks or faulty parts are addressed:
- Clear out any residual error code history.
- Run a short diagnostic cycle to verify proper functioning.
- Do a test wash cycle with a small load to confirm normal operation.
The E13 code should remain cleared after testing. If not, further troubleshooting is needed.
Conclusion
Fixing the annoying E13 error on your Electrolux washer is totally doable with some basic tools and safety precautions.
To quickly recap, here are the key things to remember:
- The E13 code means there’s a water or air leak in the outer tub
- Carefully inspect the tub, air bell, hoses, and pressure sensor
- Check for cracks, punctures, blockages, or loose fittings
- Review the manual and take safety seriously
- Fix any leaks and verify normal operation
Finding and repairing leaks in the tub, air system, or pressure sensor will get your washer functioning properly again. The E13 indicates a fault has occurred, but the washer is smart enough to stop and alert you before any major damage happens.
With some detailed troubleshooting, a bit of handiwork, and safely followed steps, say goodbye to the E13 code for good! Before you know it, your Electrolux will be churning out fresh loads of laundry once more.