
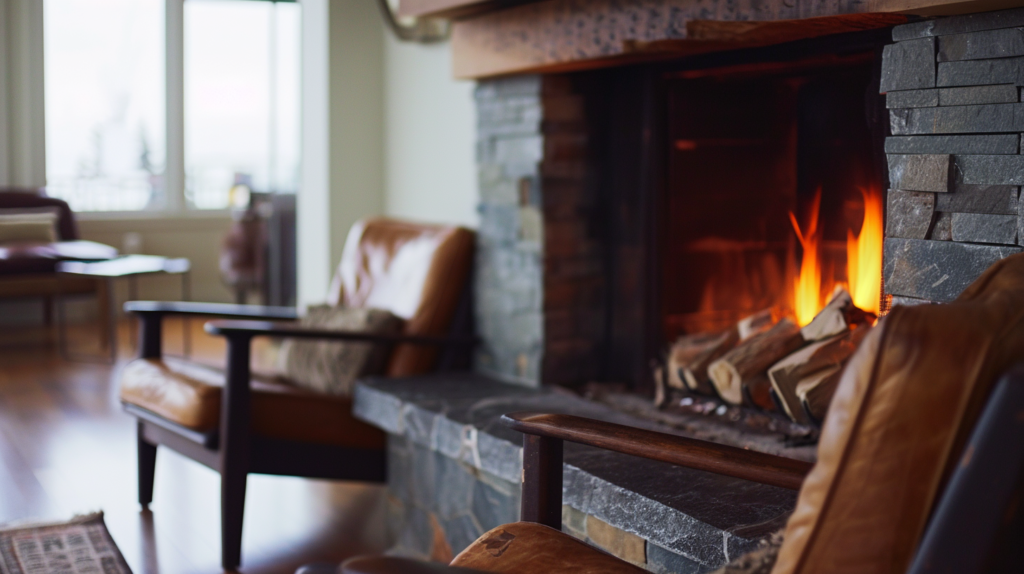
Installing a beautiful wood mantel over your fireplace can completely transform the look and feel of your living room. A stunning mantel adds elegance, character, and charm to any space.
While a fireplace mantel may seem like a simple decorative feature, properly installing one requires care and precision. There are important safety considerations, structural supports to implement, and aesthetic details to finesse.
This comprehensive guide will walk you through the complete process of safely and securely installing a wood mantel over your fireplace, from start to finish.
Mantel Design Preparation
Before touching a hammer, there are key planning steps to take for a smooth and successful DIY mantel installation.
Determining Height, Width, & Depth
You’ll first want to decide on the ideal size and proportions for your mantel. Consider the size of your firebox opening as well as the overall scale of the wall.
Height
- The standard height is 54 inches from the floor to the bottom of the mantel. However, you can adjust to your preferences and space.
- Check your local building codes for minimum height restrictions above the firebox opening. Usually 12 inches is the requirement.
Width
- For ideal proportions, choose a mantel that’s at least 8 inches wider than the firebox opening on both sides.
- Make sure to leave enough breathing room around surrounding décor.
Depth
- Standard depths range anywhere from 4 inches to over a foot deep. The options are open!
- Deeper mantels can allow more decorative space on top. However, too deep may overwhelm the space visually.
Selecting Materials
Once you’ve decided on the size, it’s time to choose materials. The most common options include:
Wood
- Popular woods: Oak, maple, walnut, pine, poplar
- Stain or paint to achieve desired finish
- Durable and easy to work with
Stone
- Granite, marble, limestone, slate
- Elegant, natural look
- Heavy, may require additional structural support
Brick or Tile
- Match home’s existing masonry
- Rustic appeal
- Sealing required to avoid staining
Mantels vs. Surrounds
- Mantels sit on top of the fireplace only
- Surrounds encompass all three sides
- Both can look spectacular!
Designing Support Structures
Since mantels are heavy, structural reinforcement in the wall is vital for safety.
Types of Supports
- Ledgers – Secure horizontal boards already built into the stud framing
- Blocking – Short horizontal boards added between studs
- Extra studs – Vertical boards added for direct weight bearing
How to Add Support
- Identify stud locations with a stud finder.
- Match supports to land at same height as bottom of planned mantel.
- Use lag bolts drilled into the studs to attach ledger boards or extra studs.
Adding these supports early in the process will make installing the mantel smooth sailing!
Gathering Tools & Materials
With design details decided, support ready, it’s time to compile needed installation supplies.
Essential Tools
- Tape measure
- Stud finder
- Level
- Electric drill
- Safety equipment (glasses, dust mask)
For Ledgers & Blocking:
- Ledger board material (2×6 or 2×8 lumber)
- Lag screws
- Washers
For Mantel Installation:
- Digger anchors or mollies
- Screws
- Adhesive/construction glue (optional)
Double check that you have all tools before beginning!
Applying Structural Supports
Step 1: Locate Studs
Locating studs behind drywall or masonry is the vital first step.
Stud spacing
- Standard wall studs are spaced 16 inches on center.
- Fireplaces may have closer stud spacing of 12 inches.
How to locate:
- Use an electronic stud finder on drywall. Sweep slowly at multiple heights.
- For masonry, use a magnet to detect nails in studs. Or tap gently to identify solid points.
Mark all stud center points with a pencil for easy reference.
Step 2: Determine Support Placement
Decide where ledger boards or blocking will go based on your mantel depth and height.
- Bottom of supports should be level with planned mantel bottom.
- Mark a clearly visible line at this height across wall for reference.
- Space supports no more than 16 inches apart.
Mark intended locations with a pencil.
Step 3: Cut Supports to Length
Cut your ledger board or blocking material (2×6 or 2×8 lumber) to proper lengths.
- Match lengths to distance between centers of chosen studs.
- A miter saw with extension support is best for cross cuts.
Deburr any rough edges with a file or sand paper.
Step 4: Fasten Supports to Wall
Attaching supports securely into studs is vital for safety and stability.
For each support:
- Drill pilot holes at stud centers to prevent wood splitting.
- Use 3-4” lag screws with washers to fasten. Tighten firmly into stud.
- Double check bottom is aligned to reference line height.
Installing the Physical Mantel
With structural reinforcement complete, the fun part begins…hanging the actual mantel!
Step 1: Dry Fit the Mantel
Before permanently fixing the mantel, do a preliminary dry fit.
- Have helpers hold mantel at installation height.
- Check level on bottom and sides. Adjust supports if needed.
- Confirm desired look, positioning, size etc.
Make any final adjustments to supports before moving to permanent install.
Step 2: Attach Mounting Hardware
With mantel removed, mount hardware onto wall supports.
Option 1) Ledger Boards:
- Use mollies or digger anchors drilled into mortar joints on masonry walls.
- Pre-drill holes for anchors horizontally into ledger boards.
Option 2) Blocking Between Studs:
- Use 3-4” lag screws horizontally screwed into blocking supports.
Space hardware no more than 16 inches apart.
Step 3: Mount the Mantel
Now for the big reveal…hoisting that mantel in place!
- Have 4+ helpers to hold mantel steady. Prepare team.
- Carefully lift mantel up to installation height.
- Align mounting holes to hardware and lower into place.
Secure mantel to all fasteners with a socket wrench if needed.
Step 4: Complete Finish Work
With the mantel structurally installed, apply final touches.
- Caulk perimeter edges if gaps exist. Allow to cure.
- Prep and paint/stain mantel as desired to match décor.
- Consider added trim pieces like plinth blocks or decorative legs.
Step back…and admire your stunning new fireplace centerpiece!
Safety Considerations
While enhancing visual appeal, a mantel affect fireplace function. Follow these guidelines to ensure safety.
Fireplace Access
- Leave 14-18” of clearance from mantel to hearth for fireplace door access.
- Consider height limitations for built-in screens, doors or grates.
Heat Ventilation
- The mantel shelf can redirect heat outward. Keep furnishings safely away.
- Position blowers or fans to maximum efficiency.
Protective Finishes
- Use high-grade wood rated for fireplace use.
- Apply fire-retardant sealers to wood mantels.
- Select natural stone versus composites or plastics.
By planning for safety, you can prevent hazardous situations and property damage. That allows relaxing fireside time!
Design Styling Inspiration
While structural installations may seem technical, don’t lose sight of the creative possibilities!
Mantels are the perfect canvas to layer gorgeous visual details that enrich a space with warmth. Embrace your design style imagination!
Traditional Refined Elegance
Evoking heritage charm, traditional mantels feel timeless and inviting.
Key Elements
- Ornate decorative molding
- Plinth blocks and bun feet
- Fluted columns or corbels
- Arched openings
Design Ideas
- Add an antique style mirror as a focal point
- Flank with porcelain vases and ornate candle holders
- Hang a custom lantern or chandelier above
Rustic Farmhouse Charm
Rustic styles employ raw, organic textures and earthy distressed finishes.
Key Elements
- Exposed beams or reclaimed wood
- Natural stone
Design Ideas
- Showcase collected antiques
- Arrange dried botanicals in ceramic pitchers
- Drape cozy woven blankets atop ladderback chairs
Modern Industrial Edge
Sleek modern designs feel fresh and contemporary with an urban edge.
Key Elements
- Galvanized metal
- Concrete
- Steel beams and frames
Design Ideas
- Display monochrome photography
- Layer on sleek candle holders and trays
- Illuminate with modern sconces
Have fun and let your mantel reflect what you love! The options are limitless.
Troubleshooting Common Issues
While mantel installations are relatively straightforward, little hiccups occasionally crop up. We have the solutions!
Issue #1 – Gaps Visible Behind Mantel
Solutions:
- Recheck support alignment and shim if needed
- Apply trim or backer pieces to conceal gaps
- Caulk gaps before painting
Issue #2 – Mantel Rocks or Seems Unstable
Solutions:
- Tighten all hardware attachments
- Ensure supports are firmly and deeply mounted into studs
- Add metal L brackets at bottom corners for reinforcement
Issue #3 – Discoloration or Heat Damage Occurs
Solutions:
- Increase height above firebox opening
- Use materials designed for fireplace exposure
- Improve ventilation around mantel
With attention and minor adjustments, these issues can easily smooth over.
FAQs about Fireplace Mantels
Looking through home remodeling sites, a few key questions seem to emerge frequently around mantels. Here are quick answers!
How much does it cost to install a mantel?
Cost varies greatly by exact project scope, but expect roughly:
- Materials – $150 to $3,000+
- Labor – $200 to $1,000
Luxury custom designs with stone can reach $5,000 to $10,000 or beyond.
Simple DIY kits cost under $500.
Can I install a mantel myself?
Definitely! If you’re comfortable following construction guides and handling basic tools, DIY installation can save substantially over contractor rates. Just take care with safety and get helpers for the heavy lifting steps.
What tools do I need to install a mantel?
The essential tool kit includes:
- Tape measure
- Stud finder
- 4-foot level
- Electric drill
- Hammer
- Miter saw (for cutting boards)
- Safety equipment like glasses, gloves, & mask
Refer back to the comprehensive tool list provided in Section 1.
How long does it take to install a fireplace mantel?
Allocate the following timeframes:
- Planning/preparation: 2-3 hours
- Structural support work: 2-4 hours
- Physical mantel mounting: 1-3 hours
Total installation time: 5 to 10 hours spread over multiple project work sessions.
Be sure to leave extra cushion if new to DIY!
Advanced Mantel Design Techniques
Once feeling confident with standard installation methods, consider branching into more advanced mantel construction techniques for added visual intrigue.
Open Shelving Dividers
Segmenting shelves with vertical dividers amplifies display space.
How To:
Cut divider wood strips to shelf depth. Secure centered at even intervals with finishing nails and adhesive. Can also attach to wall behind.
Side Storage Cabinets
Built-out cabinets flanking the mantel provide functional concealed storage.
How To:
Construct basic plywood boxes at desired size. Face frames with molding to integrate styles. Attach side cabinets directly into studs.
Custom Wood Corbels
Carved or dimensional corbels lend unique architectural interest.
How To:
Mill wood to desired shape. Install using angled ledger boards. Or, hollow out corbel backs to fit directly over studs.
Get creative with these more innovative techniques once you perfect the mantel basics! The design options are wide open.
Preserving & Protecting Your Mantel
Once your showpiece mantel finally takes center stage, preserve it for longevity.
Seasonal Cleaning
Tackle seasonal cleanings to prevent heavy buildup:
Supplies Needed:
- Soft brush attachment
- Gentle wood cleanser
- Tack cloth
- Polishing pastes or sprays
Focus on:
- Brushing crevices
- Removing debris, wax, or dirt build up
- Polishing wood surfaces
Protecting from Heat
Mantels endure extra wear-and-tear above heating fireplaces.
Tips to Minimize Damage
- Keep finishes well-sealed
- Increase height above firebox
- Improve heat circulation
Monitor closely for any cracking or discoloration needing repair.
By incorporating preservation best practices, your lovely mantel will thrive for years enhancing your fireside.
Conclusion
We hope this comprehensive guide covered all considerations for DIYers installing their dream fireplace mantel!
While a full-on renovation project, mantel additions are extremely rewarding. With adequate planning and safety steps, you can execute a showstopping focal feature tailored to your home’s character.
Just be sure to budget greater time cushions when attempting advanced detailing or masonry work. Seek contractor consultation or assistance if project scope exceeds skills.
Most importantly, embrace the joyful process. Envision cozy wintertime gatherings in your new fireside haven. Mantels instantly vitalize interiors with heart and soul.