
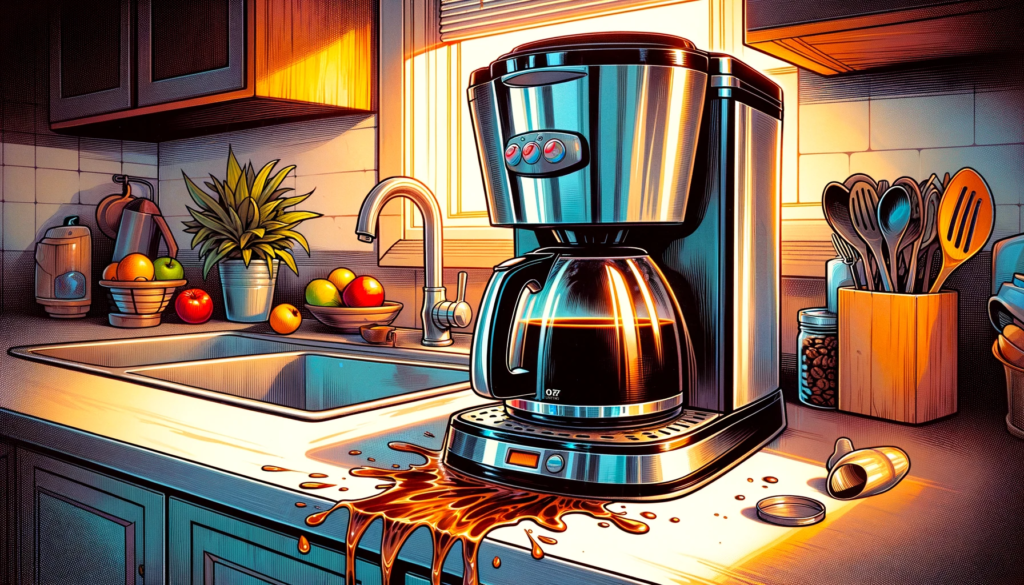
A leaking coffee machine can be a frustrating issue to deal with. Not only does it make a mess, but it impacts your ability to brew your morning cup of coffee. Thankfully, most leaking issues can be resolved with some troubleshooting and minor repairs. This comprehensive guide will teach you how to properly identify the source of any leaks in your coffee maker and provide fix-it solutions for the most common issues.
Common Causes of Leaking Coffee Makers
Before diving into repairs, it’s important to understand what causes coffee makers to leak in the first place. Here are some of the most common culprits:
Improperly Seated or Damaged Water Tank
The water tank is one of the most leakage-prone areas on a coffee machine. Tanks can leak due to:
- Improper placement in the reservoir
- Cracked or warped tank
- Worn out rubber gasket seal
If the water tank is askew, cracked, or the rubber seal is loose or damaged, water can seep out around the edges of the tank.
Mineral Buildup in Lines or Valves
Just like in sinks and showerheads, hard water can leave behind mineral deposits over time. In coffee makers, these limescale deposits can clog valves, spray heads, and tubing. Blocked water flow puts excess pressure on fragile interior tubing and joints leading to cracks and leaks.
Overflows from Excess Coffee Grounds
If old coffee grounds are not cleaned out regularly, they can build up and eventually block the coffee maker’s drainage lines. Any excess water that the machine tries to heat up has nowhere to go and can overflow out of concealed internal reservoirs.
Worn Out Internal Tubing
The internal tubes and hoses that route water throughout the coffee machine endure a lot of heat and pressure day after day. Eventually, they can become brittle and develop small cracks or pinholes allowing water to leak out.
Deteriorating Seals and Gaskets
Like all appliances, the grommets, seals, and O-rings inside your coffee machine degrade over time. As the rubber components age, they lose their flexibility and sealing capabilities leading to drips and leaks at connection points.
Also Read: How To Clean Your Coffee Maker
Step-by-Step Instructions for Fixing Leaks
Now let’s go through a systematic troubleshooting process to diagnose and repair your leaking coffee machine:
1. Unplug Machine and Wipe Down
Before doing anything else, make sure to unplug your coffee maker from the wall and wipe down any exterior water buildup. This prevents electric shocks and lets you clearly inspect the machine for leaks.
2. Check Water Tank Placement
Open the water tank lid and remove the tank from the reservoir carefully. Check for any cracks in the plastic and examine the condition of the rubber gasket. Replace cracked tanks. Reseat intact tanks properly and check if sealcompression stops minor leaks:
To reseat tank:
- Rinse tank under tap to remove residue
- Allow to fully air dry
- Check tank and reservoir mating surfaces for debris
- Insert tank evenly into slot, gently press straight down until it stops
- Maintain downward pressure for 30 seconds
This allows the rubber gasket to reconform to the reservoir for a tighter seal.
3. Descale Water Lines and Valves
For persistent drips or leaks, especially near tubing joints, try descaling the machine’s internal parts:
Descaling solution:
- 4 cups white vinegar
- 4 cups hot water
Process:
- Pour vinegar solution into water tank
- Place empty 12 oz carafe on hot plate to catch drips
- Power on and select largest brew size
- Allow half the solution to cycle through machine
- Power off and allow to soak overnight
- Power on and finish cycle
- Rinse by running 4 cycles with plain water
Vinegar dissolves chalky limescale obstructing water flow paths which may eliminate leaks.
4. Clear Out Coffee Ground Buildup
If you notice large amounts of old coffee sludge in the filter basket or tray, clogged grounds could be diverting water into overflow channels:
To clear buildup:
- Remove filter basket
- Use rubber spatula to scrape down reservoir grime
- Check inlet holes under filter are clear
- Remove excess grounds stuck in perforated drain plate
- Check overflow tube is clear using chopstick
Removing the thick oily residue lets water properly funnel down to the carafe again.
5. Replace Damaged Gaskets and Seals
If leaks originate at tubing joints, worn grommets are likely to blame. Examine connection points closely for degraded or misshapen seals. Replace any suspicious gaskets:
Replacement process:
- Order replacement gasket kit for make/model
- Unscrew connector fittings
- Note orientation of old gaskets
- Clean mating surfaces with rubbing alcohol
- Lubricate new gaskets with food-grade grease
- Reinstall parts in original configuration
Consult manufacturer guides for proper gasket orientation. Avoid overtightening fittings.
6. Patch or Replace Leaky Internal Hoses
For stubborn seeping around internal tubes and hoses, the lines themselves have probably cracked from heat cycles:
Patching small leaks:
- Drain machine reservoir fully
- Identify leaks by area of origin
- Disconnect hoses or fittings
- Clean area thoroughly
- Apply clear sealant per sealant instructions
- Allow to cure fully before reconnecting (1-2 hours)
Replacing hoses:
For larger split tubes or irreparable damage, you may need to replace entire hose assemblies:
- Order OEM replacement tubes for make/model
- Disconnect all fittings on bad hose
- Attach ends of new hose to existing fittings
- Ensure tube is not kinked or too taught when reconnecting
Be very careful not to damage delicate tubes in the process.
Preventing Future Leaks
To maximize your coffee maker’s lifespan and prevent recurring issues, implement an ongoing maintenance regimen:
- Descale regularly – Monthly descaling keeps mineral buildup from blocking water pathways
- Change filters – Replace reusable metal filters every 2-3 months
- Clean carafes – Don’t allow coffee residue to solidify on glass pots
- Empty grounds – Discard old grounds after each use
- Inspect seals & tubing – Check rubber components every 6 months for signs of wear
Setting usage and cleaning reminders on your phone calendar can help.
Additionally, higher-end machines with solid steel boilers hold up better over time than models with aluminum internal parts which corrode and spring leaks easier.
When to Call a Repair Technician
While many leaks stem from basic wear-and-tear issues or sporadic overflows, more serious mechanical flaws requiring specialized tools and expertise do occasionally occur.
Contact customer support if you notice any of the following:
- Visible cracks in boiler tanks or reservoirs
- Major pressure-related blowouts
- Multiple leak sites indicating system failure
- Strong burning odors
- No power at all
Maintain your product warranty details in case professional service is needed.
For simpler fixes though, this guide should have you back to brewing aromatic coffee without messy leaks using components readily available at home or online.
Conclusion
A leaking coffee maker can definitely be a nuisance but these handy tips should help you identify and resolve the most common causes on your own without too much fuss. Learn to recognize issues from water tank misalignments to worn gaskets so you can get your machine resealed and back percolating properly. With some periodic maintenance and replacement of affordable parts as needed, your coffee maker should drip freely into cups rather than puddling countertops for years to come. Now finish your cup and get brewing your next fresh pot!