
A sandwich maker is an incredibly useful appliance to have in any home kitchen. Sandwich makers, also known as panini presses or grill presses, allow you to quickly and conveniently make hot, toasted sandwiches at home. From grilled cheeses to paninis to quesadillas and more, a countertop sandwich press can take your sandwiches from boring to gourmet in just minutes.
In this ultimate guide, we will cover everything you need to know when shopping for the best sandwich maker, from key features to top brands to using and maintaining your appliance. Read on for tips and recommendations to help you find the right sandwich press for your needs and budget.
Why Buy a Sandwich Maker?
Before we dive into what to look for when buying a sandwich maker, let’s first go over some of the key benefits this handy appliance has to offer:
- Speed and convenience – Sandwich presses cook sandwiches in just 4-8 minutes, much faster than using a skillet or baking in the oven. They provide a quick weeknight dinner or easy lunch on the go.
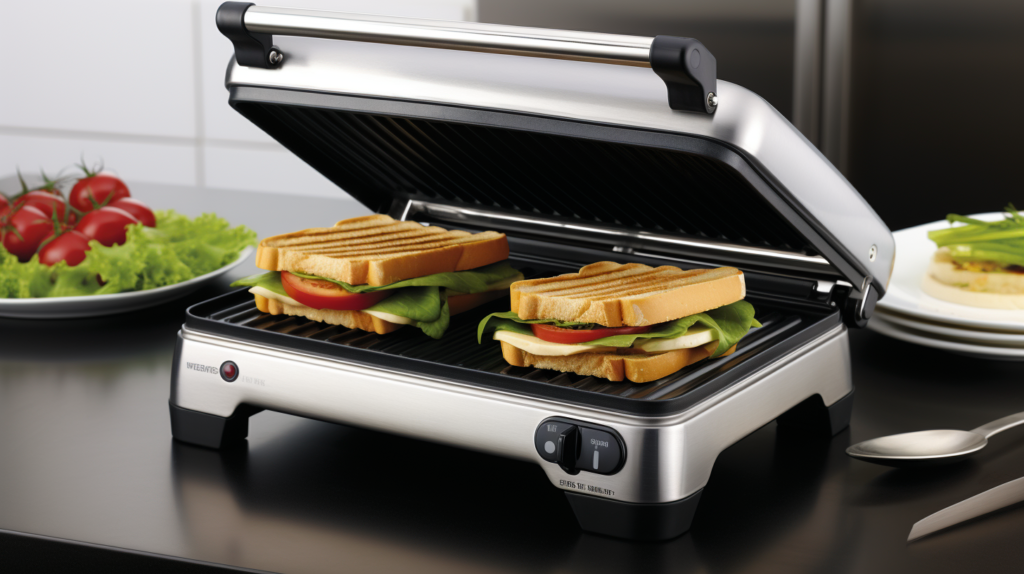
- Perfectly crispy and browned results – The hot plates of a sandwich press crisp up the outer bread while melting the fillings inside, giving you an evenly browned and pressed sandwich.
- Compact size – Most sandwich presses have a slim vertical design that takes up very little countertop space. They are easy to store in a cabinet or pantry when not in use.
- Versatility – While called “sandwich” makers, these appliances can make much more than just paninis. Try quesadillas, grilled vegetables, flattened chicken breasts, or other inventions.
- Easy to use and clean – Sandwich presses have simple controls and removable, nonstick plates that clean up fast after cooking.
Now that you know the many perks of owning one of these handy kitchen tools, let’s get into what features you need to look for when purchasing a press.
Key Features to Consider When Buying a Sandwich Maker
There are a few important features that differentiate the many sandwich maker options on the market. Keep these key factors in mind while shopping:
Size and Capacity
- The size of the cooking surface is one of the most important considerations when selecting a sandwich press. If you plan to only make 1-2 sandwiches at a time, a compact model with 8-10 inch plates will suffice. For larger families or entertaining, look for a press with expansive 11-12 inch plates that can handle 4 sandwiches at once.
- Thickness is also a factor for bulky sandwiches. Presses with floating hinges or top plates that raise up higher can accommodate thick sandwiches with lots of fillings. Measure the interior depth when open.
- Also, note the exterior housing size if you need to store your appliance in a cabinet or have limited countertop space.
Type of Plates
- The plates or cooking surfaces come in a few different options:
- Cast iron – Retains and conducts heat very well for crispy browning and sandwiches that are hot all the way through. However, cast iron is heavy and can be prone to rust if not cared for properly.
- Aluminum – Lightweight and heats up and cools down quickly. The cheaper option that still produces decent sandwich results.
- Nonstick-coated aluminum – Combines the fast heating of aluminum with a nonstick coating for easy cleaning. Our recommended option for most home cooks.
- No matter the material, make sure plates are removable from the housing for easy hand washing or dishwasher cleaning.
Non-Stick Coating
- For easy cleanup, a good nonstick coating is essential. PFOA-free ceramic or Teflon coatings prevent food and cheeses from sticking to the removable plates.
- The durability of the nonstick coating is important – lower priced models may have coating that chips or scratches. Higher quality presses advertise more durable nonstick for longer-lasting performance.
Power and Temperature
- Wattage, or power level, as well as temperature range, can affect performance. Most standard household models range from about 800-1500 watts. Higher wattage presses heat up quicker and reach hotter maximum temps.
- Temperature is also key – a press that only reaches 385°F may struggle to properly melt cheeses and crispy bread. Look for heat settings up to 425°F.
Safety Features
- Your sandwich maker should have cool-touch handles that remain cool while the press is hot.
- Locking hinges or latches keep the lid closed securely during the pressing motion.
- Nonslip feet on the base prevent sliding around on countertops.
- A power light indicates when the unit is getting hot.
Versatility
- While paninis are what usually come to mind, consider what other foods you’d like to prepare with your sandwich press. Many presses now advertise their ability to cook waffles, grill vegetables or meats, sear fish, and more.
- Removable and reversible plates provide even more options. Grill on one side, griddle on the other.
Durability
- Stainless steel or die-cast housing will stand up to frequent pressing far better than most plastic bodies.
- Hinges should feel sturdy, not flimsy.
- Easy-access heating elements beneath plates make for simpler repairs down the road.
- Replaceable parts – plates, drip trays, etc – extend functionality over time.
Additional Features
- Adjustable height settings – Allow you to raise or flatten sandwiches for softer or more crispy results. Great for everything from delicate phyllo dough to thick baguettes.
- Removable drip tray – Catches grease, cheese drips, and other messy fillings to keep unit clean. Dishwasher-safe tray simplifies cleanup.
- Cord storage – Allows you to wrap up and tidy away excess cords easily.
- Floating hinge – Top plate lifts up to fit thicker sandwiches.
- Reversible plates – Grill on one side, griddle on the other for more versatility.
Now that you know which features to evaluate, next we will cover the most common types of sandwich presses available.
Types of Sandwich Makers
While called sandwich presses or makers, these appliances can cook much more than just paninis and grilled cheese sandwiches. They utilize electric heating plates to quickly grill, sear, flatten, and melt a wide array of foods.
Here are the main categories of presses:
Panini Presses
- Best for: Traditional panini sandwiches with grill marks
- Plates: Ribbed or flat grill plates
- Features: Compact and lightweight. Most affordable type of press. It may or may not have capability to open 180° flat.
Griddlers / Double Griddles
- Best for: Pancakes, eggs, French toast, grilled veggies/meats
- Plates: Reversible griddle/grill plates
- Features: Usually larger cooking surface. Plates flip to use as flat griddle. Higher ends of price range.
Waffle Makers with Removable Plates
- Best for: Waffles! Also, pressed sandwiches.
- Plates: Interchangeable waffle grids and flat grill plates
- Features: Allows you to swap out plates to go from waffles to paninis. Very versatile!
While specialty presses exist for everything from eggs to donuts, the types above are the most common and useful for the average home cook.
Next up – tips for using your sandwich press!
How to Use a Sandwich Maker
Sandwich presses are delightfully simple to operate. Just follow these easy steps:
1. Preheat the Sandwich Maker
- Plug in the unit and close the lid. Allow it to preheat for 5 minutes until ready light displays or indicator beeps.
- Let it fully heat to reach searing temperatures. Don’t skip this vital first step!
2. Prepare Bread and Desired Fillings
- Select bread – ciabatta, sourdough, wheat, wraps, hoagie rolls, etc. Sliced bread works but may squash down very thin.
- Gather ingredients for fillings – cheeses, veggies, pre-cooked meats, condiments/sauces, seasonings.
- Spread one side of each bread slice with butter, oil or mayo to grill and add flavor.
3. Assemble Sandwiches
- Build sandwiches on one slice of bread, buttered side down. Add meats and cheese first so the cheese melts directly onto the bread.
- Top with additional fillings and condiments. Add top slice of bread, buttered side facing up.
- Pro tips: Spread mustard or tapenade directly on bread first to prevent sogginess. Keep moist veggies like tomatoes closer to the center and away from edges.
4. Place Sandwich in Maker
- For presses with floating hinges, lift the top plate. Place assembled sandwich onto bottom plate and lower top plate.
- For thinner sandwiches like grilled cheese, simply close the press firmly.
- Use caution – plates will be hot!
5. Toast Sandwiches
- Allow sandwiches to cook for 4-8 minutes until golden brown with grill marks. Check after a few minutes and press down lid to flatten as needed.
- For thicker, heavier sandwiches, cook time may extend up to 10 minutes to ensure fillings get hot.
- Bring down top plate and press firmly near the end to compress sandwich for a crispy crust.
6. Remove and Serve
- When topping bread is golden brown, sandwich is done.
- Lift handle to raise top plate, then remove sandwiches using plastic, wooden, or heat-proof utensils to avoid scratching appliance coating. Do not use metal spatulas.
- Let rest 1-2 minutes before cutting in half and serving. Be careful when biting in as fillings will be hot!
- For open-face or single-slice cooking (like eggs or quesadillas), use same process but omit top slice of bread.
That covers the simple process of using your handy sandwich maker! Just prep your favorite ingredients, assemble, press, and impress your family or friends with your own gourmet hot sandwiches.
Next, we’ll go over some maintenance tips to keep your sandwich press working like new.
Sandwich Maker Maintenance & Cleaning Tips
With removable, nonstick plates and surfaces, keeping your sandwich maker sparkling clean is simple. Here are pro tips:
Clean After Each Use
- Allow unit to fully cool first – at least 30 minutes after cooking.
- Wipe down the outside body with cleaning spray or damp cloth if needed. Rinse cloth and wipe again to remove residue.
- Remove top and bottom plates. Hand wash with hot soapy water and soft sponge or place in dishwasher.
- If needed, use plastic bristle brush or non-abrasive scrubbing pad to remove stuck-on cheese or grease. Avoid steel wool or metal items that could damage nonstick.
- Rinse and dry thoroughly.
- Empty and wipe down drip tray as needed or place in dishwasher.
Monthly Maintenance
In addition to cleaning each component after cooking, perform this routine maintenance monthly:
- Thoroughly wipe down the inner heating element and base surface with a clean damp cloth.
- Check that heating plates are still properly aligned and sitting flat. Readjust if needed.
- Test unit by toasting plain bread. If results are very uneven, you may need to replace plates or units.
Proper cleaning and storage are also key for longevity…
Storage Tips
- Make sure all components – housing, plates, and drip tray are completely dry before storing.
- Replace drip tray and plates. Optionally place a folded paper towel between plates to soak up any residual grease during storage and prevent sticking.
- Close sandwich maker and lock latch if equipped.
- Store upright on countertop or carefully place in cabinet, protecting controls.
Following this diligent cleaning routine after each use prevents build-up and keeps everything operating properly for years to come.
What if something still goes wrong? We cover that next…
Replacement Parts & Accessories
Over time, the nonstick surface may deteriorate or small parts like trays or knobs may break from wear and tear. The good news is that most quality sandwich maker brands sell replacement parts to easily fix issues instead of having to replace the whole costly appliance.
Common Replacements Parts to Purchase
- Nonstick cooking plates
- Drip trays
- Knobs and latches
- Power cords
- Housing feet
So if your old sandwich press is still heating evenly, but scratches are showing on those cooking plates, replace them rather than buy a whole new appliance!
As your press gets used over time, having replacement parts at the ready ensures you get maximum life from your sandwich maker.
Now that you know how to use the appliance and keep it like new, let’s wrap up with final tips…
Conclusion
We’ve covered a ton of ground when it comes to important features, and using and maintaining your sandwich maker. Let’s do a quick recap:
- Sandwich makers provide fast, tasty pressed sandwiches with gorgeous grill marks in minutes. From paninis to breakfast sandwiches, quesadillas and more, they are extremely versatile kitchen tools.
- Key features to compare are size/capacity, plate type, power wattage, safety features, durability, and ease of use. Consider which is most important for your needs.
- Operation is simple – just assemble your favorite fillings between slices of bread, cook 4-8 minutes until golden, and enjoy!
- Keep your press working like new by promptly removing plates and cleaning after each use.
We hope this guide gives you the essential buying information when shopping for a new sandwich maker. There are so many options out there, but armed with an understanding of critical must-have features, you’re sure to find the perfect sandwich press to deliver mouthwatering pressed sandwiches that your family and friends will love.