Quick answer
Whirlpool ice maker W10873791 not working can involve the water supply, temperature, wiring, or harvest mechanism; the replacement procedure here covers the in-door arrangement. An ice maker fills its mold, freezes the water, and then releases the cubes. A fault at any one of those stages can leave an empty bin. The mounting layout matters as much as the part number when you prepare for replacement. A different layout needs different access steps.
A cold freezer and an empty Whirlpool ice bin do not automatically mean the ice maker must be replaced. Water supply, temperature, wiring, and the harvest mechanism can all affect Whirlpool ice maker W10873791. The checks below help isolate the fault, followed by the replacement sequence for the compatible in-door arrangement described in this guide.
Quick Facts
| Detail | At a Glance |
| Difficulty | Easy to Moderate |
| Time | 10 minutes for the reset, 30 to 45 minutes for the replacement, 24 hours for the first full batch |
| Tools | 1/4 inch nut driver, Phillips screwdriver, freezer thermometer, flashlight |
| Part Cost | $70 to $150 for the ice maker, $20 to $60 for an inlet valve |
| Skill | Beginner |
Why Is Whirlpool Ice Maker W10873791 Not Working?
Whirlpool ice maker W10873791 not working can involve the water supply, temperature, wiring, or harvest mechanism; the replacement procedure here covers the in-door arrangement.
The following details help narrow the decision.
| Condition or Detail | Meaning or Next Consideration |
| freezer above 10°F | Use this observation to narrow the fault before choosing a replacement. |
| feeler arm up or shutoff switch off | Use this observation to narrow the fault before choosing a replacement. |
| no water | the inlet valve or frozen fill tube |
| module jammed or burned out | Use this observation to narrow the fault before choosing a replacement. |
| optic sensor failed | Judge the sensor signal under the correct temperature and test conditions. |
| water filter overdue | A flow restriction can remain until the filter path is clear. |
A symptom points toward a system, but several parts in that system may cause it; the useful question is which observation separates those parts. Visible damage gives stronger evidence than a guess from age alone. An electrical fault needs a reading made at the right points.
How Do You Reset a Whirlpool Ice Maker Before Replacing It?
Follow these steps to check this part of the fault.
Check the Reset and Response
- Confirm the arm or switch is on.
- Disconnect power for 5 minutes.
- Cycle the arm or press the reset if present.
- Wait 2 hours for a harvest.
- Watch the tray.
A reset can clear a temporary control state; it cannot remove a physical blockage or repair a broken wire. What happens after the reset matters more than a for a moment normal display. A returning fault suggests that the control is detecting the same condition again.
What would make this part a poor choice? A sound test result means you need to consider the other causes before ordering it.
Which Whirlpool Refrigerator Models Use Ice Maker W10873791?
Confirm the part against the full model number before ordering; a family name or visual match alone does not prove compatibility.
Keep these points in mind.
- Whirlpool
- Maytag
- KitchenAid
- And Amana French door and bottom-freezer families
- Supersession from earlier numbers
- Where the model tag sits
A model family describes a group of appliances, not one confirmed parts list; different versions can use a different length, mount, or connector. The full model identifier distinguishes those versions. Shared branding can also hide different internal designs.
Is W10873791 the Right Ice Maker for My Whirlpool Model?
Follow these steps to check this part of the fault.
Check the Specified Test Conditions
- Match model number in the parts lookup.
- Compare the mounting bracket and harness plug with the old unit.
- Confirm fill cup position.
A part number is useful only when it matches the complete appliance model; similar pieces can differ at a plug, clip, seal, or mounting point. A part that almost fits can leave the original fault or create a new one. The model label matters more than the cabinet color or the year you bought the appliance.
Do You Need to Unplug the Fridge Before Replacing the Ice Maker?
Yes, disconnect power before opening the assembly or testing resistance; restore it only for a separate powered check when that test is required.
Keep these points in mind.
- Unplug or trip the breaker
- Shut off the water if the fill tube will be disturbed
- Move ice bin and frozen food
The Off button is a control setting, not a way to remove electrical power from every internal part; a resistance test belongs on a disconnected circuit. Water and nearby powered parts make careless access especially risky. A live reading is a separate task with different hazards.
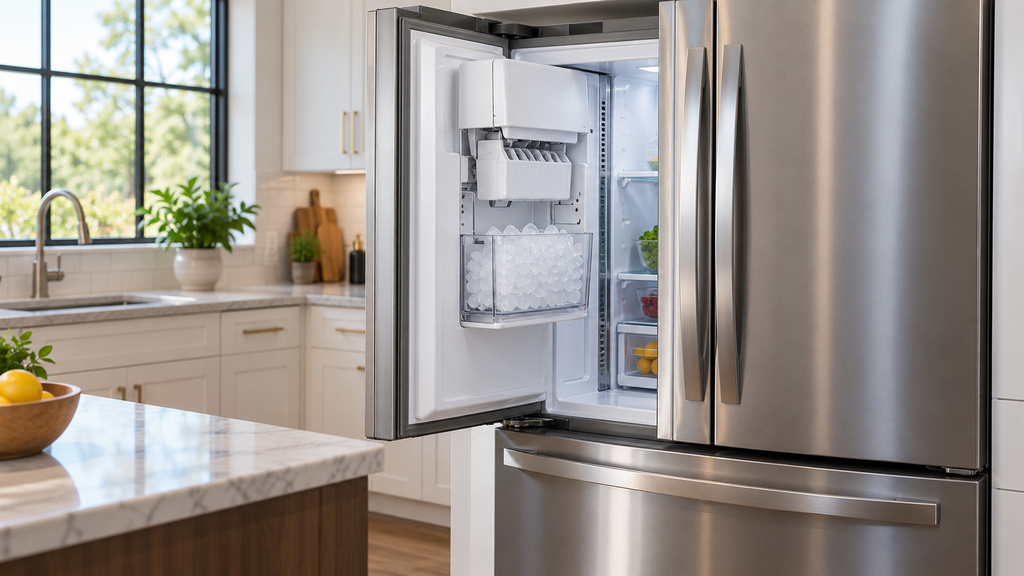
How Do You Replace Whirlpool Refrigerator Ice Maker W10873791?
Follow these steps to complete the covered procedure for Whirlpool ice maker W10873791 not working.
Phase 1: Unplug the Refrigerator and Remove the Ice Bin
- Disconnect power.
- Open the freezer.
- Press the bin latch and lift out the ice bin.
Phase 2: Unscrew the Mounting Fasteners and Unplug the Ice Maker Harness
- Remove the four Phillips cover screws.
- Lift the cover carefully with its wires attached.
- Release the switch harness tab and set the cover aside.
- Disconnect the ice maker harness.
- Free the harness from its three clips.
- Disconnect the LED harness.
- Remove the lower 1/4 inch screws.
- Lift the ice maker out of the door.
Phase 3: Mount the New Ice Maker and Connect the Harness
- Release the old LED tab with a flat screwdriver.
- Fit the LED in the new ice maker.
- Click the bottom into its opening.
- Align the door tabs and keep wires clear.
- Fit the 1/4 inch screws.
- Reconnect all harnesses.
- Fit the harness into its three clips.
Phase 4: Reinstall the Bin, Restore Power, and Wait for the First Harvest
- Connect the cover switch harness.
- Fit the cover bottom, then press its top into place.
- Fit its Phillips screws.
- Refit the ice bin.
- Close the door.
- Restore power.
- Allow several harvest cycles and check ice dispensing.
Should You Replace the Ice Maker, the Inlet Valve, or Call a Technician?
Choose the repair that matches the confirmed fault; a cheaper part will not help if it belongs to a different part of the system.
Keep these points in mind.
- Inlet valve $20 to $60 when the tray stays dry
- Ice maker $70 to $150 when the tray fills but never harvests
- Technician when the freezer itself runs warm
A low-cost part is a good choice only when it corrects the confirmed fault; cleaning can solve a blockage, but it cannot repair a cracked housing or an open winding. A control board should come later in the diagnosis because a bad connection can create the same symptom. Parts cost is only part of the decision.
FAQ
How Long Until the New Ice Maker Makes Ice?
Allow time for the ice maker to cool and complete its first harvests. The initial batch may be limited before normal production resumes.
Why Is the First Batch Small or Hollow?
Air in the supply, low flow, or incomplete cooling can affect early cubes. Continued hollow cubes call for another water and temperature check.
Does the Ice Maker Come With the Fill Cup and Bracket?
Package contents vary. Confirm the fill cup, bracket, and any reused pieces in the exact part listing.
A Full Ice Bin Again
You have a clearer path when the symptoms, model, and test results agree; focus on the failed part and keep the nearby wiring, mounts, and seals in view. A sound diagnosis helps the repair solve the original problem.
Check the full model number, then choose the compatible ice maker W10873791 so the bin is full again within a day.