

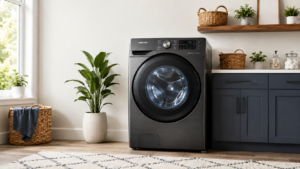
Cracks, leaks, kinks, or weak drain flow can make the washer’s drain hose a practical replacement target. Samsung washer drain hose replacement requires access to the lower rear panel, the pump connection, the upper hose bracket, and the washer outlet.
Drain problems can also come from the pump or another restriction in the drain path. Common drain pump blockages matter when the hose looks intact but water still leaves the tub slowly.
When the Drain Hose Needs Replacement
Several hose conditions deserve attention before a small leak spreads beyond the washer area.
- Visible cracks or splits appear along the hose body.
- Water drips from the hose during drain operation.
- A kink restricts the hose and returns after the washer is moved.
- The hose has hardened, softened, or developed rubbed areas.
- A clamp connection leaks even after the hose is seated correctly.
Parts to Have Ready
The replacement uses the hose and clamps that fit the washer’s drain connections.
- Compatible drain hose
- Lower hose clamp
- Upper gear clamp
Tools
Have these tools ready before the rear access panel is removed.
- Phillips screwdriver
- Pliers
Safety Before Replacement
Power, water, and residual drain water should be controlled before the old hose is disconnected.
- Unplug the washer and switch off its circuit breaker before rear-panel access.
- Shut off both water supply valves behind the washer.
- Place a towel under the pump area before the lower hose connection is opened.
- Use caution around sharp clamp edges and metal cabinet panels.
- Keep the floor dry so water does not reach the power cord or outlet.
- Move the washer only far enough to reach the rear panel without stretching supply hoses.
What to Inspect Around the Leak Area
A hose leak can leave clues that help prevent a repeat problem after the new hose is installed.
- Look for a cabinet edge or bracket that has rubbed through the old hose at one repeated contact point.
- Check the pump outlet for a chip, crack, or residue that could keep the lower hose from sealing.
- Inspect the upper outlet and bracket for looseness before the new hose is routed into place.
- Check the floor and nearby cabinet for water damage that needs to dry before the washer is pushed back.
- Confirm the replacement hose follows the original support points through the rear of the washer.
How to Complete a Samsung Washer Drain Hose Replacement
Follow the removal, installation, and leak-test sequence in order.
Remove the Old Drain Hose
- Unplug the washer, switch off power at the breaker, and shut off the hot and cold water supply valves.
- Trace the drain hose from the rear of the washer to the drain pump near the lower rear area.
- Use a Phillips screwdriver to remove the lower rear access-panel screws and remove the panel.
- Use pliers to slide the metal clamp up the hose, disconnect the hose from the drain pump, and keep a towel ready for remaining water.
- At the upper washer connection, remove the screw from the hose-clamp bracket, slide the hose out of the clamp, and pull it free from the washer port.
- Remove the old drain hose from the washer.
Install the New Drain Hose
- Push one end of the new drain hose fully onto the drain-pump outlet.
- Slide the preinstalled lower clamp into position and secure the hose to the pump.
- Lift the tab on the L-shaped rear bracket and slide the hose underneath it.
- Reinstall the bracket mounting screw and position the hose correctly under the bracket.
- Push the open end of the drain hose fully onto the washer outlet port.
- Install the upper gear clamp around the connection and tighten it firmly by hand.
Finish the Repair
- Set the rear access-panel tabs in position and reinstall the retaining screws.
- Restore power and turn the hot and cold water supplies back on.
- Run an empty rinse cycle and check the drain-hose connections and surrounding area for leaks.
How to Protect the New Hose From Wear
A good hose route can reduce rubbing, pinching, and strain after the washer is returned to position.
- Keep the hose away from sharp rear-panel edges and fastener points that could cut the outer surface.
- Leave enough slack for normal washer movement without creating a low loop that can be pinched behind the cabinet.
- Keep the rear bracket installed so the hose stays in the route intended for the washer.
- Check that the washer does not press the hose tightly against the wall when the cabinet is moved back.
- Inspect the visible hose area during routine laundry-room checks. General drain hose replacement details also cover wear and routing concerns.
Routing Checks Before the Washer Goes Back
These final checks can catch a poor hose position before access becomes limited again.
- Confirm the lower clamp sits over the sealing area of the pump outlet and stays away from the hose edge.
- Check that the upper outlet connection is fully seated and the gear clamp is tight.
- Follow the hose from bottom to top and remove any twist, tight bend, or pinch point.
- Verify the bracket holds the hose without crushing it or forcing it against a cabinet edge.
- Household drain connections can add another routing concern, especially when drain hose basics point to standpipe or hose-position issues.
If Drainage Is Still Slow
A new hose cannot correct a pump, drain-path, or household drainage problem.
- Check the pump area for debris when water flow remains weak after the hose has been replaced.
- Inspect the drain path for a restriction outside the washer.
- Confirm the new hose has no kink behind the cabinet.
- Listen for abnormal pump noise during the drain portion of the empty rinse cycle.
- Stop troubleshooting and correct any leak before running another cycle.
The Bottom Line
Samsung washer drain hose replacement depends on secure pump and outlet connections, correct clamp placement, and a route that stays free of kinks. Controlling residual water during removal also keeps the work area safer and easier to inspect.
An empty rinse cycle should confirm strong drainage and dry connections before normal laundry returns. When the hose remains dry but drainage is still weak, the next diagnosis belongs elsewhere in the drain system.