Quick answer
Prepare your smoker one to two weeks before Thanksgiving. Clean the grates and grease tray, remove cold ash where applicable, check visible seals, and confirm that vents are clear. Run a normal outdoor test before cooking day. Match fuel, cleaning methods, and replacement parts to your smoker type. Preparation reduces surprises, but cannot promise a breakdown will not happen.
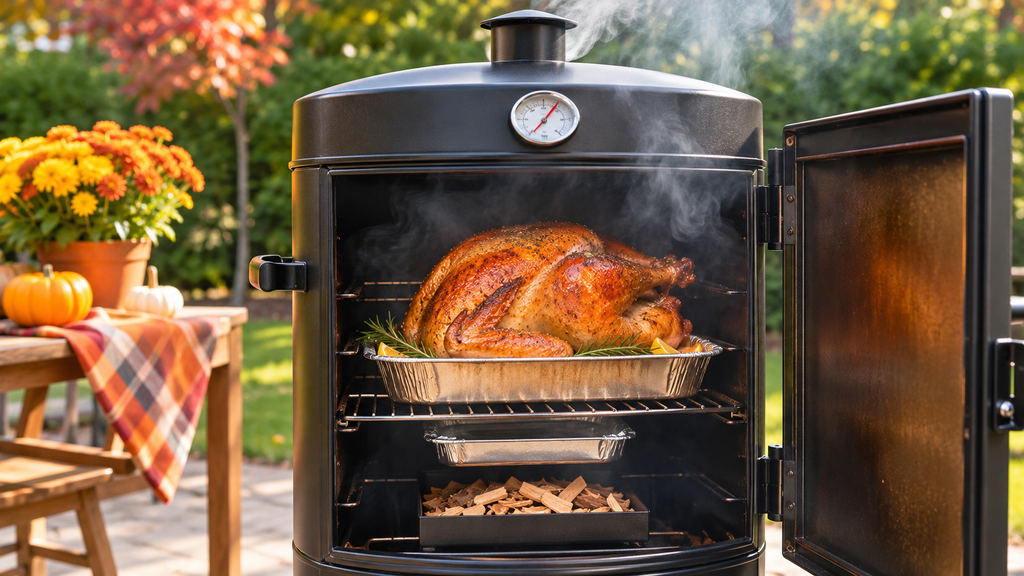
Make room in the holiday plan for the smoker before you focus on the turkey. Are grease, ash, or stored accessories blocking the areas you need to check? Learning how to prepare your smoker for Thanksgiving turkey gives you time to review clean airflow, ordinary operation, and a suitable cooking space.
You do not need to replace working parts just because a holiday is close. You do need time to clean, check fuel supplies, and try the smoker before the meal depends on it. This guide walks you through a pre-holiday checklist, careful cleaning, a practice run, and simple habits for a busy cooking day.
Quick Facts
Use these details to plan the job safely.
- Difficulty: Not specified; care varies by smoker type
- Time: Prepare one to two weeks ahead; cleaning duration not specified
- Tools: Grate brush, soft cloths, grease container, food thermometer
- Part cost: Not specified
- Skill level: Basic cleaning; repairs require suitable experience
Order the part with confidence
- Guaranteed to fit when you search by model number
- Same-day shipping on in-stock parts
- 365-day returns on any part
- Free tech support before and after you buy
Why Prepare Your Smoker Before Thanksgiving
A long turkey cook can expose problems that a short meal hides. A grease tray may fill, a fuel supply may run low, or a worn lid seal may make heat harder to hold. None of these checks needs to wait until the holiday morning.
Different smokers need different care. A pellet grill has a hopper and powered feed parts. A charcoal smoker collects ash. A gas smoker has a gas supply and burners. Work with the type you own rather than applying every cleaning task to every smoker.
Why start early? You have room to let washed parts dry and to order an actual missing item. It also gives you time to change the cooking plan if the smoker cannot run normally. Learning how to prepare your smoker for Thanksgiving turkey means leaving that room in your schedule.
A Pre-Holiday Checklist for Your Smoker
Walk around the cold smoker before gathering food. Look for damage you can see without opening fuel or electrical parts. Check the lid, grates, racks, legs, and grease collection area.
Use this short checklist before the practice run.
- Cooking space: Confirm that the turkey fits without blocking normal airflow.
- Clean surfaces: Remove loose food and heavy grease from approved cleaning areas.
- Fuel: Set aside the correct fuel for your smoker and keep it dry.
- Temperature checks: Have a working food thermometer ready.
- Outdoor space: Keep the smoker outdoors, clear of doors and flammable materials.
Check the condition of parts before buying replacements. A stained grate may only need cleaning; a broken support needs more attention. Match any new grate, heat plate, or igniter to the model. A similar shape alone does not prove that a part fits.
How to Deep Clean Your Smoker Before Guests Arrive
Follow these steps to clean a cold smoker before the holiday.
Cool and Empty the Smoker
- Turn the smoker off and let it become fully cold.
- Disconnect electrical power or shut off the fuel supply as appropriate for the model.
- Remove food scraps and empty the cold grease container.
- Remove cold ash from the areas intended for owner cleaning, if your smoker uses charcoal or pellets.
Clean the Cooking Surfaces
- Remove the grates and other owner-removable cooking parts.
- Clean them with a method suited to their finish.
- Wipe accessible grease deposits without flooding burners, wiring, or feed parts.
- Dry the cleaned pieces and reinstall them securely.
Do not strip every dark surface to bare metal. Some discoloration is normal with use. Keep harsh cleaners away from surfaces that are not approved for them, and remove any loose brush bristles before food touches a grate.
How to Test Your Smoker Ahead of Time
Follow these steps to check normal operation outdoors before cooking the turkey.
Run and Review the Practice Check
- Choose an outdoor place where you can stay nearby.
- Check the fuel supply first, then use the smoker’s normal starting method.
- Do not keep trying to light a unit that smells strongly of unburned gas.
- Watch the display, lid fit, and normal airflow. Does the smoker reach and hold your selected setting without an error or unusual smell? A blocked vent or faulty control needs attention before cooking food.
- Do not bypass a switch to get through a test.
- Let the smoker cool afterward, then check the grease tray and cooking supports again.
- Keep any food thermometer separate from the chamber display. One tells you about the food; the other describes conditions near its own sensor. A successful practice run does not replace food temperature checks on Thanksgiving.
A test run checks normal use, rather than proving a turkey is safely cooked.
Didn't fix it? Ask a technician on the AppliancePartsPros forum.
Post your model number, the symptom, and what you've already tried. Appliance techs and experienced DIYers answer for free, usually the same day.
Ask the forum →80,000+ solved repair threads · no account needed to readDay-of Tips to Keep Your Smoker Running Smoothly
Keep these habits in mind during routine use.
- Set fuel and tools within easy reach before the turkey goes in.
- Keep extra supplies out of rain and away from heat. Open the lid only when the recipe or a temperature check calls for it, since repeated opening releases heat.
- Give one person responsibility for watching the smoker. A busy kitchen can make it easy to assume someone else is checking it.
- Keep children and pets clear of the hot unit and leave its vents open in their normal operating positions.
Still deciding how to prepare your smoker for Thanksgiving turkey efficiently? Write a short cooking-day list during the practice run. Include fuel, thermometer, clean serving utensils, and a place for the hot turkey. If the smoker behaves poorly, use a safer cooking plan instead of trying an unfamiliar repair while dinner waits.
Frequently Asked Questions
How do you get your smoker ready for thanksgiving?
Clean the cold cooking surfaces, empty the grease tray, check the lid and supports, and gather the right fuel. Then complete a normal outdoor test. Use only the maintenance tasks that apply to your smoker type.
How far ahead should you prepare your smoker?
Start one to two weeks ahead. That allows time for cleaning, drying, a practice run, and any needed part order. Check supplies again before cooking day rather than waiting until the smoker is hot.
What should you clean on your smoker before guests arrive?
Focus on grates, racks, the grease tray, and accessible grease deposits. Remove cold ash if your smoker produces it. Keep water and cleaners away from electrical parts, fuel controls, and areas not intended for owner cleaning.
How do you keep your smoker running during heavy use?
Use the correct fuel, keep normal airflow paths open, and have someone watch the smoker. Limit needless lid opening and check the turkey with a food thermometer. Stop using the smoker if a new fault appears.
Final Thoughts: Keep It Simple and Consistent
Your best holiday plan starts with a clean smoker and a calm practice run. Give yourself time to check supplies and change plans if needed. Once you know how to prepare your smoker for Thanksgiving turkey, the cooking day is easier to organize.
Check your model number, then shop grill maintenance parts to find compatible supplies for your next care session.
Still stuck after this guide?
Two free options: post your model number and symptom on the forum, or search the model number in the shop to see every part that fits.