
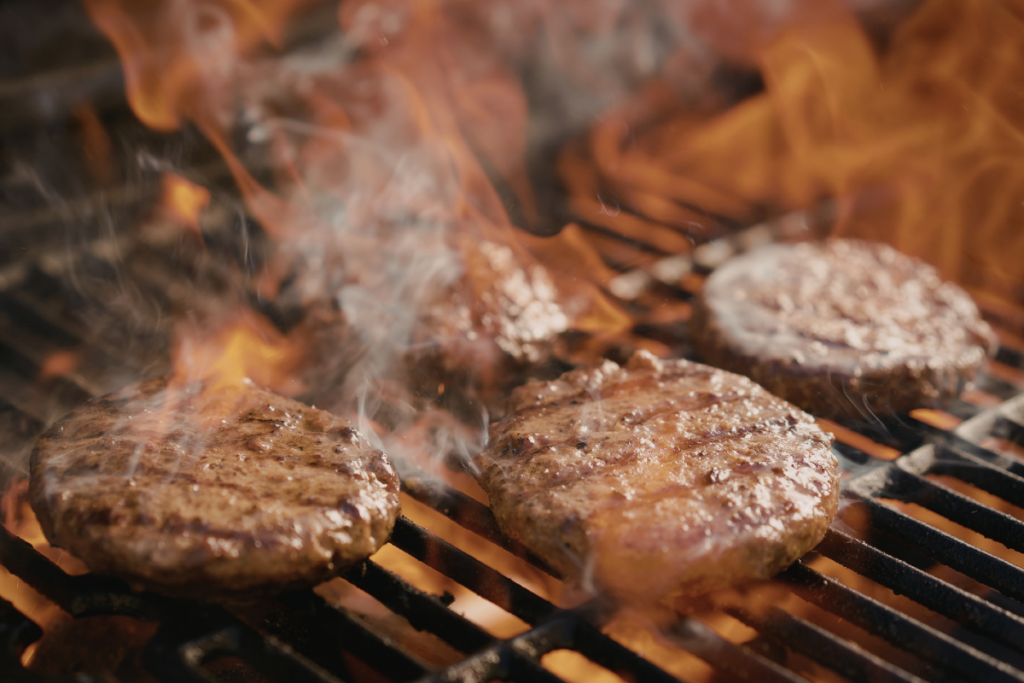
Does your grill smell like last week’s burgers every time you fire it up? You are not alone. Most people skip cleaning grill grates after cooking because it feels like too much work. But here is the truth: a simple five-minute routine can save you hours of scrubbing later.
Cleaning grill grates after every use is one of the smartest habits a grill owner can build. It keeps your food tasting fresh, your grill working well, and your cookouts stress-free. This guide walks you through a beginner-friendly system that is fast, easy, and totally doable, even on a busy weeknight.
Why You Should Clean Grill Grates After Every Use
Every time you grill, food bits and grease get left behind on the grates. While the grill is still hot, those leftovers are soft and easy to remove. But as the grill cools down, they harden and stick. The longer you wait, the harder they are to deal with.
Here is what happens when buildup sits on your grates:
- Flavor gets ruined. Old burnt food adds a bad taste to fresh meals.
- Hygiene drops. Bacteria and mold can grow in leftover grease.
- Grill performance suffers. Blocked grates heat unevenly and cause hot spots.
- Grease buildup increases. Layer by layer, grime builds up and becomes a real problem.
People who clean their grates daily spend almost no time on heavy scrubbing. A few minutes after each cookout is all it takes to stay ahead of the mess.
What Happens If You Skip Regular Grill Grate Cleaning
Skipping cleaning might feel harmless once or twice. But it adds up fast. Here is what you can expect if you ignore your grates:
- Grease hardens into a thick, sticky coating that becomes nearly impossible to remove with a quick wipe
- Burnt residue from old meals transfers bad flavors to your new food
- Grease buildup increases the risk of flare-ups, which can be dangerous
- Moisture trapped in grime causes grates to rust and wear out faster
What could have been a five-minute job now becomes a 45-minute deep clean. Does that sound like a good trade? Probably not.
The 5-Minute Routine at a Glance
Before we go step by step, here is a simple overview of the full process:
- Let the grill stay warm for a short time after cooking
- Brush or scrub off loose food and debris
- Wipe or scrape away remaining grease
- Lightly oil the grates if needed
- Close the grill and store it properly
The goal here is not perfection. It is consistency. A quick, repeated routine beats an occasional deep clean every single time.
Tools You Need for a Quick Grill Cleaning Routine
Good news: you do not need fancy or expensive tools. Here is what works:
- Grill brush or bristle-free scraper for removing loose food
- Grill stone, nylon scrub pad, or scraper tool for tougher spots
- Damp cloth or paper towels for wiping grease
- Heat-resistant gloves to protect your hands
- A small amount of cooking oil for seasoning the grates
- Optional: A spray bottle with water or diluted vinegar for sticky spots
That is it. Simple tools make easy grill maintenance tips work without any extra hassle.
When to Clean Grill Grates for the Best Results
Timing makes a big difference. The best time to clean your grates is right after you finish cooking, while they are still warm but not dangerously hot. Warm grates let grease and food residue come off with much less effort.
Here is the sweet spot:
- Too hot: You risk burns and the grease may smear instead of lift
- Just warm: Residue loosens easily and wiping takes seconds
- Fully cold: Everything hardens and sticks, making the job much harder
If you have a gas or pellet grill, turn it down to low heat for a few minutes before cleaning. For charcoal grills, wait until the coals start to die down before you begin.
How to Clean Grill Grates After Every Use
Now that you have your tools ready and know the best time to clean, let’s walk through each step so you can get it done quickly and correctly every single time.
Step 1: Let the Grill Cool Slightly but Stay Warm
After you pull your food off the grill, give it about five to ten minutes. You want the grates to drop from very hot to comfortably warm. Always wear heat-resistant gloves before touching anything near the cooking surface.
Step 2: Brush Off Loose Food and Carbon
Use your grill brush or bristle-free scraper to sweep the grates with short, firm strokes. Move back and forth across the surface. You do not need to scrub hard. A few passes are all it takes to clear most of the loose debris during regular daily maintenance.
Step 3: Wipe Away Grease and Sticky Spots
Fold a damp paper towel and grip it with tongs. Wipe the grates from top to bottom. This lifts away fresh grease before it has a chance to harden. For cleaning grill grates that have oily patches, a single pass usually does the trick.
Step 4: Spot-Clean Stubborn Areas
See a spot that will not budge? Spray a little warm water or diluted vinegar directly on it. Let it sit for thirty seconds, then scrub with your pad or scraper. You do not need to turn the whole grill into a project. Just target what needs attention and move on.
Step 5: Lightly Oil the Grates if Needed
Dip a folded paper towel in cooking oil and use tongs to rub it across the grates. This step is especially helpful for cast iron grates, which can rust if left bare. A thin coat of oil keeps the surface protected and helps reduce sticking next time you cook.
Step 6: Empty or Check Nearby Grease Traps
Take a quick look at your drip tray or grease trap. If it is getting full, empty it. Cleaning grill grates works even better when the rest of the grill stays tidy, too. A clean grease tray helps prevent buildup from spreading to other parts of the grill.
Best Cleaning Methods by Grill Grate Material
Not all grates are the same. Here is how to care for each type:
Porcelain-Coated Grill Grates
Use soft brushes or nylon pads. Avoid metal scrapers that can chip the coating. Once the porcelain cracks, rust sets in quickly. Gentle tools are your best friend here.
Cast Iron Grill Grates
Always dry cast iron completely after cleaning. Even a little moisture leads to rust. After drying, rub on a thin layer of cooking oil to protect the seasoning. This keeps the surface non-stick and rust-free.
Stainless Steel Grill Grates
Stainless steel handles regular brushing and wiping very well. Use a stiff brush after each use and wipe with a cloth. This material is the most forgiving and holds up well to a consistent cleaning routine.
Easy Grill Maintenance Tips That Make Cleaning Faster
Want to make the whole process even quicker? Try these habits:
- Preheat your grill before cooking to burn off any leftover residue
- Oil your food lightly instead of pouring oil directly on the grates
- Remove leftover food before closing the grill after each session
- Cover the grill once it cools completely to keep moisture and bugs out
- Check the grease tray every two to three cookouts
- Use the same routine every time so it becomes automatic
These easy grill maintenance tips take almost no extra time but make a huge difference over the months.
Common Mistakes to Avoid
Even people with good intentions make these mistakes:
- Waiting until the grill is fully cold before cleaning, which hardens the grease
- Using metal tools on porcelain grates, which chips and damages the coating
- Leaving moisture on cast iron, which leads to rust almost immediately
- Ignoring grease trays, which overflow and cause flare-ups
- Using too much water, which can warp grates or cause rust
- Skipping cleaning because the grates “look okay”, which allows invisible grease to keep building up
Avoiding these mistakes keeps your five-minute routine truly quick and effective.
Signs Your Grill Grates Need More Than a 5-Minute Cleaning
Sometimes regular maintenance is not enough. Watch for these warning signs:
- A thick black crust that does not come off with brushing
- A sticky grease coating spread across a wide area
- Rust spots or material that is starting to flake
- A strong burnt odor during preheating
- Uneven cooking caused by blocked grate surfaces
If you notice any of these, it is time for a deeper cleaning session using a degreaser or a soak in warm, soapy water.
Next Steps
Learning to clean grill grates after every use is one of the simplest ways to protect your grill and improve your cooking. You do not need special tools, a lot of time, or years of experience. You just need five minutes and a little consistency.
Start with the warm-grate brush-and-wipe routine after your next cookout. Do it again the time after that. Before long, it will feel as natural as turning off the burners. Small habits like this are what keep a grill in great shape for years, and what save you from spending a Saturday afternoon scrubbing off months of hardened grease.
Take care of your grill today, and it will take care of your cookouts for a long time to come.