
The sensor dry control board, also called the moisture sensor board or circuit board, is a critical component in modern dryers with moisture sensor drying cycles. It monitors the moisture levels of clothes during the drying process, allowing the appliance to stop when clothes reach the desired dryness, avoiding unnecessary energy use.
If your dryer fails to sense moisture properly or shuts off incorrectly, the sensor dry control board may be damaged or malfunctioning. Replacing this part can help restore proper functionality and make your laundry dry efficiently.
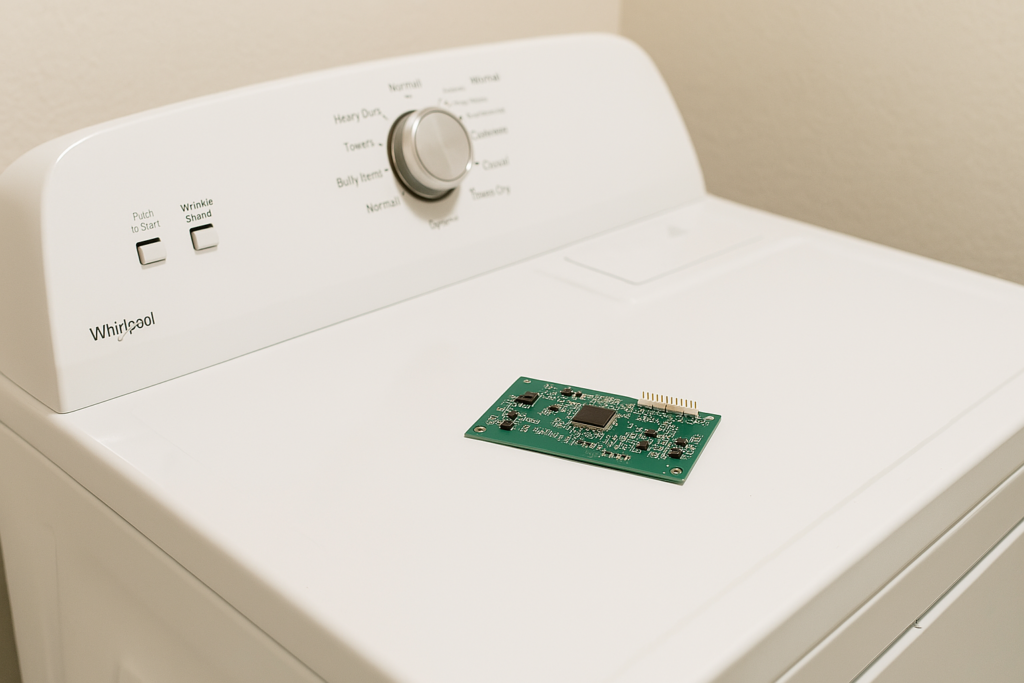
Understanding the Sensor Dry Control Board
The sensor dry control board is designed to optimize drying cycles by detecting moisture levels in clothes and stopping the dryer when they reach the appropriate level. Here’s why this component is important:
- Prevents over-drying, which can damage clothes and reduce their lifespan.
- Saves energy by stopping the dryer as soon as clothes are dry.
- Improves drying accuracy compared to time-based cycles.
- Enhances convenience by reducing guesswork in selecting cycle duration.
- Works alongside other dryer components, such as thermostats and heating elements.
Common Symptoms of a Faulty Sensor Dry Control Board
Recognizing the signs of a malfunctioning control board can help you diagnose the problem accurately. Here are some common symptoms to watch for:
- Dryer runs continuously and doesn’t stop when clothes are dry.
- Dryer shuts off too soon, leaving clothes damp.
- Moisture sensor drying cycle is unresponsive or inconsistent.
- Error codes related to the moisture sensor appear on the display.
- Clothes are over-dried, causing excessive wear or shrinkage.
- The dryer stops working altogether during moisture sensor cycles.
- Unusual or burning smells near the control panel area.
- Fluctuations in drying times despite using the same load size and settings.
If you notice one or more of these symptoms, the sensor dry control board may need replacement.
Read more: Electric Dryer Thermal Fuse Replacement Guide
Tools and Materials Needed
- Phillips head screwdriver
- Replacement control board (check compatibility with your dryer model before installation)
Safety First
Working with appliances requires attention to safety. Follow these precautions to protect yourself and your appliance:
- Power Off: Always unplug the dryer or turn off the circuit breaker before starting. This eliminates the risk of electric shock.
- Cool Down: If the appliance was recently in use, allow it to cool completely.
- Stay Organized: Keep your workspace well-lit, clean, and free of distractions. Children and pets should not be near the work area.
- Dry Conditions: Make sure your hands and work area are dry to avoid electrical hazards.
- Handle with Care: Remove and install parts gently to avoid damaging components.
- Protect Yourself: Wear insulated gloves to safeguard against sharp edges and safety glasses or a dust mask if needed for debris or chemical exposure.
- Avoid Direct Contact: Do not touch exposed wires or terminals. Use non-conductive tools when handling electrical parts.
- Follow the Manual: Refer to your dryer’s user manual for specific instructions or precautions.
How to Replace the Sensor Dry Control Board on an Electric Whirlpool Dryer
Replacing the sensor dry control board is straightforward and takes the right steps.
Preparation
- Turn off the dryer and disconnect it from the power supply.
Removing the Console
- Use a Phillips head screwdriver to remove the two screws located at the back of the console.
- Push the console forward gently and lift it upward to expose the internal components.
Replacing the Sensor Dry Control Board
- Locate the small sensor dry control board inside the console.
- Disconnect the control board from its plug carefully.
- Connect the new control board securely to the plug.
Reassembling the Console
- Reposition the console so it fits properly.
- Reinstall the two screws at the back of the console using the Phillips head screwdriver.
Final Steps
- Reconnect the dryer to the power supply and test it to confirm proper functionality.
Read more: How to replace the blower wheel assembly on a Whirlpool dryer
Bringing Your Dryer Back to Perfect Condition
No more dealing with damp laundry after a cycle or worrying about clothes getting too dry. With this fix, your dryer will run efficiently, saving energy and keeping your clothes in good condition. If you’ve noticed unusual issues, don’t wait to address them. With the proper tools and a bit of time, you can get everything back on track.