

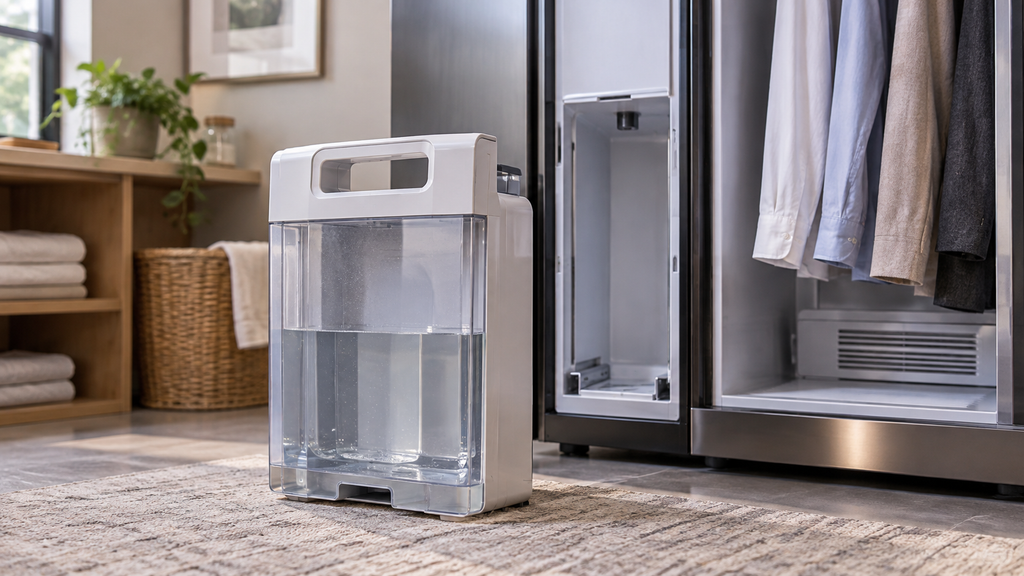
Steam closet water tank cleaning can restore dependable operation when careful checks point to steam closet water tank. The work starts with the correct part, a clear work area, and the service information for the exact model. Those details matter because fasteners, access panels, and connection points can vary even within one product line.
A focused repair also limits wasted time. The visible symptom should be confirmed before any part is removed, and each connection should be recorded during disassembly. This guide keeps the source procedure in its original order while explaining the preparation, safety, and follow-up checks that help a home repair go smoothly.
The same inspection can address clean steam closet tank questions and steam closet maintenance concerns when those conditions appear with the main symptom.
What to Know About the Steam Closet Water Tank
The steam closet water tank affects how the steam closet completes its normal job. Wear, residue, heat, moisture, or repeated movement can change how the part fits or works. A correct diagnosis looks at the full symptom instead of relying on one sound or one interrupted cycle.
The model number should be checked before a replacement part or cleaning product is selected. Product literature can also identify special access instructions, calibration steps, or limits that apply to the unit. When those directions differ from general guidance, the manufacturer information controls the job.
Signs That Support This Repair
The following signs can support further inspection of the steam closet water tank:
- The cabinet develops a stale odor.
- Steam output becomes weaker.
- Mineral scale coats the tank walls.
- Lint or film appears in standing water.
- A tank-clean or descale alert appears.
Some symptoms can have more than one cause. A related fault in the steam closet water tank should be ruled out when its signs match the problem. The goal is to replace or clean the identified item after basic checks support that decision.
Tools and Supplies
Gather the required items before opening or moving the appliance:
- White vinegar
- Warm water
- Microfiber cloths
- Soft bottle brush
- Turkey baster
- Work gloves
Safety
- Disconnect electrical power before a panel, cover, or housing is opened.
- Shut off connected water supplies when the procedure reaches hoses or water fittings.
- Let recently used parts cool before handling them.
- Wear work gloves around sheet metal, broken plastic, and sharp edges.
- Keep hands, tools, and the work area dry.
- Keep children and pets away from the open appliance.
- Stop if burned wiring, damaged insulation, or an unsafe connection is found.
How to clean a steam closet water tank
Follow the steps in order and keep removed hardware grouped for reassembly.
Empty and wash the tanks
- Disconnect power at the plug or breaker.
- Slide out the intake and drain tanks carefully with a towel ready for drips.
- Empty the tanks and rinse them with warm water.
- Mix one part white vinegar with two parts warm water.
- Use an approved descaling liquid according to its label instead when vinegar is unsuitable.
- Fill the tank halfway with the chosen solution.
- Scrub the walls, corners, and seams with a bottle brush or sponge.
- Let the solution sit for 20 to 30 minutes.
- Empty the solution and rinse several times with clean water.
- Swish distilled water through the tank for the final rinse.
- Repeat the scrub, soak, and rinse process on the drain tank.
Dry and test the system
- Dry both tanks with a microfiber cloth.
- Leave the tanks in open air for one to two hours before reinstalling them.
- Refill the intake tank with distilled water and run an empty refresh or cleaning cycle.
Plan the Work Area
A prepared work area protects the appliance and keeps the procedure organized:
- Clear enough floor and counter space to set panels or removable parts down without stacking them.
- Place towels where water, cleaner, grease, or loose debris may reach the surrounding surface.
- Use small labeled containers for screws and clips from each access phase.
- Keep the model information and service literature within reach during the job.
- Provide bright light that reaches the connection points without placing a lamp in the work path.
- Arrange tools in the order they will be used so the appliance is not left open longer than needed.
Protect Parts and Nearby Surfaces
Small habits during the job can prevent scratches, leaks, and misplaced hardware:
- Set painted panels on folded towels with the finished side facing up.
- Support heavy or flexible parts instead of letting their weight hang from wires or hoses.
- Photograph plugs, hose routes, and bracket positions before they are disturbed.
- Clean sealing surfaces with a soft cloth without scraping them with metal tools.
- Start threaded fasteners by hand and tighten them evenly to avoid damaged threads.
- Wipe up moisture at once so it cannot reach electrical connections or finished flooring.
Record the Result for Future Service
A short service record makes later maintenance faster and more accurate:
- Write down the date, model number, part number, and reason for the work.
- Save clear photos of the original connections and the completed installation.
- Note any rust, damaged insulation, loose fittings, or worn parts found nearby.
- Record the test cycle or operating check used after reassembly.
- Keep purchase information and part instructions with the appliance manual.
- Check the repaired area again after several normal uses for leaks, heat, noise, or movement.
In Summary
Careful steam closet water tank cleaning depends on a correct diagnosis, safe shutdown, organized parts, and a complete operating check. Those basics make the result easier to trust and make any follow-up inspection easier to understand.
Once the steam closet water tank works correctly and the area stays clean, dry, and secure, the steam closet can return to normal use. Keeping the photos and service notes nearby will also make the next routine job feel familiar and manageable.