
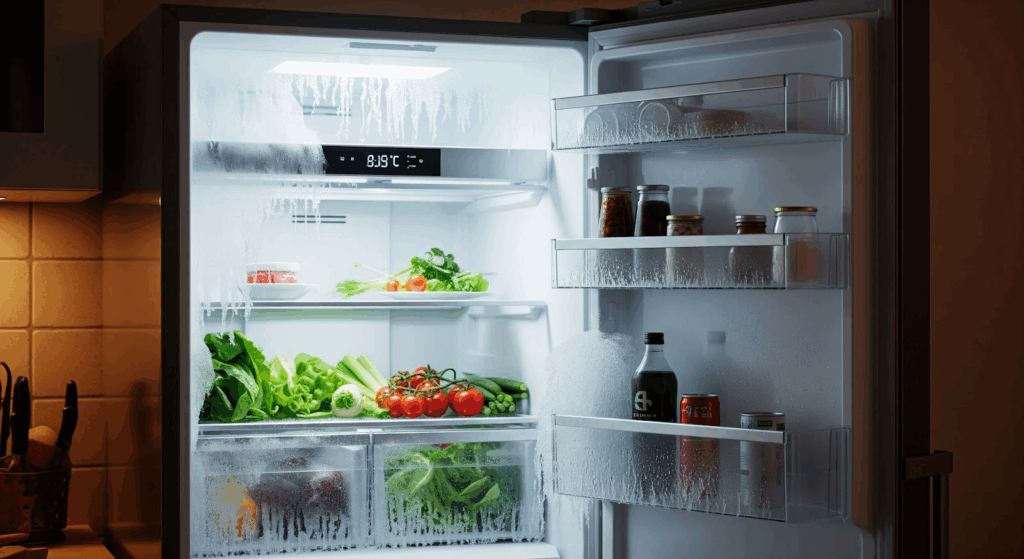
Opening your refrigerator and finding that the air inside feels warm can be frustrating, especially when you’re expecting a cold drink or trying to keep food fresh. A refrigerator that stops cooling is a problem that needs immediate attention. It can compromise food safety and lead to spoilage, waste, and even costly repairs if not resolved quickly.
This guide explains the most common reasons why a refrigerator might not cool properly and outlines the steps you can take to diagnose and fix the issue.
What Causes a Refrigerator to Stop Cooling?
Several parts inside a refrigerator work together to maintain cold temperatures. When one of them stops working, the cooling process can be affected. Below are the most common problems that cause a fridge to lose its cool.
1. Dirty Condenser Coils
Condenser coils remove heat from inside the fridge. If they are covered in dust, dirt, or pet hair, they cannot release heat properly. This can cause your refrigerator to use more energy and may result in poor cooling.
How to clean condenser coils:
- Unplug the refrigerator.
- Locate the coils, usually behind or beneath the unit.
- Use a vacuum cleaner or a soft brush to remove dirt and dust.
- Clear the area around the coils to support better airflow.
Cleaning the coils twice a year helps reduce wear on the appliance and keeps cooling performance stable.
2. Faulty Evaporator Fan Motor
The evaporator fan motor helps circulate cold air from the freezer into the fridge. If the fan motor stops working, your refrigerator may stop receiving cool air even if the freezer still works.
How to inspect the fan motor:
- Unplug the refrigerator before opening it.
- Access the motor behind the rear freezer panel.
- Look for signs of damage, such as broken blades or ice buildup.
- Check if the fan spins freely or makes unusual noises.
Sometimes cleaning out dust or ice is enough, but in many cases, the motor will need to be replaced.
3. Malfunctioning Thermostat
The thermostat controls how cold the fridge gets by turning the compressor and fan motor on or off. If it stops working, your refrigerator may not cool at all.
Steps to check the thermostat:
- Make sure the temperature setting is correct. A good range is 37°F for the fridge and 0°F for the freezer.
- Adjust the dial and see if the compressor turns on.
- If nothing changes, test the thermostat with a multimeter or contact a technician for help.
Some refrigerators have multiple thermostats, so testing them individually may be necessary.
4. Worn or Damaged Door Gasket
The gasket is the rubber seal around the edge of the door. It keeps cold air inside and prevents warm air from getting in. If the gasket becomes dirty or cracked, the fridge can lose cold air quickly.
How to maintain the gasket:
- Wipe the gasket clean with soapy water.
- Look for any signs of wear, tears, or areas that are not sealing properly.
- Test the seal by closing the door on a piece of paper. If you can pull the paper out easily, the gasket may need to be replaced.
Replacing a worn gasket can help bring the fridge back to proper cooling levels.
5. Low Refrigerant Levels
Refrigerant absorbs heat from inside the fridge and releases it outside. If the system has a leak or was not filled correctly during installation, the fridge cannot cool properly.
Signs of low refrigerant:
- Both the fridge and freezer feel warm.
- The compressor is silent or does not run.
- There may be frost buildup around the evaporator.
What to do:
Do not attempt to fix refrigerant issues yourself. Refrigerant must be handled with special tools and training. Call a licensed technician to check for leaks and refill the refrigerant.
Also Read: Why Is My Refrigerator Not Cooling?
How to Prevent Cooling Problems
While some fridge issues come from age or wear, many can be avoided through regular care and proper usage. Below are simple habits that help maintain cooling performance.
Clean the Coils Twice a Year
Coils should be cleaned every six months to prevent dust buildup. This helps keep the cooling system running smoothly. Use a soft brush or vacuum to clean around the back or bottom of the fridge.
Maintain the Door Gasket
Keep the gasket clean to support a good seal. Wash it once a month with soapy water and check for cracks. Replacing a damaged gasket can help reduce energy use and cooling problems.
Avoid Overfilling the Fridge
Putting too much inside your refrigerator can block air vents and limit airflow. This affects how well the cold air moves throughout the unit. Try to leave space between items, especially near fans and vents.
Give the Fridge Room to Breathe
Place the refrigerator in a space where air can flow freely around it. Leave space between the wall and the back of the appliance so that warm air can escape and not build up around the coils.
Have It Checked Once a Year
Regular inspections by a technician can help catch problems early. They can clean hidden parts, check refrigerant levels, and test parts like the thermostat or fan motor.
How to Fix a Refrigerator That Is Not Cooling
If your refrigerator has stopped cooling, follow these steps to diagnose the problem before calling for service.
1. Start with Safety and Power Checks
- Unplug the refrigerator before starting any inspection or cleaning.
- Plug it back into a working outlet after cleaning or checking internal parts.
- Check if the circuit breaker has tripped or if the outlet has lost power.
- Plug the unit directly into the wall socket if it’s currently connected to a power strip.
2. Clean the Condenser Coils
- Move the refrigerator away from the wall to access the back or bottom panel.
- Locate the condenser coils, which may be behind a rear panel or under the base grille.
- Use a vacuum or soft brush to remove dust, dirt, and pet hair from the coils.
- Wipe the coils gently with a damp cloth and mild soap solution if needed.
- Let the coils dry before turning the refrigerator back on.
- Plug the fridge back in and give it several hours to cool.
3. Inspect the Evaporator Fan Motor
- Unplug the refrigerator again before checking internal components.
- Open the freezer compartment and locate the evaporator fan, usually behind a panel.
- Remove the panel to access the fan.
- Spin the fan blades by hand to check if they move freely.
- Look for signs of damage or frost buildup around the fan.
- Plug the fridge back in and press the door switch to test if the fan turns on.
- Replace the fan motor if it does not spin or makes an unusual noise.
4. Adjust and Verify Thermostat Settings
- Locate the thermostat inside the fridge or freezer compartment.
- Check the current setting. Set the freezer between 0°F and 5°F (-18°C to -15°C), and the fridge at or below 40°F (4°C).
- Place a refrigerator thermometer in both compartments to compare actual temperatures.
- Adjust the thermostat if needed, and allow 24 hours for temperatures to stabilize.
- Make sure air vents inside the fridge and freezer are not blocked by items or packaging.
5. Inspect the Door Gasket
- Examine the rubber seal around the refrigerator and freezer doors for cracks or looseness.
- Clean the gasket with warm, soapy water and a cloth to remove dirt or residue.
- Do a dollar bill test by closing a bill in the door and tugging on it.
- If the bill slides out easily without resistance, the gasket may not be sealing well.
- Replace the gasket if it’s torn, warped, or no longer fits tightly.
6. Check Airflow and Storage Practices
- Avoid overcrowding shelves, which can block cold air from circulating.
- Leave a few inches of space around the fridge, especially at the back and top, to allow proper ventilation.
- Keep vents inside the fridge and freezer clear of items to allow air to move freely.
7. Observe Cooling Performance
- After completing the steps above, let the refrigerator run for 24 hours.
- Recheck the internal temperature using thermometers to see if cooling has improved.
- Continue monitoring for consistent temperatures in both the fridge and freezer sections.
8. Call a Professional if Needed
- If the fridge is still not cooling after all steps, more complex issues may be present.
- Problems such as a faulty compressor, control board, or refrigerant leak require professional diagnosis.
- Contact a licensed technician to inspect and repair the unit.
In Summary
Taking care of your refrigerator doesn’t have to be hard. Simple steps, like cleaning the coils or checking the door seal, can often fix cooling problems before they get worse. If your fridge starts warming up, these checks are a good place to begin.
Try each step and give the fridge time to adjust. Sometimes, small changes are all it takes to get things working again. If the issue continues, you might need help from a technician. Some repairs involve parts or tools that require training.
Doing a bit of maintenance now and then helps the fridge work better for longer. Keeping shelves spaced out, cleaning parts when needed, and watching how it runs can save you from bigger issues later. If something feels off, don’t wait too long to take action.
A well-maintained fridge helps your food stay safe and fresh. And when problems pop up, having a clear plan makes it easier to figure out what to do next. Start simple, follow each step, and you’ll be more prepared the next time your fridge doesn’t cool the way it should.