
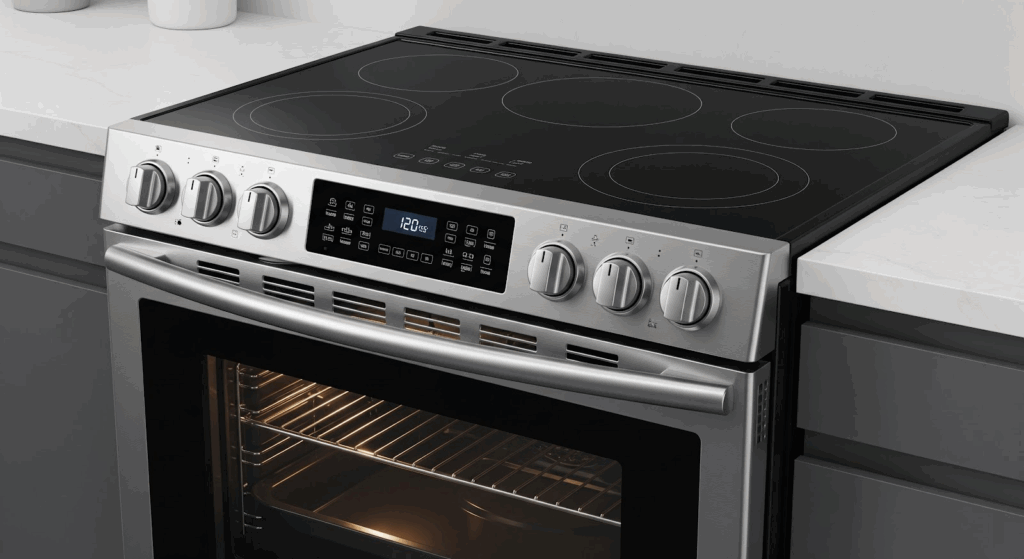
When the warming element on your Samsung electric range stops heating, it can really disrupt your cooking routine. Luckily, you might not need to call a technician right away. With just a few tools and some basic troubleshooting, you may be able to fix the issue yourself.
What You’ll Need
- Phillips head screwdriver
- Multimeter
Safety First
Before starting any repairs, your safety should come first. Keep the following precautions in mind while working on your appliance:
- Always turn off the power and unplug the appliance or flip the circuit breaker before starting any work. This prevents the risk of electric shock.
- If the appliance has been used recently, wait until it has completely cooled down before beginning any work.
- Take your time and work carefully to avoid injuries or accidents. Precision is more important than speed.
- Use proper lighting so you can clearly see what you are doing.
- Keep your work area free of clutter, and make sure pets and children stay away from the space.
- Never work on internal parts with wet hands. Keep the workspace completely dry to avoid any hazards.
- Refer to your appliance’s manual for any model-specific installation or safety instructions.
- Handle all parts with care to avoid damage or injury.
- Wear insulated work gloves to protect your hands from sharp edges and debris.
- Be cautious when working with wires. Avoid touching exposed wires or terminals. Use non-conductive tools or insulating gloves if you need to move any wires.
- Take photos or write down how wires and terminals are connected before disconnecting anything. This will help during reassembly.
- Do not test live voltage with a multimeter unless you are confident in how to do it safely.
How to Troubleshoot a Non-Working Warming Element on a Samsung Electric Range
Follow these steps to diagnose and identify the issue if the warming element on your Samsung electric range isn’t working.
Main Control Board Testing
- Plug in and power on the range.
- Locate the CN04 connector on the far-left bottom of the main control board.
- Set a multimeter to DC Volts mode.
- Place the multimeter probes on each orange wire and each blue wire at the CN04 connector.
- Verify the meter reading is approximately 4.7 VDC.
- Locate the CN05 connector, which is the second connector to the right of CN04 on the main control board.
- Keep the multimeter in DC Volts mode.
- Place the meter probes on each black wire and each white wire at the CN05 connector.
- Verify the meter reading is approximately 3.85 VDC.
Relay Control Board Testing
- Remove the lower panel to access the relay control board.
- Locate the CN04 connector on the top left of the relay control board.
- Keep the multimeter in DC Volts mode.
- Place the meter probes on each orange wire and each blue wire at the CN04 connector.
- Verify the meter reading is approximately 4.7 VDC.
- Locate the CN05 connector, which is the second connector to the right of CN04 on the relay control board.
- Keep the multimeter in DC Volts mode.
- Place the meter probes on each black wire and each white wire at the CN05 connector.
- Verify the meter reading is approximately 3.85 VDC.
Voltage Supply to Warming Element
- Locate the T01 connector on the relay control board.
- Set the multimeter to AC Volts mode.
- Place the probe on the violet wire, which supplies power to the warming element.
- Verify the meter reading is approximately 120 VAC.
Warming Element Testing
- Unplug the range from the power outlet.
- Remove the cooktop surface to access the warming element.
- Set the multimeter to continuity mode.
- Place the probes on the yellow and violet wires at the thermostat and check for continuity. The meter should beep.
- Place the probes on the black and gray wires at the thermostat and check for continuity. The meter should not beep at room temperature.
- Set the multimeter to resistance mode.
- Place the probes on the red and yellow wires at the warming element terminals.
- Verify the resistance reading is between 570 and 580 Ohms. Replace the element if it is outside this range.
Wire Harness Testing
- Set the multimeter to continuity mode.
- Test each wire in the harness from end to end.
- Confirm continuity for each wire. The meter should beep.
- Replace any wire that does not show continuity or is visibly damaged.
Read More: How to replace the warming element on an electric Samsung range
Maintenance Tips to Avoid Future Issues
Preventing future problems is just as important as fixing current ones. Following these maintenance habits can help extend the life of your cooktop:
- Always clean spills promptly to avoid residue buildup under the glass
- Use cookware with flat, smooth bottoms to maintain even contact with the glass surface
- Avoid dragging heavy pots or pans across the cooktop
- Double-check that the warming zone is not accidentally left on after cooking
- Do not place oversized pots on the warming element, as they can stress the component
- Check the power cord and plug periodically for signs of wear
- Wipe down the control knobs and interface gently to prevent moisture from getting inside
When to Call a Professional
While many warming element issues can be addressed with DIY troubleshooting, there are some situations where it’s smarter to reach out to a qualified appliance technician:
- You detect a burning smell or see visible scorch marks under the glass
- The cooktop glass is cracked or damaged near the warming zone
- Multiple elements are malfunctioning at the same time
- Your multimeter readings are inconsistent and difficult to interpret
- Replacing the warming element does not resolve the issue
- You’re uncomfortable working with electrical components
- The range is still under warranty, and you want to avoid voiding it
Summing Up
Fixing a non-working warming element might sound like a big job at first, but once you break it down step by step, it becomes a lot more manageable. With some basic tools, a careful approach, and a bit of patience, you can often get things working again without waiting for a repair appointment.
Just remember to take all the right safety steps, go slowly, and test thoroughly. If something feels off or outside your comfort zone, it’s totally okay to call in a pro. A little effort now can save you both time and money in the long run and help keep your Samsung range in great shape for many meals to come.