
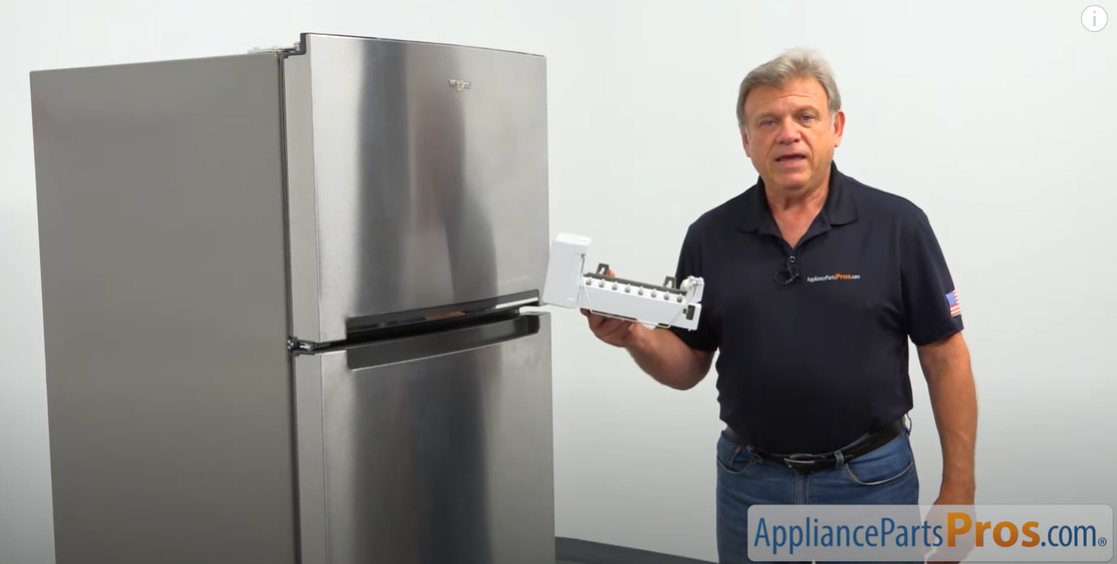
Tired of taking trips to the store for bagged ice or fumbling with ice trays? Upgrade your top freezer refrigerator with a built-in ice maker kit for convenience and cost savings. With some basic tools and moderate DIY skills, installing an ice maker is a straightforward project. Follow simple steps to connect the water supply, mount the unit, and plug it in. Soon, you’ll be enjoying fresh ice on demand. This guide covers everything from safety tips to troubleshooting common issues. Get ready to keep plenty of cold drinks and treats chilled with an endless supply of ice!
Tools and Difficulty
Tools Needed
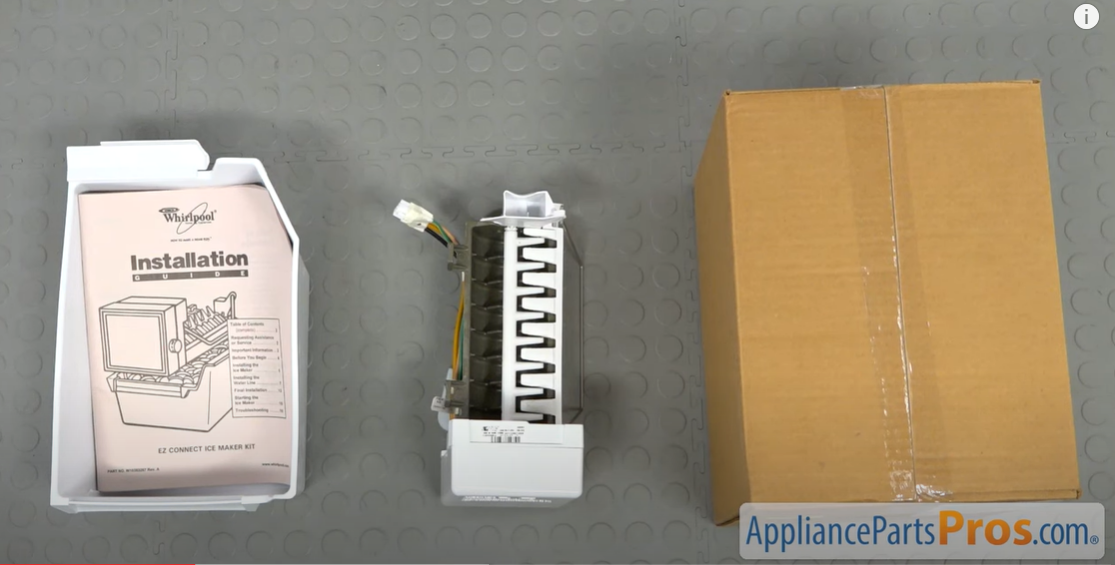
To install an ice maker kit, you will need the following tools:
- Phillips screwdriver
- Flathead screwdriver
- Adjustable wrench
- Utility knife
- Needlenose pliers
- Flashlight
- Level
Having the right tools makes the installation process much easier. Trying to use the wrong tool can damage the refrigerator or ice maker parts.
Difficulty Level
Installing an ice maker kit is a moderate difficulty. It involves removing freezer shelves, disconnecting tubing, fitting the ice maker on mounting screws, and connecting valve and supply lines.
Here’s a breakdown of the difficulty:
- Physical Demand: Medium. Moving the refrigerator and installing the ice maker requires some strength and stamina.
- Technical Expertise: Medium. Following instructions to connect tubing and wiring are required. No soldering or complex skills are needed.
- Time Requirement: 2-3 hours for first-time DIYers. It could be less for experienced installers.
Overall, a moderately handy homeowner should be able to tackle this project with the right tools and adequate time. Professional help is not necessary but can make the job much quicker.
Time Required
- For first-timers, expect the installation to take 2-3 hours.
- For more experienced DIYers, it may take 1-2 hours.
- Having an extra person to help speed up the process can save significant time.
It’s wise to allot extra time in case any difficulties come up. Rushing the job can lead to mistakes. Taking your time ensures things are done right.
Step-by-Step Instructions
Follow these steps carefully to properly install your ice maker kit. Having a friend helps make the job easier.
Water Supply Connection
The ice maker needs a water supply to make ice.
Power Off
Unplug the refrigerator or turn off the power at the circuit breaker. This makes the installation safer.
Freezer Compartment Preparation
The existing shelves and insulation inside the freezer need to be removed to fit the ice maker.
- Remove the freezer shelf spacer: Pull it up and out to detach it. Set aside to reinstall later.
- Remove freezer shelf: Unscrew bracket screws to detach the shelf. Set aside the shelf and screws.
- Remove plastic plugs: Use a flathead screwdriver to pry out the plugs covering the holes where the ice maker will mount.
- Detach plastic cover: Carefully pry off the interior plastic cover at the top of the freezer.
Preparing the Refrigerator’s Back
Access the back of the refrigerator to connect tubing and wiring.
- Move the refrigerator away from the wall: Have a friend help push the refrigerator out. Protect flooring from scratches.
- Remove rear compartment cover: Unscrew cover screws using a Phillips screwdriver. Set cover and screws aside.
- Punch out cutout for water supply line: Use a screwdriver to knock out the circle tab covering the water line hole.
Ice Maker Water Supply Line Installation
Connect plastic tubing to bring water to the ice maker.
- Remove the label covering the ice maker water line opening: Peel off the label to access the opening.
- Extract foam plug: Carefully pull out the foam insulation plug inside the opening using pliers.
- Insert and secure water inlet tube: Push plastic water tubing firmly into the opening until sealed.
- Attach black tube seal: Slide rubber seal over tubing end to seal opening.
- Connect water supply line nylon compression nut: Screw on the compression nut to secure the tubing.
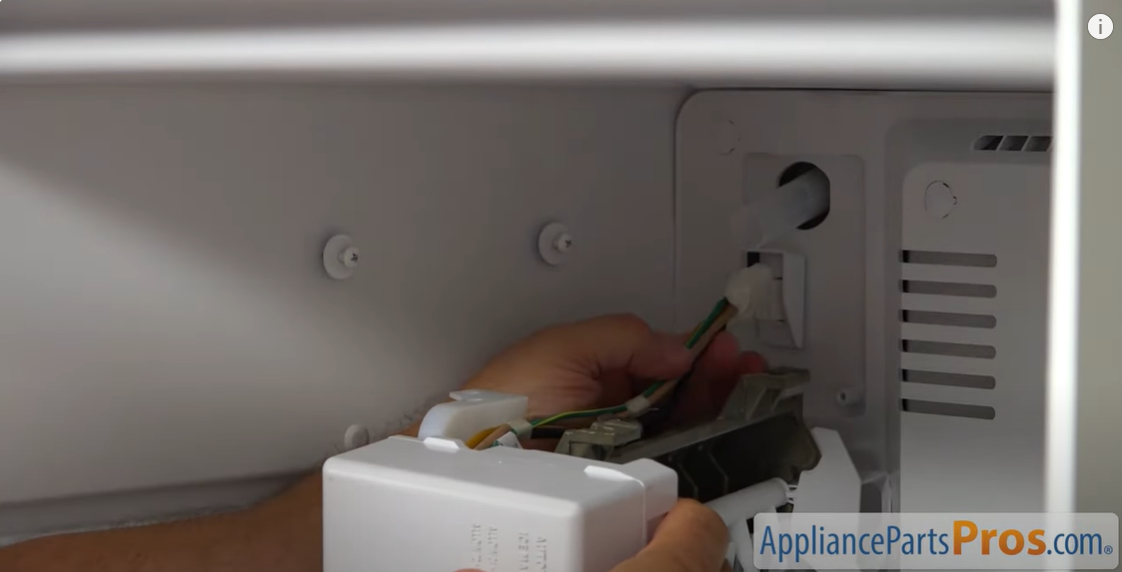
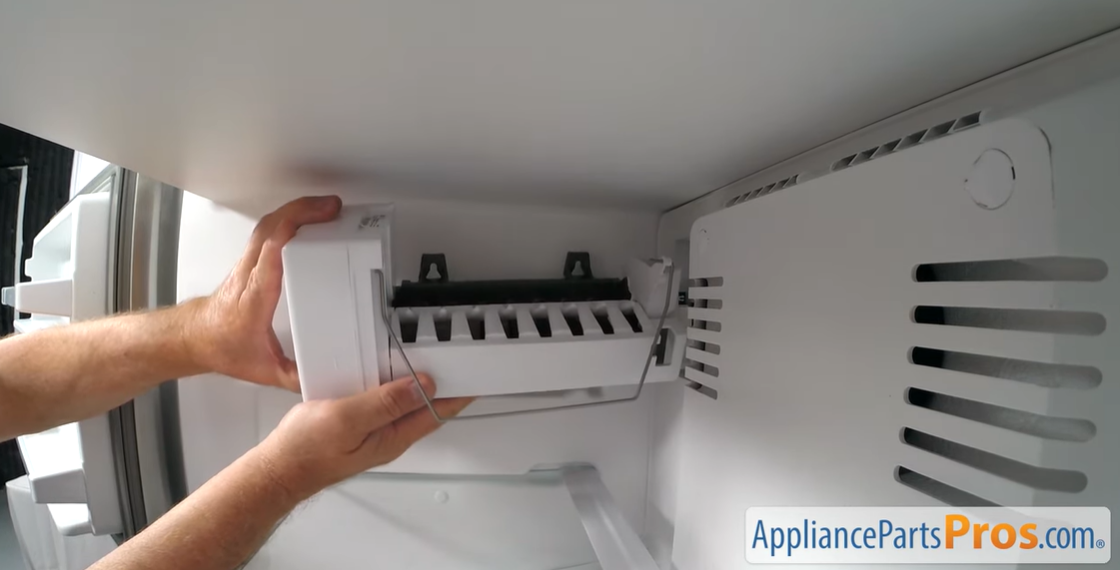
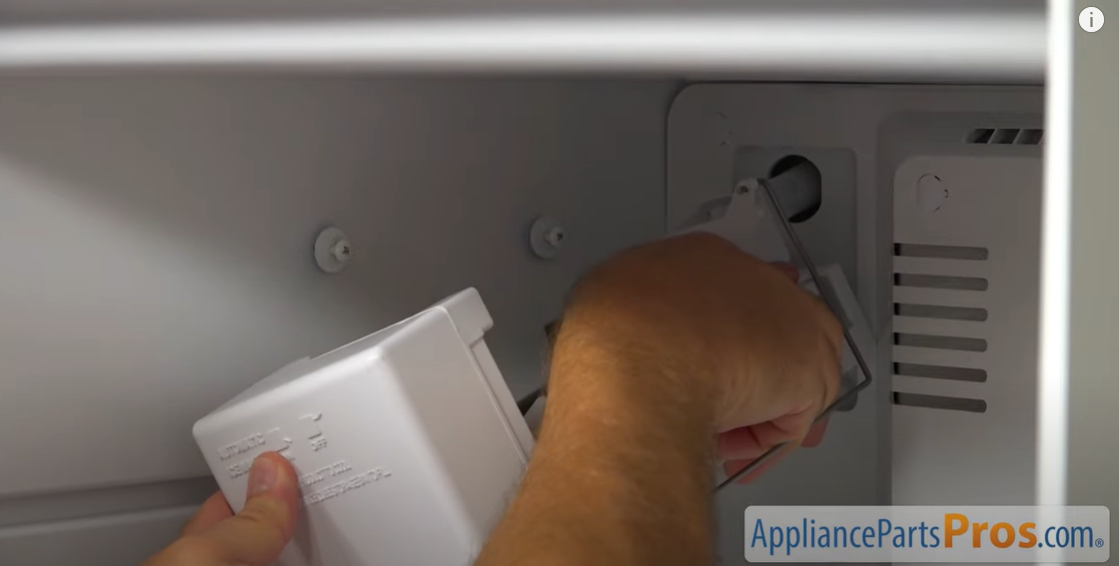
Ice Maker Installation
With the back accessed and water line installed, mount the ice maker.
- Attach adjustable leveling bracket: Screw the bracket onto the bottom of the ice maker using Phillips screwdriver.
- Insert mounting screws: Partially screw in mounting screws into freezer holes.
- Connect wire harness and secure plastic cover: Plug the wire harness into the ice maker and reattach the plastic cover.
- Hang ice maker on mounting screws: Carefully lift, and position the ice maker so screws fit into slots on the bracket.
- Tighten mounting screws and adjust leveling bracket: Alternately tighten screws to secure the ice maker. Adjust bracket feet so the ice maker sits level.
Ice Container Setup
With the ice maker mounted, slide in the ice bucket below the chute.
Water Inlet Valve Installation
Connect the valve that controls water flow to the ice maker.
- Insert the ice maker water supply line into the inlet water valve: Push the supply tubing firmly into the valve opening.
- Connect the wire harness to the inlet water valve: Plug in the wiring connector to the valve.
- Secure valve with mounting screws: Position the valve and partially screw in the mounting screws. Tighten the screws fully.
Water Supply Line Clamps
Clips help organize and position the water supply tubing.
- Clean mounting area: Wipe the surface where the clamps will attach using a damp rag.
- Install clamps and secure plastic water tubing: Stick clamps to the cleaned area. Press the tubing into clamps to hold it in place.
Connecting the Refrigerator Water Supply Line
Connect the ice maker’s water supply tubing to the water source.
- Reattach the rear compartment cover: Position the cover and screw in cover screws using a Phillips screwdriver.
- Remove the black rubber cap from the water supply line fitting: Pull off the protective cap from the fitting.
- Connect the water line to the water inlet valve fitting: Push the water supply line firmly onto the valve fitting.
- Open the water supply cut-off valve and check for leaks: Slowly turn on the water supply and inspect connections for leaks. Tighten if needed.
Restoring Power
With all connections made, restore power to the refrigerator.
- Plug the refrigerator back in or turn the circuit breaker back on.
- Let the refrigerator cool down for a few hours.
- Turn on the ice maker switch.
- Allow sufficient time for ice to be made. Test the first batch of ice and discard it.
After installing the ice maker, periodically check for proper functioning and ice production. Refer to the troubleshooting and maintenance sections for guidance.
Troubleshooting Common Issues
Even with proper installation, ice makers can sometimes have problems. Here are solutions for the most common issues:
Ice maker not producing ice
If your ice maker isn’t making ice, try these tips:
- Make sure the ice maker is turned on. The switch may be off.
- Check that the freezer temperature is around 0°F. It may need to be adjusted to colder.
- Examine the water supply line for kinks that reduce water flow.
- Remove any ice or frost buildup blocking the sensor.
- Test the water inlet valve to see if it is opening to fill the ice maker.
- Replace the water filter cartridge if it is clogged.
Water leaks
Water leaks are a messy problem. Try this to stop them:
- Make sure all fittings are tightened properly without cracks.
- Check that tubing is inserted fully into fittings.
- Inspect valves and supply lines for cracks, allowing water to drip out.
- Confirm the drain tube is positioned correctly to drain water.
- Remove ice buildup around the ice maker that can cause overflow.
Ice maker is not receiving water
If the ice maker isn’t getting water, check these items:
- Verify the water supply line shut-off valve is turned on fully.
- Make sure the refrigerator has sufficient water pressure.
- Examine the water filter to see if it needs replacing.
- Check that the water supply line is not kinked, clogged, or leaking.
- Inspect the water inlet valve for proper operation and ensure there is no clogging.
Ice cubes are too small or too large
For the right size ice, try adjusting:
- The water fill adjustment screw to increase or decrease the water amount.
- The freezer temperature. Colder temperatures produce slower, larger ice cubes.
Ice maker is making noise
Some noises are normal, but loud or unusual sounds could mean problems:
- Ice dropping into the bucket makes a thumping sound when fresh ice is made.
- The valve opening and closing to fill the ice maker will make an audible click.
- Ice scraping against the ejector’s arms produces light rattling as cubes are released.
- Loud banging or chattering noises likely indicate an issue needing repair.
Maintenance and Cleaning
Regular upkeep keeps your ice maker working right. Follow these maintenance tips:
1. Cleaning the ice maker
- Wipe down surfaces with a soft cloth and mild cleaner. Avoid abrasive pads.
- Descale mineral buildup with white vinegar and water solution.
- Remove the ice container and wash with warm, soapy water.
- Use a brush to scrub out the ice chute and wipe out the interior with a clean cloth.
2. Replacing the water filter
- Check the manufacturer’s guidelines for the recommended intervals.
- Twist off the old cartridge and discard it.
- Insert a new cartridge and turn until it stops.
3. Checking for leaks
- Examine all water connection points.
- Look for wet spots or drips under the unit.
- Confirm no tubing is cracked or has come loose.
4. Ensuring proper water pressure
- Water pressure below 40 psi may reduce ice production.
- Test pressure at the supply line using a gauge.
- Consult a plumber if the water pressure needs boosting.
5. Storing the ice maker during long periods of non-use
- Shut off the water supply and drain out all water.
- Remove all ice from the bucket.
- Turn off the ice maker unit.
- Clean thoroughly before storage.
Proper maintenance prevents problems and keeps your ice maker working efficiently for years.
Benefits of Having an Ice Maker
Adding an ice maker to your refrigerator has many advantages.
Convenience
- Ice is always ready when you need it. No more ice runs to the store!
- Simple access to ice right on the refrigerator door.
- Features like hands-free auto-dispensing make using ice a breeze.
Cost-effectiveness
- Save money by not buying bagged ice from the store.
- Ice makers can pay for themselves in under a year with savings.
- Get ice at a fraction of the cost of bagged ice.
Consistent ice supply
- Produces ice automatically 24/7, even when you’re asleep or away.
- Ensure you always have ice for drinks, recipes, injuries, and more.
- Types like nugget ice makers churn out mounds of chewable ice.
Improved water filtration
- Better tasting, clearer ice from the water filtration system.
- Removes odors, chlorine taste, sediments, and impurities from ice.
- Some models include air filters to purify ice further.
Increased refrigerator storage space
- Free up room in the freezer by moving ice production out.
- Creates space for extra frozen foods and smoothie bulk packs.
- Food stays frozen better with fewer freezer door openings to get ice.
With so many perks, it’s easy to see why installing an ice maker is a great upgrade for any refrigerator!
Also watch How To: Whirlpool/KitchenAid/Maytag Refrigerator Icemaker Assembly WPW10715709
Conclusion
Installing an ice maker in your refrigerator is a worthwhile upgrade that pays for itself over time. Follow the step-by-step instructions to connect the water supply and mount the ice maker properly. Basic tools and moderate DIY skills are needed for success. Consider having an experienced friend lend a hand, especially when moving the refrigerator.
Troubleshooting tips help get your ice maker working smoothly. Proper maintenance and cleaning will keep it functioning efficiently for years. Enjoy the many benefits of fresh ice on demand when you add this appliance! The convenience and cost savings make the project well worth the effort.