
Keeping your clothes dryer vent properly maintained is critical for appliance performance, energy efficiency, and home safety. Clogged vents can lead to increased drying times, utility bill spikes, and even dangerous fires. This DIY guide will teach you everything you need to know about clearing debris from your dryer ductwork.
Clothes dryers work by heating air and circulating it through the drum to remove moisture from fabrics. For this process to work efficiently, adequate airflow is crucial. Lint and other debris inevitably accumulate inside the vent over time, restricting airflow. According to the Consumer Product Safety Commission (CPSC), over 15,500 clothes dryer fires occur in U.S. homes every year, causing an estimated $99 million in property loss, hundreds of injuries, and numerous deaths.
The main causes of dryer vent fires include:
- Built-up lint restricting airflow
- Excess heat building up
- Lint igniting due to proximity to heating element
Many of these fires can be prevented by regularly clearing lint out of the vent system. This DIY guide will walk you through the necessary steps to safely and effectively unclog your home dryer vent.
Understanding Dryer Vent Systems
To clean your dryer vent properly, you first need to understand how the system is put together.
Components of a dryer vent:
- Exhaust duct – Typically 4-inch diameter flexible or rigid metal pipe that runs from dryer to exterior vent hood. Includes elbows/turns when needed.
- Vent hood – Covering outside your home that allows hot exhaust air to exit while preventing rodents/debris from entering.
- Vent cap – Flap or screen on vent hood that stops air from flowing back into vent.
Dryer vent configuration overview:
| Vent Part | Description |
| Exhaust duct | Flexible or rigid metal pipe, usually 4 inches in diameter. Extends from back/side of dryer to exterior vent hood. Makes necessary turns. |
| Vent hood | Exterior vent with hood that mounts to outside wall. Made of metal or plastic. |
| Vent cap | Hinged or louvered flap inside hood that allows air to exit but stops it from flowing back in. Keeps pests out. |
Proper airflow through the vent system is necessary during clothes drying process. As hot wet air exits the dryer drum, it enters exhaust duct and gets pushed out of the vent hood to outdoors. Any obstructions or lint buildup can restrict this crucial airflow, leading to efficiency losses and safety hazards.
Additionally, dryers must vent heat effectively for optimal performance. Excess heat buildup caused by blockages can damage dryer components or ignite lint.
Keeping ductwork and vent hoods clear through regular cleaning is essential for maintaining airflow and heat transfer.
Preparation for Cleaning
Before getting started, take preliminary steps to access dryer vent access and get set up safely.
Locate External Dryer Vent Hood
- Walk outside your home and find the external vent hood, usually on side or back wall few feet off ground
- Identify style – common types are plastic wall hoods, metal hoods with adjustable flaps, or simple hoods with static vent caps
- Remove any debris, plants/vines, snow, etc. that may be obstructing the hood
- Use ladder if needed to provide full access
Locate Dryer and Exhaust Vent Opening
- Find back or side of dryer where flexible or rigid metal exhaust vent attaches
- Follow vent pipe visually or manually to confirm exterior vent hood is the termination point
- Tip: Insert a dry sheet or tissue into vent opening right by the dryer. Go outside to check that it comes out of external vent.
Disconnect Dryer Properly
Before cleaning vent, dryer unit must be powered down and ducting detached.
Steps to disconnect dryer safely:
- Unplug dryer from wall outlet
- Turn off gas supply valve if gas dryer
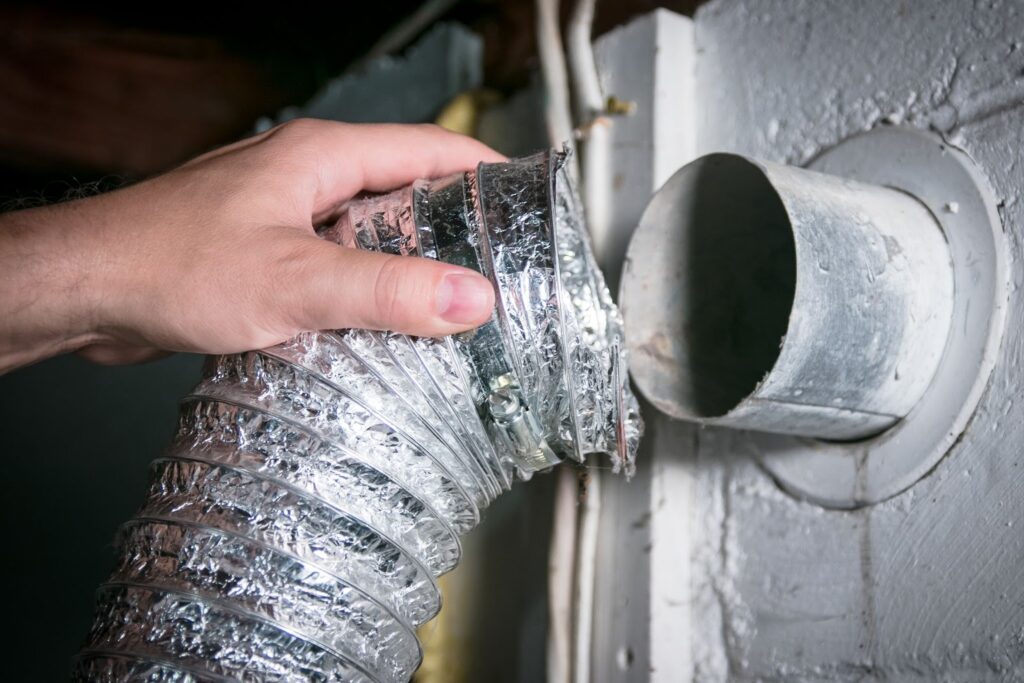
- Detach flexible vent pipe from dryer exhaust and vent hood opening (or nearby access panel for rigid vents)
- Pull dryer away from wall if needed to improve duct access
- Place towel or tray under detached vent opening to catch lint
Acquire Proper Dryer Vent Cleaning Equipment
Cleaning dryer ducts requires specialized equipment you likely do not already own. The job cannot be done effectively with makeshift tools. Purchase a professional-grade dryer vent cleaning kit.
Essential components of a vent cleaning kit:
- Flexible metal auger – feeds rotary brush end down vent to dislodge clogs
- Handheld power drill – provides rotary motion to auger and brush to clear debris
- Vent brush attachments – variety of brushes to scrub entire vent surface
- Extension rods – connect into auger for reaching distant obstructions
- Utility vacuum – collects removed lint; fine filter bag recommended
Kits under $40 generally include these basics for cleaning average length, and moderate debris vents in single-family homes. More heavy-duty options are available for commercial needs.
Cleaning Process
With the proper vent cleaning equipment and workspace setup, you can now get started on removing lint and clearing clogs. Work slowly and carefully to dislodge debris in manageable quantities.
Step 1 – Power Auger Down Vent Duct
Process:
- Attach flexible metal auger to connector bit on hand drill
- Feed auger down vent pipe towards exterior vent hood
- Power on drill to medium speed and push auger to penetrate clogs
- Make several passes going deeper each time; pull out to remove debris
Tips for augering:
- Add extension rods if standard auger does not reach full vent length
- Do not force auger or drill hard against tight obstructions
- Pull out frequently to remove loosened lint rather than compacting it further in
Step 2 – Brush Entire Vent Surface
The auger tool penetrates and breaks up dense clogs but cannot effectively scrub vent walls. Various-sized brushes with specialized tips are required to scrub the entire vent surface.
Process for vent wall brushing:
- Select appropriate brush size to match vent diameter
- Attach handheld drill and insert brush 2-3 feet into vent
- Power drill on medium and use push/pull technique, scrubbing a 3-5 foot length per pass
- Work away from dryer end to outside vent hood in sections
- Remove and clean brush frequently to clear lint
Brush selection considerations:
- Use narrow, corner brushes for elbow joints
- Wider brushes for main run sections
- Long, narrow brushes for extended reach if needed
Scrub all accessible vent sections possible, focusing on corners and seams prone to lint capture.
Step 3 – Clear Vent Hood and Cap
By this point, you should see visible lint deposits exiting the outdoor vent hood. This indicates good duct clearance progress.
Use utility vacuum positioned by hood opening to capture discharged lint.
Also, use vent brushes and shop vacuum hose to clean vent hood interior and clear debris/residue from vent flaps or cap screen.
Post-Cleaning Steps
You are almost finished! With cleaning done, take actions to deal with lint aftermath and restore dryer function.
Contain and Dispose of Lint
- Use vacuum to clean work area under detached vent and around dryer
- Avoid lint contamination in house ducts or ventilation systems
- Bag and seal lint debris before placing it in outdoor trash for quick removal
Reconnect Dryer Vent Properly
Follow vent re-assembly procedure correctly:
- Ensure vent interior and all components are fully clear of debris
- Reattach flexible vent pipe or rigid duct sections properly aligned and secured
- Verify vent hood exterior and cap are clear and functioning
- Slide dryer back into position against wall
- Restore gas valve and power supply connections
- Start quick test drying cycle and go outside to check strong airflow from vent hood
- Monitor test cycle for any signs of vent blockage or exhaustion issues
Vent connection is a common failure point for poorly aligned ducts. Verify secure fitment and listen/feel for leaks during dryer operation.
Also Read: 7 reasons why your electric dryer won’t turn off
Maintenance and Safety Tips
Proper dryer vent cleaning techniques and maintenance habits are key to home safety and optimal appliance performance over time.
Establish a Regular Cleaning Schedule
Recommended dryer vent cleaning frequency:
| Household Size | Cleaning Frequency |
| 1-2 occupants | Every 2 years |
| 3-4 occupants | Annually |
| 5+ occupants | Every 6 months |
Adjust schedule based on:
- Higher drying loads
- Primarily fabric-lint generating items (towels, sheets)
- Observable ventilation strains such as longer drying times
Document cleaning dates and track visible lint reductions over time.
Exercise Safety Precautions
Dryer vent cleaning has inherent hazards, take appropriate care:
- Wear eye protection – vent brushes can eject debris
- Wear work gloves and long sleeves
- Do not operate drill with auger/brush fully retracted
- Avoid fall risks from height, especially on ladders
- Stop work immediately if you feel tired or off-balance
Having a helper to hold vacuum hoses, lint bags, and pass tools can also improve safety.
Inspect Vent Components Fully
When cleaning is complete, check system condition:
- Verify joints have no gaps or detachments
- Ensure vent material has no holes or cracks
- Identify damage from rodents or exterior factors
- Check debris screens on vent hood and cap
Make repairs immediately if operation-impacting defects are found.
DIY vs Professional Cleaning
While DIY dryer vent cleaning is possible in many homes, professional service has distinct advantages in some situations.
Consider DIY Vent Cleaning When:
- Standard flexible aluminum or rigid metal ducting
- Short to moderate duct length under 25 feet
- Minimal turns/elbows in vent system
- Expected light to moderate lint accumulation only
- Homeowner has mobility and capability to access duct
Professional Cleaning Recommended For:
- Long, complex duct runs over 25 feet
- Multiple turns or vertical routing
- Prior history of dense clogs and excess lint
- Inability to thoroughly access full ductwork
- Presence of nests/pests or related damage
- Age, condition defects, and leakage detected
Though professional cleaning costs more, experts with commercial equipment can often do a more thorough job clearing difficult obstructions in complex or damaged vent systems.
Evaluate the full situation before deciding between DIY tools or contracting specialists. Combining both periodic DIY maintenance cleans supplemented with professional deep cleanings can offer a solid vent care strategy.
Conclusion
Allowing dryer vent systems to become severely clogged with lint poses a dangerous fire hazard, reduces dryer effectiveness, and wastes energy that saps utility budgets.
This guide covers processes, tools, and techniques for homeowners to safely clear their dryer vents and ductwork to mitigate these risks using affordable DIY methods. While specialized equipment and some physical capability are required, you can likely handle vent cleaning yourself in most basic home installations.
Just remember – dryer ventilation systems cannot be neglected. By establishing a habit of periodic inspection and cleaning, you can take control of this important home maintenance chore for safety and savings.