
A cordless window vacuum has become an extremely popular cleaning tool for its ability to thoroughly clean windows, doors, mirrors, and other hard surfaces with minimal effort. However, like any device, proper maintenance and care are crucial for ensuring optimal performance over an extended period of time.
This comprehensive guide will explore all the essential practices for keeping your cordless window vacuum running smoothly for years to come.
Benefits of Cordless Window Vacuums
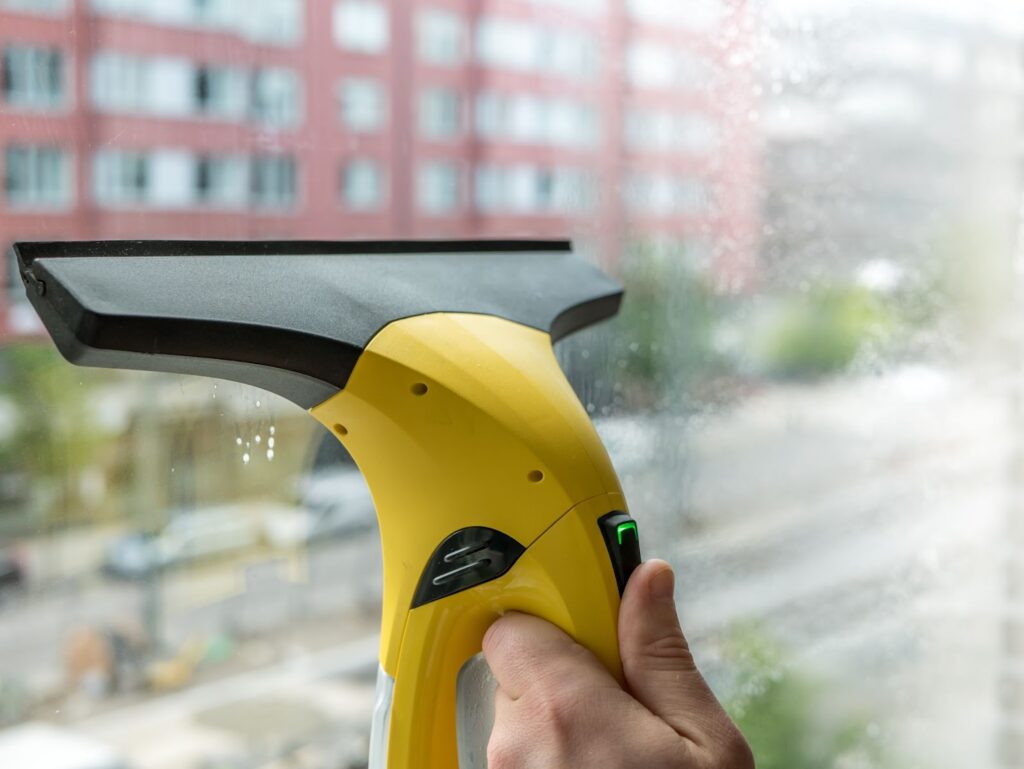
Cordless window vacuums are lightweight, handheld devices that can clean glass surfaces using only battery power. They utilize strong suction and specialized squeegee blades to lift dirt, debris, and liquid from smooth, non-porous materials.
Some of the major benefits of cordless window vacuums include:
- Completely cordless for maximum portability and range while cleaning
- Powerful suction comparable to corded vacuums
- Specialized cleaning tools and blades designed specifically for glass and tile
- No need for buckets, harmful chemicals, or dripping water
- Lightweight and easy to maneuver into tight spaces
- Rechargeable battery for hours of cleaning on a single charge
- Cost-effective over repeated professional cleanings
Cordless window vacuums have revolutionized the cleaning industry with their ability to simplify and expedite the process of washing windows, showers, automobiles, and countless other surfaces. Their compact size, specialized cleaning tools, and cordless design make household cleaning far more manageable.
Popular Cordless Window Vacuum Models:
| Brand | Model |
| Kärcher | KV 4 Cordless Window Vacuum |
| Shark | Shark Wandvac Cordless Window Vacuum |
| Bissell | Bissell PowerFresh Slim Cordless Window Vacuum |
| Black + Decker | BLACK+DECKER 20V MAX Flex Cordless Handheld Vacuum |
However, while cordless window vacuums provide an incredible amount of value, their performance and lifespan greatly depend on proper maintenance and care from owners.
Understanding Your Cordless Window Vacuum
Before getting into the maintenance recommendations and best practices for your device, it’s important to understand what makes up a cordless window vacuum and how it operates.
Components of a Cordless Window Vacuum
While individual models may vary slightly, cordless window vacuums primarily consist of the same core pieces:
- Battery and Motor: Provides power to the vacuum to create strong suction capabilities. Rechargeable lithium-ion batteries that supply over an hour of continuous cleaning time per charge are common across most cordless vacuums.
- Power Button and Speed Controls: Allows users to turn the device on and off and control the intensity of the suction power. Variable speed options on some vacuums provide more customization over the cleaning experience.
- Dirt Bin: Transparent container that visibly fills up with collected dirty water, debris, and dust as you clean. Most bins feature easy emptying mechanisms with the touch of a button for quick disposal of liquid waste.
- Charging Station: The base that the vacuum sits on when not in use to recharge the battery. Allows for cordless flexibility since the vacuum itself does not need to be plugged in while operating. Some charging stations also serve as wall mounts.
- Squeegee Head Assembly: The large rectangular cleaning head at the bottom of the device features a specialty squeegee, blades, and a suction intake. Designed specifically for flat surfaces like windows and shower doors. Channels liquid into the dirt bin. Other models may include alternative head attachments.
- Water Spray Bottle: Small removable bottle that attaches to the device and evenly mists water over surfaces to help loosen and collect dirt and grime. Helps facilitate the vacuum’s ability to easily wash windows and smooth walls using only water.
- Accessory Tools and Nozzles: Many cordless window vacuums come with additional cleaning tools like crevice tools for cleaning blinds and tight spaces. Extension hoses and specialized nozzles increase versatility across multiple cleaning needs.
Understanding the function and maintenance needs of these components will give you the knowledge needed to properly care for your vacuum over time.
Operating a Cordless Window Vacuum
Operating a cordless window vacuum is quite straightforward. However, these few tips will help you optimize performance as you clean different surfaces:
- Always pre-spray your cleaning solution (water) over the entire surface to help lift up grime from the nooks and crannies. Let this sit for a few minutes before vacuuming.
- Slowly pass the vacuum head 1-2 inches at a time, overlapping each pass slightly to prevent streaks.
- Sprinkle baking soda over glass shower doors before spraying with water and vacuuming. The abrasive texture helps remove stubborn hard water stains.
- Detach the head and use crevice tools to vacuum window tracks and frame edges. Pay close attention to textured areas that easily collect dust.
- Rinse and hand wash vacuum components under running water if needed between cleaning projects.
Taking the time to methodically clean each surface while utilizing all your device’s capabilities will provide you with the most thorough, streak-free finished result every time.
Maintenance Practices
While cordless window vacuums make cleaning simpler, their convenience should not lead owners to neglect proper maintenance that ensures ongoing performance. Establishing consistent maintenance habits is vital for preventing issues before they happen.
Cleaning the Vacuum Head
The vacuum head undergoes a lot of wear and tear during operation. Failing to clean it regularly leaves it susceptible to damage. Here is a simple cleaning procedure:
What You Need:
- Small brush
- Mild detergent
- Water
- Dry towel
1. Remove the head from the vacuum handle by gently pulling it off the swivel base.
2. Rinse under tap water while using the brush to scrub away large debris caught between crevices.
3. Mix a small amount of detergent with water and continue scrubbing stains and dirt buildup until it lifts. Pay close attention to:
- The squeegee blades
- Corners where debris collects
- Suction intake chamber
4. Rinse once more and check that all soap residue has been eliminated.
5. Pat dry with the towel before reattaching to the handle. Make sure connection points are completely moisture-free.
6. Run a quick test to ensure the head attaches snugly and suction performance has not diminished after cleaning.
Adding this cleaning step every 5-10 uses ensures no lingering dust, dirt, or grime can harden vacuum components and hinder performance.
Emptying the Dirty Water Tank
The easiest way to tell when your dirty water tank needs to be emptied is when you notice liquid visibly sloshing around inside while in use. However, here is a good rule of thumb for maintenance:
- After Every Use: Quickly rinse the tank under running water to flush out loose debris. Remove and clean the filter if applicable.
- After 5-10 Uses: Thoroughly empty, rinse, and disinfect the tank to prevent mold, mildew, and bacteria growth.
To empty and clean the dirty water tank:
- Press the release button to detach the tank from the handheld vacuum handle.
- Dump contents into a sink and rinse away debris caught in the grate cover.
- Fill halfway with warm water and a small amount of rubbing alcohol to thoroughly clean inner surfaces. Cover the opening and shake vigorously.
- Rinse until all cleaning solution is eliminated. Wipe down the exterior with a dry cloth.
- Air dry completely before securely reattaching to the vacuum.
- Optional: Use Q-tips dipped in vinegar to effectively scrub and disinfect nooks around the tank’s edges and release the button
Remember to never use harsh chemicals that could erode rubber and plastic components. Tanks should also never contain liquids when storing away your vacuum.
Checking Seals and Blades
The squeegee head relies on soft rubber seals and sharp blades to effectively vacuum water away, leaving surfaces crystal clear without streaks. But these parts face wear over time.
Here’s how to check them:
- Remove the cleaning head and place it upside down with the blades facing upward.
- Run a finger along each blade edge, checking for roughness or nicks. If detected, blades likely need replacement.
- Wiggle the corner flaps and seals with your fingers taking note of any excessive stiffness or visible cracks.
- If seals appear misshapen or are leaving behind streak marks, replacement is needed to maintain vacuum performance.
Refer to your device’s documentation for the appropriate replacement seals and blades tailored for your model. Install them properly onto the head to resume fantastic cleaning results.
Care Tips for Prolonging Device Life
In addition to scheduled maintenance, implementing these general care tips will help prevent avoidable damage and maximize the usable life of your cordless window vacuum:
Proper Storage
The storage practices for your device can impact long-term durability:
- Always store with a full battery charge to avoid battery deterioration. Charge before putting it away after every use.
- Detach water tanks and other accessories before storage to extend component life. Tanks should be completely dry.
- Store the vacuum upright in a temperate, dry area away from environmental extremes to protect sensitive electronic parts. Never store with wet accessories attached.
- Utilize wall-mounting charging stations or accessory hooks to properly store the vacuum and additional components like hoses, nozzles, and charger cords.
- Consider purchasing a protective carrying case for travel and to prevent damage between uses.
Following these storage guidelines minimizes wear caused by improper handling and detrimental environmental factors over time.
Battery Care
As with most electronics, the lithium-ion battery equipped in cordless vacuums is the component most vulnerable to environmental factors and detrimental user behavior. Practicing proper battery care extends the running time between charges and the total operational life before replacement needs:
- Avoid overcharging: Remove from the charging station immediately when the battery is fully charged. Overcharging degrades overall life.
- Use within a safe temperature range: The battery will drain faster in extreme cold. High heat also causes faster deterioration. Store the device around room temperature whenever possible.
- Prevent full discharge: Power down the vacuum before the battery drains completely empty. Recharge before it shuts down on its own. Full discharges strain battery capacity.
- Regular calibration: Run the full battery lifespan down monthly before recharging fully to maximize the accuracy of battery capacity detection.
Adhering to these simple lithium battery care tips drastically reduces the rate of performance deterioration over years of ownership.
Regular Inspections
Setting routine inspection reminders provides you an opportunity to detect and replace worn parts before operational performance becomes severely impacted.
- Monthly: Check filter, seals, blades, and accessory nozzles for debris buildup and damage. Confirm all components fit snuggly together.
- Every three months: Disassemble the vacuum head and thoroughly clean each individual piece before proper reassembly. Inspect battery contacts and connectors.
- Every six months: Inspect the condition of accessory hoses, power cord covers, and other external components for cosmetic damage like cracks or loose fittings, which could lead to breakage over time.
Repairing or replacing defective components as early as possible prevents safety hazards, permanently ingrained grime, and further damage to adjoining vacuum sections. Extending the years of optimal performance ultimately saves money over time before whole unit replacement becomes necessary.
Troubleshooting Common Problems
Being able to quickly diagnose and fix minor issues saves the headache of unnecessary vacuum downtime. Here are solutions to some of the most frequently occurring problems:
| Problem | Possible Cause | Solution |
| Loss of suction power | – Clogged filters/intake – Dirty vacuum head – Worn/damaged seals or blades – Tank releasing air | – Clean or replace filters – Follow the head cleaning procedure – Check/replace seals and blades – Inspect the alignment of the tank release button insertion point and surrounding seal |
| Sporadic motor function | – Dust/debris inside motor – Loose component connections | – Use a small air duster inside the handle/motor cavity – Check all attachments are clicked into place completely |
| Battery not holding charge | – Infrequent charging – Charger cord damage – Old lithium-ion battery | – Recharge after each use – Inspect cords and outlet power – Replace battery approximately every 2-3 years, depending on usage |
| Device failed to power on | – Battery not installed correctly – Battery drained – Faulty power button | – Check battery orientation and insertion – Attempt recharging – Contact manufacturer for potential button replacement |
| Accessories not attaching | – Debris inside component connection points – Broken tabs/locking clips | – Use brush and cloth to clean out dust inside vacuum openings and accessory grooves – Refer to the manual for proper tab reinsertion or replacement part purchase |
| Water leakage during use | – Hairline cracks in internal hoses – Loose water tank insertion | – Inspect hoses for damage and replace them if necessary – Make sure the button release on the tank is fully depressed and locked when attaching |
Regularly inspecting your device provides the best chance of catching issues while they are still minor. Having the proper troubleshooting knowledge handy assists you in minimizing both cleaning delays and repair costs.
Also Read: How to Repair a Vacuum Cleaner: A Step-by-Step Guide
Conclusion
Cordless window vacuums have become an essential tool for simplified cleaning around the home. Their portable, lightweight, cord-free design allows you to frictionlessly wash windows, mirrors, tile, and countless other hard surfaces without the headaches of buckets, chemicals or dripping water.
However, taking the proper steps to maintain your device is crucial for ensuring long-lasting optimal performance. From routinely cleaning removable components to properly storing lithium-ion batteries, establishing consistent maintenance habits preserves power and suction capabilities over years of use. Additional techniques for inspection, repair, and troubleshooting also equip you to resolve problems quickly before they intensify or cause permanent damage.
Implementing this ultimate guide empowers you with the knowledge needed to care for your cordless window vacuum like an expert. Put these tips into practice to extend operational lifespan and avoid unnecessary early replacement costs. A functioning, well-maintained cordless window vacuum saves you both money and energy over time – providing sparkling clean surfaces with each efficient use for years to come.