
Owning an electric toothbrush can greatly improve your oral health and hygiene habits. However, like any electronic device, electric toothbrushes can malfunction or break over time. When your electric toothbrush stops working properly, it can negatively impact your oral care routine.
This comprehensive guide will walk you through the steps for troubleshooting common electric toothbrush problems. You’ll also learn tips for attempting do-it-yourself repairs on a broken electric toothbrush handle.
Troubleshooting a Malfunctioning Electric Toothbrush
Before attempting to fix a broken electric toothbrush, you first need to accurately diagnose the problem. Here are some of the most common electric toothbrush malfunctions and how to troubleshoot them:
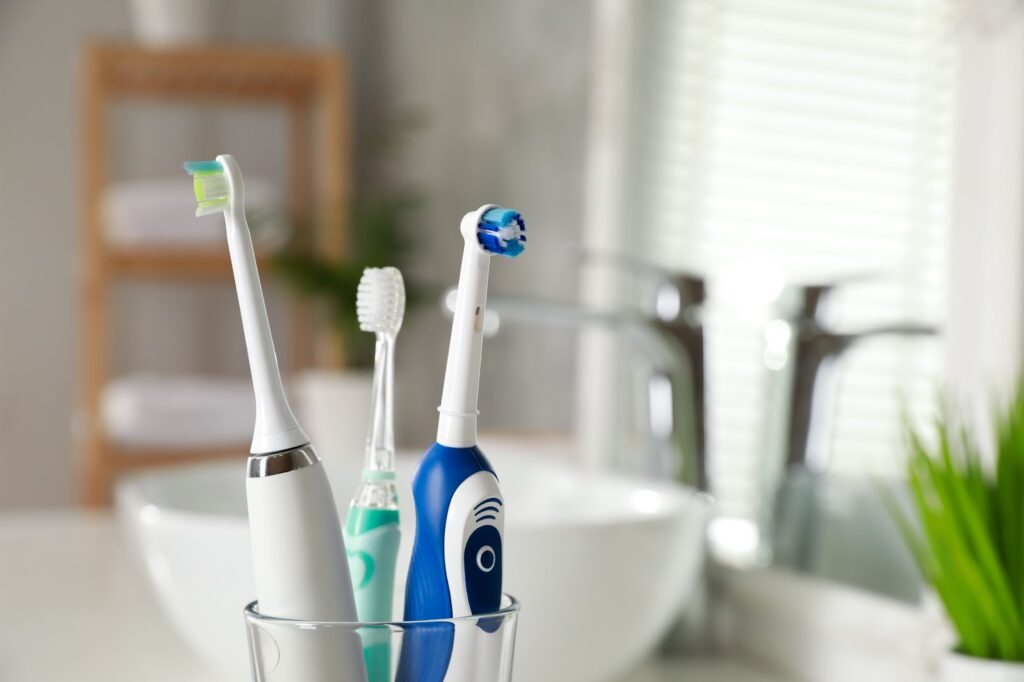
The Brush Head Isn’t Spinning or Vibrating
If your electric toothbrush turns on but the brush head isn’t spinning or vibrating, the issue likely lies with the brush head itself. Try these troubleshooting tips:
- Remove and reinsert the brush head into the handle. Ensure it’s fully secured in place.
- Check for cracks or damage to the metal post that connects the brush head to the handle.
- Replace the brush head with a new one. Over time, the internal mechanisms can wear out.
The Toothbrush Won’t Turn On
If your electric toothbrush won’t power on at all, start troubleshooting by checking these items:
- Battery Charge – Recharge the battery per the manufacturer’s instructions. Some toothbrushes provide battery charge indicators.
- Power Button – Clean around the power button to remove any toothpaste or debris buildup. Press the button several times firmly.
- Electrical Connections – Check that the plug connector or charger base is securely attached.
Still not powering on? It might be an internal electrical failure requiring professional service.
Battery Isn’t Holding a Charge
Rechargeable batteries eventually wear down and won’t hold a viable charge. Signs of a drained battery include:
- Toothbrush only runs for a minute or two per charge
- Battery indicator shows low charge immediately after full recharge
- Toothbrush won’t run at all, even after extensive recharging
The good news is that many electric toothbrush batteries can easily be replaced by the owner. We’ll cover DIY battery replacement later in this guide.
Electric Toothbrush Handle Cracks or Breakage
Electric toothbrushes contain fragile internal components and circuit boards. If you drop your toothbrush or the handle sustains heavy damage, internal parts can break.
Signs of physical handle damage include:
- Visible cracks or splits in the plastic handle
- Loose/separated electric toothbrush handle casing components
- Buttons or features that no longer engage when pressed
- Rattling sound from inside the toothbrush
Physical handle damage often requires professional repair or replacement of the entire toothbrush.
DIY Troubleshooting Repairs
Many common electric toothbrush problems can easily be fixed at home without visiting a repair shop. Let’s look at two DIY troubleshooting techniques: brush head replacement and battery replacement.
How to Replace Your Electric Toothbrush Head
With regular daily use, the internal mechanisms and materials inside electric toothbrush heads wear down over months and years. This causes reduced vibration and spinning. Replacing old brush heads is an easy first troubleshooting step.
Brush head replacement instructions vary slightly depending on your toothbrush model. However, the overall process is largely similar across brands:
- Power off your toothbrush.
- Hold the electric toothbrush handle in one hand. With the other hand, pull firmly on the brush head to detach it from the metal post.
- Examine the new replacement brush head. Find and align the hole where the metal post must be inserted.
- Push the new brush head gently but firmly onto the post until it clicks fully into place.
Once reattached, power on your toothbrush and test for proper spinning and operation. Be careful not to overtighten the brush head. Forcing it past its natural stopping point onto the post can damage the retaining mechanisms.
How to Replace an Electric Toothbrush Battery
If your electric toothbrush isn’t holding a charge, replacing the rechargeable battery is cheaper than replacing the whole toothbrush. Follow these guidelines for DIY battery replacement:
1. Research your model’s battery type: Key information needed is battery voltage (typically 2.2V, 3.6V or 3.7V) and physical dimensions. Replacing with an incompatible battery could damage the components. Check the user manual or online manufacturer information to confirm the correct replacement battery specs.
2. Purchase the new battery: Check local electronics stores or online retailers like Amazon and eBay for the replacement battery based on the specifications you determined. Note batteries are often available in multi-packs for just a few dollars more than a single battery.
3. Open the toothbrush casing: This step varies greatly across toothbrush models. You’ll likely need to remove screws or casing panels to access the internal components and circuit board. If needed, look up YouTube videos for your specific model.
4. Disconnect and remove old battery: Depending on toothbrush construction, the battery may lift directly out or disconnect via a plug or wires. If unsure, take pictures from multiple angles for reference when reassembling.
5. Insert the new battery: Gently insert replacement battery in the same orientation as the old battery, connecting any attaching wires or plugs.
6. Reassemble casing: Put the casing sections back together, replacing any screws or panels. Ensure a snug fit – loose panels can degrade water resistance.
7. Recharge and test: Fully recharge your toothbrush and test operation. If it works correctly, you save yourself the cost of a replacement brush!
Now that we’ve covered troubleshooting techniques and common do-it-yourself electric toothbrush repairs, let’s look at the steps for fixing more complex physical damage to the handle.
How to Repair a Broken or Damaged Electric Toothbrush Handle
Cracks, splits, falls, accidental impacts – all take a toll over time on your electric toothbrush’s physical structure. If you notice any external casing damage, interior rattling when shaken, or buttons/features that don’t engage, the internal handle components likely break. Professional repair or replacement is typically required.
However, if you want to attempt fixing the electric toothbrush handle yourself, follow these guidelines:
Gather the Tools You’ll Need
- Small Phillips and flathead screwdrivers
- Needle nose pliers
- Super glue or strong bonding agent
- Dremel rotary tool (for trimming and drilling replacement parts)
Carefully Disassemble the Handle
Be extremely careful not to disconnect or damage any wires or electronic assemblies. As you remove pieces, set them aside in order, taking photos if helpful for accurate reassembly. Watch for springs, gaskets, bearings, or bushings that might fall loose.
Visually inspect each part, especially the circuit board and motor. Look for detached solders or cracked solder joints on circuit boards where wires connect components. Watch for scorch marks indicating electrical shorts. Examine gear assemblies for missing teeth or cracks.
Attempt Repairs
After full disassembly and inspection, you can attempt fixing broken components:
- Super glue cracks/breaks – For clean cracks in plastic casings or gears without missing pieces, apply super glue sparingly along the break line. Clamp pieces together until bonded.
- Solder loose wires/connections – Using rosin core solder and a soldering iron, reattach any loose internal connections where possible. Apply new heat-shrink tubing over soldered wires.
- Replace broken parts – Small springs, bearings, electrical components must be correct size matched. Check eBay and specialty retailers for used/refurbished replacements. Use a Dremel with cutting wheel/high-speed drill bit carefully if resizing is necessary.
Reassemble the Toothbrush
Once any repairs or part replacements are complete, carefully reassemble in exact reverse order. Refer frequently back to your disassembly photos. Double-check all interior piece alignments before closing up handle casing.
Test Power On
The moment of truth! Before fully reconnecting casings, power on your toothbrush. Watch carefully for correct operation of the motor, lights and vibration. This confirms all internal electrical connections function properly before finalizing handle assembly.
Snap Casing Back Together
Assuming successful power-on tests, finish by snapping casing halves back together securely. Be extremely careful not to pinch any wires or components in casing gaps. Lost water resistance could lead to future electrical failure.
When to Call a Professional
While moderate electric toothbrush repairs can be done DIY, extensive damage requires skilled technicians for proper fixing. If you tried the troubleshooting steps but your brush still fails to function correctly, call in a professional. Hiring an experienced electric toothbrush repair expert avoids further damage plus gives the best chance of restoring full brush functionality.
Common instances where professionals are a wise choice include:
- Burnt circuit board odor indicating internal electrical short
- Visibly damaged charging port/base components
- Significant impact damage, like a dent across multiple handle sides
- Major cracking or breakage of internal motors, gears, shafts
- Not powering on even after battery and power button troubleshooting
In major metro areas, search online directories or call local vacuum and appliance repair shops. There are also national mail-in toothbrush repair services accessible via internet search. Expect costs of $40-90+ to professionally diagnose issues and complete fixes.
Compare this to $80-200+ for a brand new, equivalent-featured electric toothbrush. Given how often electric toothbrush heads also need replacing, repairs can offer major long-term savings.
Preventing Future Electric Toothbrush Damage
Daily handling mishaps easily damage delicate electric toothbrush components. Follow these electric toothbrush care tips to avoid future breakdowns and extend your investment:
- Use included brush head cover during travel – Toothbrush heads bang around duffel bags and suitcases when traveling. Protect yours to prevent cracked posts/heads.
- Rinse carefully after each use – While electric toothbrushes can get wet, avoid submerging the entire handle while rinsing off toothpaste.
- Store upright on included base – Laying toothbrushes horizontally can allow water to seepage into electronic openings. Store upright to let moisture fully drain.
- Install case protector – Silicone sleeves help absorb and distribute impact shocks during drops or focal handle impacts against countertop edges.
- Keep replacement heads on hand – Stash extra brush heads so you can replace them immediately when performance degrades vs. weeks of ineffective brush head use.
Also Read: Electric Toothbrush Cleaning and Maintenance Guide
Conclusion
Learning to diagnose and repair problems with your electric toothbrush saves money while maximizing your investment in oral health. Use the troubleshooting tips in this guide to accurately pinpoint core failure causes. Determine if you can safely attempt common fixes like brush head and battery replacement.
Know when to call in pros for major physical damage or electrical failures requiring skilled equipment/soldering work. With some diligent DIY care, your electric toothbrush should deliver years of reliable service.