
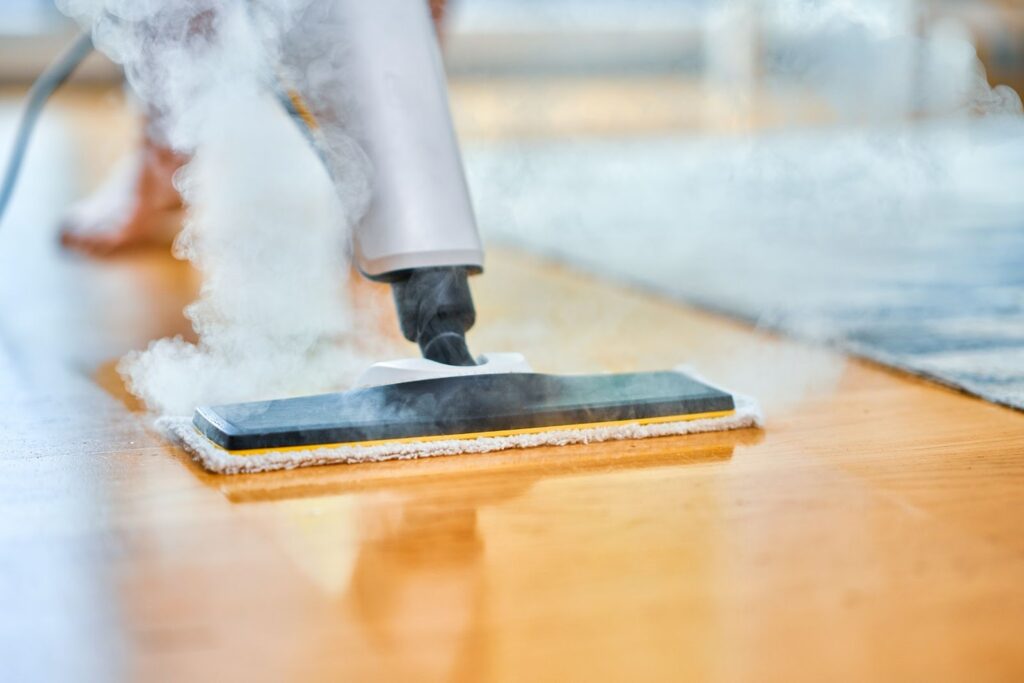
Steam cleaners are a popular cleaning tool for carpets, upholstery, tiles, and more. Over time though, the internal valves can start to wear out and leak, reducing cleaning power and potentially damaging surfaces. Replacing these steam cleaner leaking valves is an easy and inexpensive DIY project. This comprehensive guide will walk you through the entire process.
Why Do Steam Cleaner Valves Leak?
There are a few common reasons steam cleaner valves start to leak:
Mineral Buildup
Hard water leaves mineral deposits inside valves over time. This can prevent them from sealing properly, allowing steam and water to leak out.
Wear and Tear
The high-temperature steam and pressure inside a steam cleaner put a lot of stress on internal components. Valves get worn down over hundreds of cleaning cycles. Seals and o-rings lose their flexibility and no longer create a tight seal.
Improper Use
Using a steam cleaner incorrectly can cause valves to fail prematurely:
- Leaving it running for too long without releasing the trigger
- Using on inappropriate surfaces like brick or natural stone
- Failing to refill water when running low
This excessive stress damages valves and allows leaks.
Tools and Supplies Needed
Gather the following tools before starting valve replacement:
- Replacement valves – Purchase valves designed specifically for your steam cleaner model. Available online or at appliance parts stores.
- Screwdriver set – For removing housing screws. Both Phillips and flathead drivers are needed.
- Adjustable pliers – Helpful for removing stubborn valves. Tip: Cover jaws with electrical tape to prevent scratching.
- Pipe cleaners – Clear out mineral deposits from valve housing.
- Distilled white vinegar – Mix with water to clean out mineral deposits.
- Small brush – For scrubbing valve housing & components. An old toothbrush works.
- Rags – For wiping up leaks, water, vinegar, etc. Absorbent shop towels are preferred.
- Bucket – For discharge cleaning solution.
- Optional items:
- Gloves – Protect hands from hot surfaces, chemicals, and cleaning agents
- Eye protection – Safety glasses for protection against cleaning chemicals
- Headlamp or flashlight – Improves visibility when working internally
Read More: Your Kitchen Cleaning Chemical Guide
Diagnosing Leaking Valves
Before replacing your steam cleaner valves, verify that they are the cause of leaking:
1. Fill Water Tank
Empty any remaining water from cleaning tank and refill with warm tap water to maximum fill line.
2. Connect to Power
Plug steam cleaner into wall outlet. Do not turn power on.
3. Check for Drips
With power still OFF, tilt steam cleaner in different directions while observing water fill tank and valve area. Gravity should cause water displacement.
✅ If no drips occur, leaking valves may not be your issue.
❌ If dripping occurs at valves, continue to next step.
4. Activate Steam Trigger
Turn cleaner ON but do not squeeze steam trigger yet. Watch valve assembly for leaks forming.
Then briefly squeeze and release steam trigger in short bursts, watching valves while releasing trigger.
✅ No leaks indicate valves are likely not source of issue.
❌ Leaking valves confirm replacement needed.
If leaks occur only when trigger is squeezed, it indicates worn valve seals. Leaks when trigger is released signal mineral deposits preventing valves from fully closing.
Either way, new valves are the fix.
Replacing Leaking Steam Cleaner Valves Step-By-Step
Follow these detailed steps to safely install new replacement valves:
1. Turn Off and Disconnect Power
Unplug steam cleaner and move to a suitable work area.
2. Drain Water
Empty all water from inside unit. Tilt in different directions while depressing steam trigger to fully drain.
3. Gain Access
The valve housing is usually located on the lower front section of a steam cleaner.
Use a screwdriver to remove housing cover panel screws or clasps.
Be aware of any internal wires or tubing before fully removing housing cover.
4. Remove Old Valves
Looking inside valve chamber, locate rubber valve seats.
There are typically two separate valves – one for incoming water, one for outgoing steam.
Use adjustable pliers and grip valve at its base, near stem. Rotate counterclockwise and pull valve unit out.
Repeat removal process for second valve.
5. Clean Valve Chamber
Scrub inside valve housing with small brush to remove mineral deposits.
Create a 50/50 mixture of warm water and distilled white vinegar. Use pipe cleaners soaked in vinegar solution to scrub deposits from housing.
Let vinegar sit for 5 minutes before rinsing with clean water. Wipe housing interior with rag until completely dry.
6. Examine New Replacement Valves
Closely look over new valves. Threads and stems should be smooth with no defects. Seals and o-rings should be intact with no nicks or cracks.
Confirm that the valves exactly match the damaged ones they are replacing.
7. Install New Valves
Match each replacement valve with its corresponding seat inside housing chamber.
Hand thread valves clockwise into housing. Tighten further using pliers if needed. Do not over tighten.
Confirm valves are fully vertical when tightened rather than on an angle.
8. Reattach Housing
Being mindful of internal wiring, reattach valve housing cover with original screws or snaps.
9. Test Valves
Add water to fill tank. Briefly press and release steam trigger while watching valves for leaks. Activate trigger for 30 seconds, allowing internal components to heat up.
Check again for leaks with trigger both pressed and released.
See next section for additional leak troubleshooting if needed.
Testing for Leaks
During and after replacement, inspect valves closely for leaks:
1. Visual Inspection
Closely watch valves after installation while depressing and releasing steam trigger. Bubbles are visible confirmation of leaks.
2. Paper Test
Cut a piece of paper towel large enough to cover entire valve assembly. With unit powered OFF, place paper over valves. Turn steam cleaner on for 30 seconds. Remove and inspect paper for moisture.
3. Tilt Test
Fill water tank. With unit OFF, tilt steam cleaner at various angles while watching valves for drips. Helps find leaks from bad seals.
If leaks occur, double-check valve tightness and seals. Re-clean mineral deposits from housing and retest. Consider using sealant like Loctite or similar if standard replacement valves fail to seal properly.
✅ No leaks – Valve replacement successful! See tips below for preventing future valve failure.
❌ Still leaking – Try replacing valves again. If it is still leaking, bring it to an appliance repair shop for internal inspection & repair.
Preventing Steam Valve Leaks
While periodic valve failure in steam cleaners is inevitable, you can maximize the lifespan through preventative maintenance:
Use Distilled Water
Tap water contains minerals that leave damaging deposits on valves over time. Using distilled or demineralized water instead keeps valves sediment-free.
Routine Maintenance
- Monthly, fill appliance with 1:1 vinegar water solution. Run cleaning cycle with NO attachments to flush sediment from valves. Rinse well after soaking valves.
- Use appliance descaler monthly to prevent mineral deposits from building up
Let Cool Before Storing
NEVER put away steam cleaner until internal boiler fully cools. This avoids pressure differences that strain valves.
Don’t Overwork Unit
Frequently steaming for more than 1 hour straight strains valves. Release trigger intermittently, even during heavy-duty use.
Use Correctly
Only activate heating element when water tank has adequate supply. Don’t tilt beyond 45° angle during use which can siphon water away from valves.
Following these steps minimizes wear and mineral buildup. Your replacement valves will last for years instead of months!
Additional Steam Cleaner Maintenance
While you have your unit disassembled for valve replacement, consider these additional maintenance tasks:
1. Descale Entire Boiler System
Mineral scale doesn’t only affect valves. It builds up inside the metal boiler heating elements over time. Covering heating coils with vinegar solution and running a descaling cycle removes this sediment, restoring functionality.
2. Clean or Replace Filters
Most steam cleaners have inline water filters preventing debris from entering valves. Rinse any mesh filters with clean water. Replace disposable cartridges if expended.
3. Check Accessory Hoses
Inspect all steam discharge hoses and gasket fittings. Replace any with cracks or loose connections, preventing leaks.
4. Examine Boiler Tank
Internal boiler tanks eventually corrode, crack, or rupture from heat stress. Inspect carefully for leaks during maintenance. Replace boiler if material defects are noted.
5. Recharge Batteries
For cordless steam cleaner models, test and recharge onboard batteries. Replace batteries no longer hold full charges.
These additional maintenance practices maximize appliance lifespan and cleaning performance.
Conclusion
Fixing leaking valves restores cleaning power and pressure in tired steam cleaners, saving you money over machine replacement. Follow these detailed steps to safely replace valves and prevent future leakage. Pay special attention to:
- Using distilled water
- Monthly descaling
- Letting boiler fully cool before storage
Proper maintenance keeps replacement valves operating for years. Bookmark this article for a handy reference anytime valves need to be replaced!