
A custom range hood is an excellent way to add high-end style and increased ventilation to your kitchen. Constructing your own hood allows you to create a focal point over the stove area with exactly the look you want, while also improving air quality by venting smoke, grease, odors, and excess heat outside.
This step-by-step guide will take you through the entire process of designing and installing a DIY custom range hood. We cover everything from developing plans, gathering materials, building the hood, adding stylish touches, properly venting the unit, and safely mounting it in place. With the right tools and some dedication, you can create a beautiful and functional centerpiece for your cooking space.
Introduction to Custom Range Hoods
Before getting started, let’s look at why a custom range hood is worth the effort:
- Enhanced Ventilation – A powerful hood clears the air over the stove more effectively than typical under-cabinet models. This makes the kitchen more comfortable while cooking and improves indoor air quality.
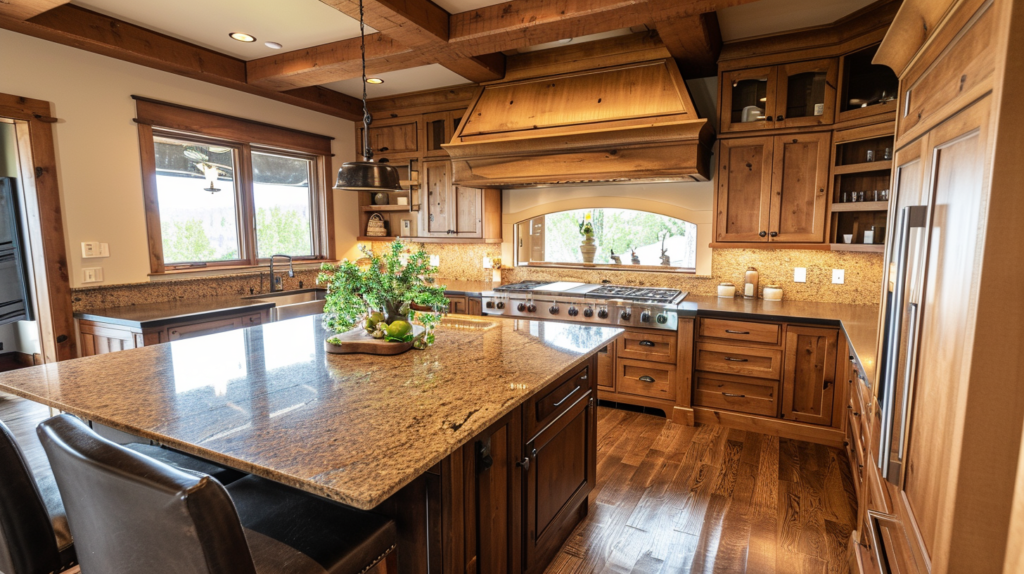
- Focal Point – As a major visual feature, an eye-catching hood makes a strong style statement and becomes a standout element in the kitchen.
- Flexible Design – Building it yourself allows customization for an ideal fit with your cabinets, ceiling height, aesthetic tastes, and ventilation needs.
- Added Home Value – High-end range hoods increase resale value and appeal to potential home buyers who want an upscale kitchen.
Now let’s look at the steps involved in constructing your own top-quality custom hood. Carefully planning the project and purchasing the necessary equipment ahead of time will set you up for success.
Planning and Design
Thorough planning is crucial when taking on a major DIY project like a range hood installation. Rushing in without solid plans often leads to mistakes, frustration, and unsatisfactory results. Instead, take the time upfront to work out important details that impact the whole process.
Measurements
You’ll design plans based on precise measurements of the stove area:
- Width of the stove top
- Height above the cooktop surface to the bottom of the hood
- Distance to the ceiling
- Cabinet dimensions on surrounding walls
Make sure to leave proper clearances from the stove to the hood’s front and sides as recommended by building codes and the cooktop manufacturer (often 30-36 inches above the hood). Consider an island with more overhead space as an ideal location for creating a dramatic focal point.
Design and Style
With measurements in hand, now envision the perfect style and appearance for your kitchen. Consider factors like:
- Materials: stainless steel, wood, stone, etc.
- Finish: smooth paint, exposed grain, mosaic tile, copper patina, etc.
- Size and shape
- Features: shelves, decorative trim, lighting, etc.
- Matching or contrasting surrounding cabinetry
Browsing Houzz and Pinterest images can help spark design ideas. Create sketches to visualize plans.
Ventilation Approach
An integral consideration is exactly how the system will ventilate. The main options include:
- Ductless: Uses filters to recirculate indoor air
- Ducted: Vents air externally via exhaust ductwork
A ducted vent is more effective for removing smoke and grease, while a ductless system avoids the cost of running ductwork.
Tools and Materials
With design plans in place, now gather the necessary tools and supplies. Having the right equipment on hand prevents mid-project delays and frustrations.
Tools
Gather tools for measuring, cutting, fastening, finishing, and installing:
- Tape measure
- Pencil
- Level
- Stud finder
- Circular saw
- Drill
- Screwdriver
- Sandpaper
- Safety gear: gloves, goggles, mask, ear protection
Consider renting or borrowing any expensive power tools needed rather than buying them.
Materials
You’ll find many options to create a range hood structure while matching your desired style. Some top materials choices include:
- Wood boards
- Stainless steel
- Aluminum sheets
- Tile
- Stone
Beyond the main structural pieces, also pick up:
- Range hood insert unit
- Vents/ducting
- Fans
- Lights
- Filters
- Fasteners: screws, nails, brackets
- Adhesive/caulk
- Paint/stain
- Decorative trim pieces
Shop around to find all materials at the best prices. Some may be sourced reused for greater cost savings.
Building the Custom Range Hood
The real hands-on work begins by constructing the hood itself from the planned materials. Make sure to build on a flat, stable surface with ample room to measure and maneuver the components. Having an assistant makes fabrication easier as well.
Frame
Start by framing together the underlying structure using straight wood boards secured at right angles. Construct an open-faced box shape to match the width of your cooktop below.
- Cut boards to required sizes with a circular saw
- Arrange into shape and align corners
- Drill pilot holes
- Attach together using screws or nails
Use levels frequently to ensure vertical boards are perfectly plumb. Measuring accurately results in a frame properly sized to match the stove and kitchen layout.
Shell
Next, enclose the sides and top surface of the frame. This internal shell presents the surface visible below the hood. Use the planned finish material cut to size.
- For wood, arrange tongue and groove boards
- For metal, cut sheets and rivet together at seams
- Ensure the overhang matches the cabinetry depth
Take care to keep surfaces aligned, edges straight and consistent gaps for a seamless appearance especially where boards meet.
Interior Access
Now add physical and visual access inside the hood shell. Professional-style hoods feature removable angled metal screens behind which lights and filters mount.
- Cut matching angled openings on each side
- Install support rails
- Attach removable screen panels
Plus, consider additional options like tempered glass panels across the front which let light through while protecting from grease splatters.
Insert Installation
The vital component that provides ventilation power mounts inside hidden from view.
- Obtain an insert designed for custom hood installation
- Match ducting outlets and electrical hookups
- Test fan speeds and lighting
Consider a commercial insert unit for maximum ventilation capacity rated in CFM. Look for whisper-quiet operation at higher settings.
Exterior Attachment
At this point the basic hood structure and internals are complete. You can now overlay and fasten decorative exterior panels onto the outer face.
- For tile or stone, set directly into adhesive
- For metal or wood, position it onto the framework and screw it into place from the interior side
Take careful measurements so exterior panels sit flush and corners align evenly.
Also Read: Types of range hoods and how to choose the best one for your kitchen
Extra Touches
With the hood operational and venting properly, shift focus to optional cosmetic enhancements that impress visually. Elevate the hand-crafted look through details like:
- Contrasting finishes on different surfaces
- Built-in shelves for spice jars or decorative items
- Trim accents in a secondary material
- Recessed lighting strips shining down or up
- Glass/stone backsplash panel
Personalize it to seamlessly match your existing kitchen decor. Add some shelves, glass panels, or backsplash materials to integrate it with nearby cabinetry and counters for a unified appearance.
Venting the Hood
While an attractive exterior is important for appearances, you don’t want to overlook the crucial ventilation capabilities. Ensure your custom hood ventilates smoke, grease, and odors effectively so you can breathe easily in the kitchen.
Ducting
Nearly all range hoods require ductwork running vertically to carry air outside. Install steel, aluminum, or copper duct pipes from the hood’s vent outlet through cabinets, walls, and roof openings.
Site ducting to create the shortest, straightest path outdoors. Limit bends or horizontal runs which reduce airflow. Use proper connectors and seals so the exhaust flows freely to the exterior.
Exterior Vent
The external ventilation cap should:
- Release air at least 40 inches above ground level
- Include backflow flappers to keep outdoor air, pests, and precipitation from entering
Position the wall or roof vent where exhaust won’t accumulate near outdoor living spaces or air intake vents.
Make-Up Air
Powerful ventilation can create back-drafting by starving a home of replacement air. Opening doors/windows helps, but kitchen codes often require dedicated makeup air intakes. This system introduces fresh replacement air to balance the interior pressure. Consider integrating this into your custom hood plans.
Installation
When fully constructed and tested, it’s time to mount your custom hood masterpiece onto the wall or ceiling above your stove. Take necessary precautions to safely install this heavy appliance without mishaps or damage.
Location
Building codes specify minimum clearances between cooktop surfaces and overhead range hoods, often 30-36 inches. Check guidelines and manufacturer instructions for your cooking equipment. Consider additional height to create an eye-catching focal point.
Ceiling and cabinetry dimensions influence ideal placement. An island location often allows greater visibility. Ensure adequate bracing strength where attached.
Mounting Method
Securely support the weight using:
- Wall anchors for brick/concrete walls
- Toggle bolts for drywall attachment
- Reinforced ceiling bolt anchors
Use at least #12 screws in proper pilot holes to avoid cracking surrounding surfaces. Align the unit level and center over the stove.
Electrical
Hire an electrician unless you have wiring expertise, especially for a 240v stove circuit. The hood requires a grounded outlet for the ventilation motor and lights. Hide wires to prevent exposure.
Consider wiring lights to a separate switch than the fan. Install additional switches/dimmers for custom multi-level lighting capabilities.
Safety Tips
Since this focal point appliance hovers over a hot cooktop, take precautions to prevent safety issues:
- Keep wood, fabrics or plastics away from heat exposure
- Install fire-resistant metal filters
- Maintain proper ventilation pipe slopes
- Check for leaks around duct connections
- Use tempered glass panels instead of breakable materials
- Enable auto-shutoff features in a fire
- Keep liquids from electronics
Carefully follow all electrical and building safety standards. Ongoing maintenance like cleaning filters prevents operational issues.
Final Thoughts
Creating a custom range hood takes planning, effort and skill…but the fabulous results are worth it! Not only do you get an amazing focal point and upgraded ventilation system, but you also have the satisfaction of designing and building a major kitchen appliance yourself.
Soon your kitchen will have the stylish, high-performance range hood of your dreams! If challenges arise during the process, don’t hesitate to refer back articles for tips. We wish you success in creating your custom culinary showpiece.