
A pressure cooker is a must-have appliance for any home cook. Pressure cooking uses steam pressure to cook foods faster while retaining more nutrients. This comprehensive guide will teach you everything you need to know as a beginner – from understanding the different types of pressure cookers to learning safety tips, troubleshooting common mistakes, and finding easy recipes to start cooking.
Understanding Pressure Cookers
Before we dive into using a pressure cooker, let’s start by understanding what it is and why it’s a great cooking tool.
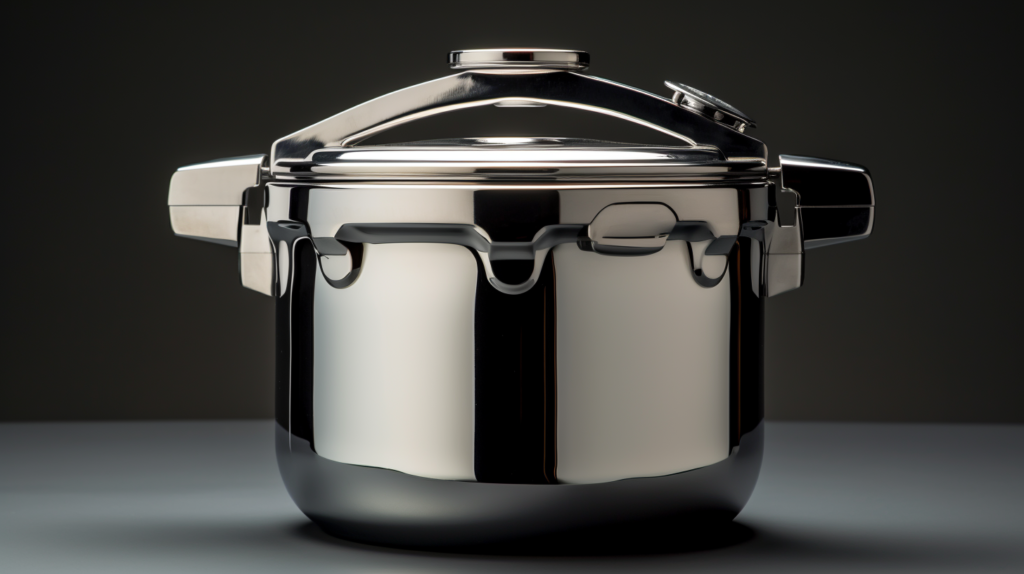
What is a Pressure Cooker?
A pressure cooker is an airtight pot that cooks food quickly using steam pressure. The sealed pot allows the pressure to rise, raising the boiling point of water above 100°C or 212°F. This high-pressure environment lets food cook up to 70% faster while retaining more nutrients.
Pressure cookers have been around since the 1600s but modern electric models make pressure cooking safe, easy and convenient. They have built-in safety mechanisms and multiple pressure settings so you can customize cooking times.
Benefits of Pressure Cooking
Here are some of the biggest advantages to using a pressure cooker:
- Speed – Pressure cooking is very fast. Dishes that normally take hours can cook in minutes.
- Nutrient retention – The quick cooking keeps more vitamins and minerals locked in.
- Energy efficiency – Foods cook with less liquid at a higher temperature, using up to 70% less energy.
- Flavor concentration – Pressure extracted juices remain within and intensify flavor.
- Versatility – Almost any food can be pressure cooked from meat to desserts!
Types of Pressure Cookers
There are two main types of modern pressure cookers: stove top and electric.
Stovetop Pressure Cookers
This classic style must be used on a stove top burner. Models consist of:
- Aluminum – An affordable option but may react with some acidic foods.
- Stainless Steel – More expensive but very durable and nonreactive. Good heat conductivity.
- Aluminum Clad Base – Base is aluminum for quick, even heating with a stainless steel pot.
They have a dial or weighted valve to regulate pressure. You manage the heat to control pressure while monitoring it the entire time.
Electric Pressure Cookers
Electric pressure cookers (also called multi-cookers) do all pressure regulation automatically with one-touch buttons. This “set it and forget it” ease makes them extremely popular. The downside is they’re bulkier and pricier than stove tops. Some top models are:
- Instant Pot – The most ubiquitous multi-cooker with great features at a moderate price point.
- Ninja Foodi – Does pressure cooking plus air frying, sautéing, baking and more in one vessel.
- Breville Fast Slow Pro – Higher-end cooker great for precision cooking with helpful presets.
Pressure Cooker Safety
While extremely convenient, pressure cookers must be used carefully as steam buildup can be dangerous. Follow these tips for safe operation:
General Safety Tips
- Read Your Manual! Instructions vary so know your model’s specific safety steps.
- Check Seals Before each use, ensure rubber gaskets and pressure valves are clean and in good shape.
- Use Proper Sized Cooker Always choose an appropriately sized pot for the amount of food to prevent overfilling.
- Keep Your Face Away Don’t put your face close to the cooker. Steam releases can cause severe burns.
Using the Proper Liquid
Having adequate cooking liquid is vital for pressure cooking to work properly:
- Pressure needs moisture to build steam. Insufficient liquid can damage the cooker.
- Never fill a pressure cooker less than 1/2 cup liquid. Typically 1-2 cups liquid to start.
- Add more thin liquids (broth, wine, water) versus thick sauces. Thick liquids can clog valves.
- Frozen foods and high-starch foods also need extra liquid to allow for expansion and prevent scorching.
Releasing Pressure Properly
As soon as cooking is done, pressure must be released before opening the cooker. There are 2 release methods:
Natural Pressure Release (NPR)
- Allowing pressure to come down gradually on its own as the cooker cools (~15 minutes)
- Safest method that preserves textures
Quick Pressure Release (QPR)
- Manually venting steam immediately by turning the valve
- Quick but can affect texture and cause splattering
Pay attention as you release pressure, keeping hands, face and body away from the steam jetting out!
Using Your Pressure Cooker
Now that we’ve covered some essential info, let’s get down to actually using a pressure cooker!
Before Your First Use
On first use and periodically after, do a water test run:
- Add 2 cups water to pot
- Lock lid securely
- Select high pressure then set timer for 20 minutes
- When beep sounds, allow pressure to naturally release for 10 minutes then quick release any residual steam
- After float valve drops, carefully open lid angled away
- Inspect that no leaks occurred and parts are in order
This test ensures all valves, seals and safety features function properly.
Preparing to Cook
Proper prep before closing the pot is also key for successful pressure cooking including good ingredient measuring and browning meats.
Measuring Ingredients
- As pressure greatly intensifies and concentrates flavor, use minimal added liquids like wines, vinegars and broths to prevent overly salty/bitter food.
- Unless following a verified pressure cooker recipe, reduce amount of aromatics like garlic, onions and spices to one third the normal amount.
- Use care when adding dairy, thick sauces, pasta, grains and foods prone to foaming or scorching.
Browning and Sautéing
If desired, meats, veggies and aromatics can be lightly browned using the “sauté” or “brown” function first. Benefits include:
- Enhanced visual appeal
- Added flavor from caramelization
- Reduced risk of scorching lighter ingredients
Then deglaze the pot by stirring in 1/2 cup broth, wine or water, scraping any browned bits from the bottom.
Pressure Cooking
Now you’re ready to start pressure cooking! Just follow these simple steps:
- Secure the lid, ensuring it’s properly locked based on your model
- Select cooking program then adjust cook time and pressure setting as needed
- Press start – The display will indicate when pressure is building then cooking countdown will begin
- When beeps sound signaling done, allow pressure to release naturally for at least 5 minutes before doing quick release
Use this time to prepare any final ingredients like pasta, grains or garnishes so they’re ready to mix in once unsealed.
Setting the Timer
- Recipes provide average guidelines but cook time can vary based on altitude, food size, appliance wattages, etc.
- For first tries, start checking food for doneness several minutes early, then add minutes as needed.
- Make notes on optimal times for your cooker.
Releasing Pressure
Don’t rush this vital step!
- Use natural release primarily to prevent splatters plus finishing cooking foods. After 5-15 mins do quick release.
- Quick release works best for non- expanding foods like vegetables or broths by immediately flipping the valve.
- But never open the cooker until the float valve fully drops showing all internal pressure has released. This can take 10+ minutes.
Tips for Common Foods
Pressure cooking techniques vary slightly depending on ingredients used. Follow these tips when starting out:
Meat and Poultry
- Always thaw meats before cooking. Partially frozen sections can lead to uneven cooking.
- For better browning, pat meats very dry before sautéing. Wet meat won’t sear well.
- When doing a whole chicken, be sure liquid fills only 1/3 of the pot or can use a trivet.
- After cooking meat, use natural release allowing carryover cooking to finish without overcooking.
Beans and Legumes
- Presoak beans in water for 8 hours or overnight prior to cooking for more even softening.
- Add 1 tablespoon oil to help foam stabilization.
- Do not fill pot more than halfway when cooking beans or grains.
- Allow natural release – the gradual depressurizing helps beans retain shape.
Rice and Grains
- Rinse rice and grains well before cooking.
- Routinely open and check during cooking time to gauge if fully done.
- Allow natural release and 5 minute rest before opening lid and fluffing with fork.
Making Desserts
Sweet pressure cooker recipes allow making quick cakes, custards and more!
Cheesecakes
- Grease the pot well with butter or oil before baking.
- Use a pan within a pan method: Place cheesecake pan on a trivet inside the main cooker pot with water at the bottom for even heating.
- Chill completed cheesecake afterwards so it sets up.
Puddings
- Mix ingredients right in the cooking pot.
- Place a few paper towels under lid gasket during cooking to prevent gasket residue dripping into pudding.
- Refrigerate puddings in another storage container after cooking to chill completely.
Cleaning and Maintenance
To keep your pressure cooker in top working order, proper cleaning and storage is key!
Cleaning After Each Use
Get into the habit of cleaning components after cooking:
- Wash removable parts – hand wash lid, silicone gasket, pressure valve, condensation collector, pots, trivets and other parts after each use with hot soapy water.
- Check valve openings – ensure any buildup around pressure release valve openings is removed so steam flows freely.
- Dry thoroughly – use a dish towel to thoroughly dry all parts so no moisture remains before storage.
Storing Properly
- Store lid upside down on the pot so no moisture collects in valves leading to potential clogs.
- Don’t nest lids inside the pot insert stacking for storage as scratches can form.
Replacing Parts
- Over time, gaskets and valves wear down with use and heat exposure, requiring replacement. Keep extras on hand!
- Also periodically inspect the silicon gasket and replace it every 1-2 years to prevent lid sticking or leaking issues.
Following good practices keeps everything in proper sealing, venting and regulating order!
Troubleshooting Problems
Even when meticulously following all the rules, you may occasionally encounter some common pressure cooking troubles. Here’s how to decipher and fix them:
Not Coming to Pressure
Causes
- Lid not properly sealed
- Blocked pressure valve
- Insufficient steam from low liquid or frothing recipes
Solutions
- Check float valve pops up and any other model-specific indications pressure has engaged.
- Examine the valve for obstructions like food, and clean out.
- Add more liquid to pot and scrape bottom crusty areas generating steam.
Burn Notice or Food is Burning
Causes
- Not enough liquid for cooking duration
- Sugary sauces scorching on bottom
Solutions
- Deglaze the pot by stirring in 1 cup liquid, scraping any browned residue off bottom.
- For sugary foods, place a heat diffuser trivet under the pot next time.
Leaking Steam
Causes
- Damaged seals/gaskets
- Lid not aligned and locked properly
- Cracks in cooker pot
Solutions
-Replace faulty gaskets
-Reset lid ensuring it’s rotated into the fully locked position
-Contact manufacturer if cooker base is damaged
Read More: Electric Pressure Cooker Problems and Repair Techniques
Tips and Best Practices
Here are some top techniques for becoming a pressure pro:
- Unless following a verified cooker recipe, use the oven cook time as a starting reference then adjust as needed.
- Minimally modify recipes to start, then tweak with more substitutions once comfortable.
- Use the delay start function to time dishes to finish when you’re ready to eat for perfect meals with no reheating required.
- Track cooking times and customizations in a notebook designated just for your pressure recipes.
Beginner Pressure Cooker Recipes
Here are some easy, delicious recipes perfect for those just starting out on their pressure cooking journey:
Chicken Stock
- 5 lbs chicken bones
- 2 carrots, chopped
- 2 celery stalks, chopped
- 1 onion, chopped
- 6 cups water
- 2 teaspoons salt
- Place all ingredients into pot, lock lid and seal
- Cook at high pressure 25 minutes
- Allow natural release 20 minutes then quick release
- Strain out solids – stock is ready to use!
Hard Boiled Eggs
- 6 large eggs
- 1 cup water
- Pinch salt
- Evenly place eggs in single layer in pot and add water
- Seal and cook at high pressure 4 minutes
- Quick release, then immediately transfer eggs to ice bath
- Peel eggs after cooling. Whites should be just firm with creamy centered yolks!
Pot Roast
- 3 lb chuck roast
- 2 cups beef broth
- 5 potatoes, quartered
- 3 carrots, chopped
- 2 celery stalks, chopped
- 1 onion, chopped
- 2 bay leaves
- 1 tsp each salt and pepper
- Season roast with salt and pepper then brown in cooker pot on sauté mode
- Add remaining ingredients and lock lid
- Cook at high pressure 1 hour
- Natural release 20 minutes then quick release remainder
- Transfer meat and vegetables to platter, thickening juices if desired for gravy
Bean Soup
- 1 bag (1 lb) dried mixed beans
- 2 quarts chicken or vegetable broth
- 1 onion, chopped
- 3 carrots, chopped
- 3 celery stalks, chopped
- 4 garlic cloves, minced
- 2 bay leaves
- 1 tsp each oregano, thyme, salt and pepper
- Rinse beans then soak 8 hours or overnight
- Drain beans, discarding water, then add to pot along with remaining ingredients
- Pressure cook at high for 18 minutes followed by 15 minute natural then quick pressure release
- Remove bay leaves, adjust seasoning as desired and serve
This guide should equip you with all the key safety, usage, troubleshooting and recipe tips you need to start experiencing the speed, flavor and fun of cooking with pressure! Remember – start simple then expand your pressure horizons. Now get cooking!