Quick answer
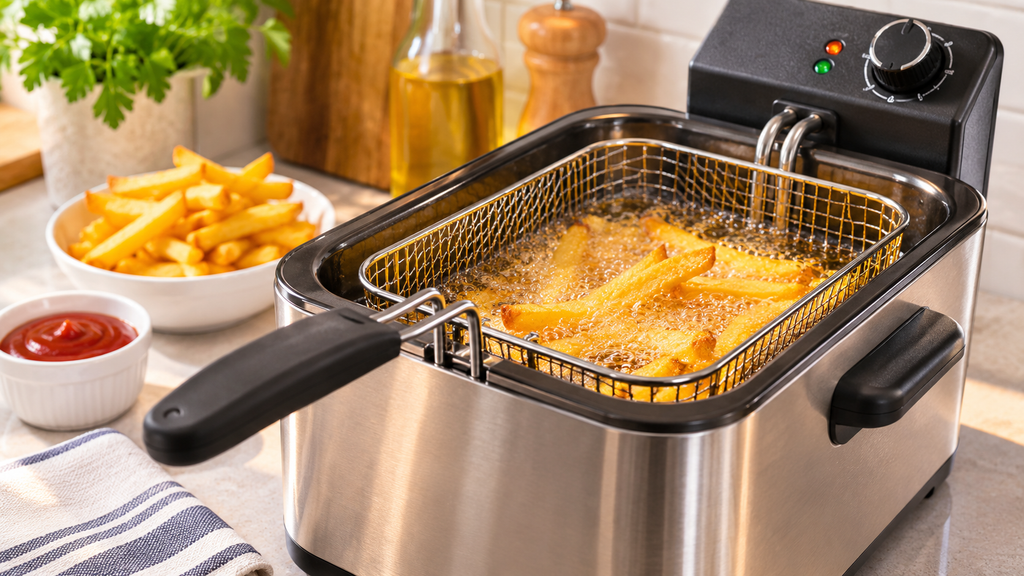
Wash only the removable parts approved for washing and dry them completely. Fit the dry pot, basket, and control assembly in the model’s required order, then add suitable oil within the marked limits. Place the fryer on a stable, heat-safe surface and preheat using its normal controls. Never preheat an empty oil fryer or immerse its controls.
Fresh oil and a favorite recipe can wait until the fryer is ready. Have you checked the dry parts, work surface, and oil-level marks? Learning how to set up a deep fryer puts those basics first, so you can prepare the cooking area before heat, food, and hot oil need your attention.
This guide covers the box contents, placement, setup order, and first heating check for a household electric deep fryer. An outdoor turkey fryer uses a different setup and fuel system, so do not apply indoor electric-fryer steps to it. You’ll also learn when a damaged part or unclear instruction is a reason to stop and get help.
Quick Facts
Keep all washed parts completely dry before oil is added; keep water away from hot oil.
- Difficulty: Not specified
- Time: Under an hour for basic setup; drying and model requirements can add time
- Tools: Included pot and basket, suitable fresh oil, mild soap, soft cloth
- Part cost: Not specified
- Skill level: Not specified
Order the part with confidence
- Guaranteed to fit when you search by model number
- Same-day shipping on in-stock parts
- 365-day returns on any part
- Free tech support before and after you buy
What Comes in the Box and What You Still Need
Compare the package contents with the parts list before washing anything. A basket, oil pot, lid, and control unit may be separate, but their attachment methods vary. Some units also include a filtering feature or removable cord.
Keep these supplies ready.
- Suitable fresh frying oil
- Mild dish soap
- Soft non-scratch sponge
- Clean dry cloths
- Model-specific supplied parts
Do not assume every part is dishwasher-safe or removable. An oil filter, lid, or basket bought separately needs the correct fit. A replacement heating element is not a routine setup extra unless service has established a need. Check for shipping damage, including a cracked handle or damaged cord, before adding oil.
Where to Place Your Deep Fryer
Choose a stable, level, heat-safe counter with room for the required clearances. Keep the fryer away from water sources, counter edges, hanging fabric, and places where children can reach the basket. Do not use it where the cord crosses a walkway.
Plan a safe place for hot food and drips beside the fryer. Keep paper packaging and other items away from the heating area. A crowded counter is a poor place to lift an oil-coated basket.
Use only the suitable electrical connection required for the unit. Do not improvise an extension arrangement to reach a distant outlet. Outdoor turkey fryers belong outdoors under their own placement rules, never in a garage or indoor kitchen.
How to Set up Your Deep Fryer Step by Step
Follow these steps to prepare a household electric oil fryer using its actual assembly order.
Clean, Dry, and Assemble
- Keep the fryer unplugged while you prepare it.
- Wash the pot and basket only if they are approved washable parts.
- Rinse those parts and dry them completely.
- Fit the pot, control assembly, and basket supports in the required order.
- Check that the control assembly is seated correctly and the cord is sound.
- Add suitable fresh oil between the model’s marked fill limits.
- Put the basket and lid in their required starting positions.
- Connect power and use the normal preheat controls.
Do not lift a filled pot to change its position after heating begins. If a part does not seat properly, stop before adding power. Never defeat an interlock to make the fryer heat.
Didn't fix it? Ask a technician on the AppliancePartsPros forum.
Post your model number, the symptom, and what you've already tried. Appliance techs and experienced DIYers answer for free, usually the same day.
Ask the forum →80,000+ solved repair threads · no account needed to readFirst-Use Settings and a Test Run
Choose a first-use setting allowed for the fryer and oil. Do not copy a temperature from a different model or use water as a test liquid. This appliance is designed to heat the specified frying medium within its marked level.
Observe the normal indicator and heating behavior while staying nearby. Watch for leaks, an unstable pot, or a cord that is too close to a hot surface. Stop and unplug safely if the appliance behaves abnormally.
Before food is added, check that the work area is clear and the basket can be handled without reaching across the oil. Knowing how to set up a deep fryer includes a safe movement plan as well as getting the oil hot.
Setup Mistakes to Avoid
Avoid these mistakes and unsafe methods.
- The most important setup mistake is leaving water in washed parts. A damp basket or pot can cause violent splashing when it contacts hot oil.
- Let all surfaces dry rather than relying on a quick wipe.
- Other mistakes include overfilling, heating below the minimum oil line, using a damaged cord, and placing the fryer where it can be knocked.
- Never use the fryer as a general pot for boiling water unless that function is explicitly designed into it.
- Ask for service when parts are damaged or the controls do not work normally. The answer to how to set up a deep fryer is not to adjust a heating element or modify a plug so a damaged unit can be used.
Frequently Asked Questions
These answers cover a household electric fryer’s first setup.
Can you set up your deep fryer yourself?
Many household electric units are designed for owner setup. You must be able to follow the assembly, oil, and placement requirements. An outdoor fuel-fired fryer has a different procedure. Stop for damaged parts, uncertain power needs, or assembly that does not fit as intended.
What tools and parts do you need to set up your deep fryer?
Use the included pot, basket, lid, and controls, plus suitable oil and supplies for approved washing. Most routine setup does not need extra tools. Replacement filters or baskets must match the model, and no universal oil quantity fits all fryer sizes.
How long does it take to set up your deep fryer?
Basic setup may take under an hour, with extra time for complete drying and any model-specific steps. Do not rush drying to meet that estimate. Cooling after a first test adds separate time before the appliance can be moved or drained.
What are the most common mistakes when you set up your deep fryer?
Common mistakes include wet parts, the wrong fill level, poor placement, and an incorrectly seated control assembly. Using an indoor method for an outdoor turkey fryer is also unsafe. Get qualified help for electrical damage or a unit that does not heat and control normally.
Final Thoughts: Keep It Simple and Consistent
Clean, dry parts and a clear counter make the first use easier to manage. Confirm the oil level and assembly before power is connected, then stay nearby during use. Keep compatible accessories ready for later cleaning without replacing sound parts unnecessarily.
Still stuck after this guide?
Two free options: post your model number and symptom on the forum, or search the model number in the shop to see every part that fits.