Quick answer
Check obstruction, dirt, seating and visible damage first. A paper-pull test shows weak contact at a location, but it cannot separate gasket damage from alignment. Verify the full model before choosing this gasket number.
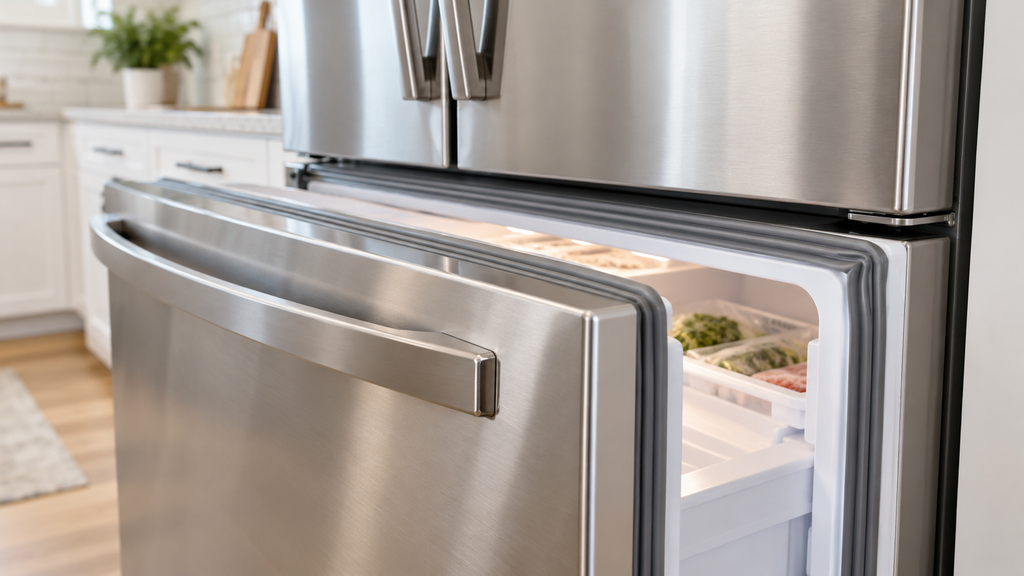
Your Whirlpool freezer door gasket WPW10436253 can look worn without being the only reason the door leaks air. Food, a misplaced bin, dirt or door alignment can prevent closure too. Frost at the edge does not prove the gasket has failed. Does the door shut freely, and is the seal clean? Check those details before pulling it out. A tear or persistent sealing gap after simple closure checks gives stronger evidence for replacement than frost alone.
What This Symptom or Part Can and Cannot Prove
Use these distinctions before choosing a repair.
- Frost can follow frequent openings or poor door closure.
- Dirt can prevent a sound gasket from contacting the frame.
- Weak paper grip identifies poor contact, not its cause.
- A new gasket cannot correct damaged hinges or an obstructed drawer.
The Whirlpool door-sealing guidance calls for checking food, bin position, gasket cleanliness and level. Correct those issues first. For a Whirlpool freezer gasket dollar bill test, a paper strip helps compare contact around the edge; it is not a stand-alone part-failure verdict.
Verify Your Model First
Find the Refrigerator model tag before ordering. Record the full model number, including its suffix, because parts with the same name can use different connectors, dimensions, ratings or mounting points across models.
Use the Whirlpool model label help to locate the tag. Keep a clear photo of the full label, including the serial number. A brand name and cabinet size do not identify every part inside the appliance.
The parts diagram must match your full model. Similar-looking components can have different plugs or mounting points. Do not transfer a test value or connector number from a different circuit. Does the layout match what you can see? Stop and obtain the correct instructions if it does not.
Safety Before Testing
Protect yourself and the appliance during access.
- Unplug the refrigerator or switch off its breaker before replacement.
- Work slowly in a well-lit, uncluttered area away from children and pets.
- Follow the model and gasket instructions; avoid excess force.
- Wear insulated work gloves around sharp metal and debris.
- Use eye protection or a dust mask when chemicals, dust or heavy debris require them.
- Keep warming gentle and controlled; do not melt the gasket or liner.
Keep covers and loose hardware clear of the work area. Leave household outlets, fixed wiring and breaker work to a qualified electrician under local electrical codes. Disconnect power before internal access, and replace parts and panels before normal operation.
Useful tools for the matching repair include:
- Clean cloth
- Paper strip
- Low-heat hair dryer
- Work gloves
Causes to Check Before Buying a Part
Compare the observation with the cause it can support.
| Cause | Evidence | Safe check | What result means |
| Obstruction | Door contacts food or a bin | Inspect the closure path | Reposition items first |
| Dirty seal | Debris on gasket or frame | Clean as the manual directs | Recheck contact afterward |
| Alignment problem | Uneven contact without a tear | Inspect closure and level | May need hinge or drawer adjustment |
| Gasket damage | Tear or permanent deformation | Inspect the full perimeter | Supports replacement after fit checks |
Once diagnosis identifies the failed part, compare freezer door gasket for your complete model. Match the component to the fault before selecting a replacement.
How to Check a Whirlpool Freezer Door Gasket WPW10436253
Follow these steps to remove the confirmed failed press-in gasket and fit the matching replacement.
Replace the Press-in Gasket
- Disconnect power.
- Open the freezer door fully.
- Identify the gasket’s retaining channel around the door.
- Gently free one corner.
- Continue around the perimeter.
- Remove the old gasket completely.
- Unpack the replacement.
- Check for shipping folds; use one approved softening method below.
- Let it relax in a warm room for several hours.
- Alternatively, soften it in hot water for 10 to 15 minutes if the part instructions permit.
- Alternatively, use a low-heat hair dryer to relax folds.
- Read the included instructions for model-specific details.
- Align one upper corner with the door.
- Fit the lip over the edges into the channel without overstretching.
- Press the rib into the channel around the entire door.
- Check that it is fully and evenly seated.
- Inspect remaining creases or gaps.
- Gently warm permitted areas with a low-heat dryer.
- Keep the dryer several inches from the rubber.
- Lightly massage the softened gasket into position.
- Proceed once the gasket lies smooth.
- Close the freezer door and inspect the seal.
- Check that the door closes easily with no visible gap.
- Restore power.
- Let the unit cool and monitor sealing over the next few hours.
Interpret the Result
A Whirlpool freezer door gasket WPW10436253 with a visible tear and weak contact can support replacement. For the paper check, close the door on a strip and gently pull, then compare several locations. The gasket supplier’s inspection guide illustrates this check. Easy release means poor contact there. For a Whirlpool freezer door gasket wpw10436253 replacement, confirm that dirt, obstructions and alignment do not explain the gap first.
After a confirmed failure, find the correct replacement freezer door gasket. A symptom that remains unexplained still needs diagnosis before purchase.
How to Identify the Correct Replacement for This Model
Find the Whirlpool freezer door seal by model number. Does the listing identify the freezer door rather than the fresh-food door? Check the full suffix, color and diagram position. A fresh-food gasket and freezer gasket can differ even on the same appliance. Dimensions alone do not establish compatibility.
Keep the model label, the old part number and the repair findings together. An updated part number may replace an older one, but the current fit listing still needs to include your full model. Check the diagram entry as well as the part photo.
The model number guide helps you retain the full label details for the gasket lookup.
When to Stop and Call a Professional
Call for help if the door sags, the retaining channel is damaged or a gap remains after correct seating. Stop if warming distorts the liner. Do not keep heating or stretch a gasket to make the wrong part fit.
FAQ
What should be checked first when a Whirlpool freezer shows frost or sweating at the door edge?
Check food, bins, gasket cleanliness and door closure. Inspect for a tear or a visible gap.
How can you tell whether gasket WPW10436253 is actually bad rather than dirty or cold stiffened?
Clean and check seating first. Temporary folds may relax under the part instructions; a tear or lasting deformation is stronger evidence.
What dollar bill test result confirms that the Whirlpool freezer gasket has failed?
Easy release shows weak contact but does not prove gasket failure. Rule out alignment and obstruction before replacing it.
Where is the model number on a Whirlpool refrigerator and why does the full suffix matter when ordering WPW10436253?
Find the cabinet label with Whirlpool’s locator. The full suffix identifies the correct shape, finish and mounting design.
When should a leaking Whirlpool freezer door seal be handed to a professional?
Call if hinges, rails or the retaining channel are damaged, or the door still cannot seal with a correctly fitted gasket.
In Summary
Inspect the Whirlpool freezer door gasket WPW10436253 and the door’s closure path before buying. Clean the seal and compare contact, then identify persistent gasket damage. Match the full model and follow the replacement’s seating and warming instructions.
After identifying the fault, match a replacement freezer door gasket to your Whirlpool that fits your complete model after the failed part has been identified.